

Applies to: Lasernet Core 10, Lasernet Core 11
This guide describes how to upgrade Lasernet Core to a later release.
The upgrade process depends on the type of upgrade you are performing.
Types of Upgrade
An upgrade can be a major, minor, or patch upgrade. The upgrade type is determined by how the new Lasernet Core version number differs from the currently installed version. Lasernet Core version numbers follow a <major>.<minor>.<patch> system; for example, Lasernet Core 10.12.1.
Major Upgrade
If the major version number differs (for example, 10.10 to 11.1), you are performing a “major upgrade”.
For instructions, see the relevant major version migration process.
Minor and Patch Upgrades
If the minor version number differs (for example, 10.10 to 10.13), you are performing a “minor upgrade”.
If only the patch version number differs (for example, 10.10.2 to 10.10.4), you are performing a “patch upgrade”.
For instructions, see the minor or patch upgrade steps.
The Upgrade Process
Follow the relevant process below.
Perform a Major Upgrade
To upgrade from Lasernet 9 to Lasernet Core 10, see Upgrade from Lasernet 9 to 10.
To upgrade from Lasernet Core 10 to Lasernet Core 11, see the Lasernet Core 11 Migration Guide.
Perform a Minor or Patch Upgrade
In summary, this process involves backing up the Lasernet Core configuration (as an .lnconfigx file), uninstalling the currently installed Lasernet Core applications, and then installing the new version of those applications.
Note
You do not need to manually stop any Windows services or deactivate Lasernet Core licenses.
Note
This is an in-place upgrade. The new version of Lasernet Core replaces the currently installed version and all other Lasernet Core files remain in place. You do not need to set up your Lasernet Core configuration and forms again or reconfigure Lasernet Config. Currently installed licenses will apply to the newly installed software.
Note
To upgrade from Lasernet Core 11.0 to Lasernet Core 11.1 or later, refer to Upgrade from Lasernet Core 11.0 to Lasernet Core 11.1 or Later.
For all other minor or patch upgrades, follow the instructions below.
To upgrade, follow these steps:
Review the Lasernet Core Compatibility Matrices to identify whether Lasernet Core's support for versions of its prerequisite software has changed between the currently installed Lasernet Core version and the new version. If so, take any necessary action, such as upgrading prerequisite software.
Log on to the Lasernet Core server as a user that has local administrator privileges.
Optional: To create a backup of your Lasernet Core configuration, start Lasernet Developer, open the configuration, and then export it as an
.lnconfigxfile. To export the configuration, click File > Export Configuration in Lasernet Developer, enter a File name, then click Save..png)
Check whether the Lasernet Config service runs as the Local System user:
Open the Windows Services window.
Double-click the Lasernet Config 10 or Lasernet Config 11 service.
On the Log On tab, check which of Local System account or This account is selected.
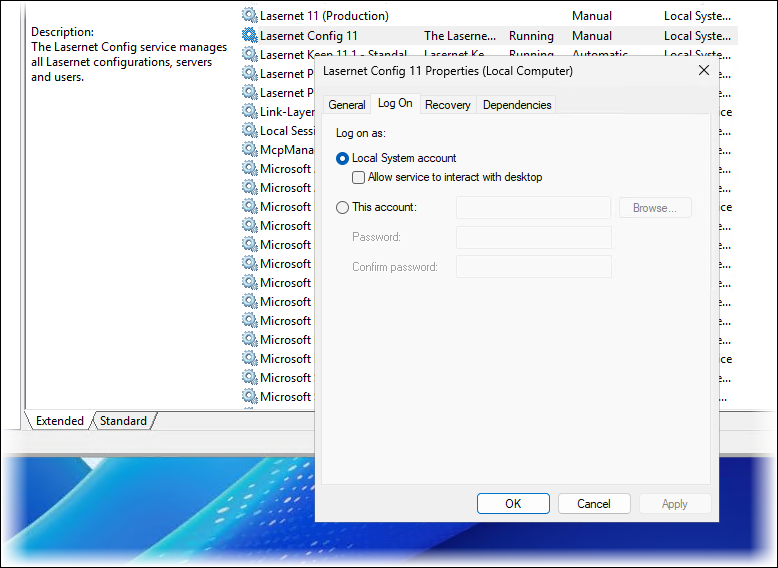
If Local System account is selected, skip to step 5.
If This account is selected, make a note of the user account’s name. You will also need to know the account’s password.
Note
This step is essential because uninstalling Lasernet Server deletes the Lasernet Config service. The new Lasernet Server installer will install a replacement service, which runs as the Local System user by default. To configure it to run as another user, you must know the user’s account name and password.
Review the Lasernet Core 10 or Lasernet Core 11 release notes for every Lasernet Core version between the currently installed version and the new version, to look for a notification that
LnLogin.exehas been updated in that release. If it has been updated in any of those versions, in the following steps of the upgrade process, you must uninstall and then install every Lasernet Core application (such as Lasernet Server, Lasernet Developer, Lasernet Printer Service, and so on). IfLnLogin.exehas not been updated, you may uninstall and then install only Lasernet Server.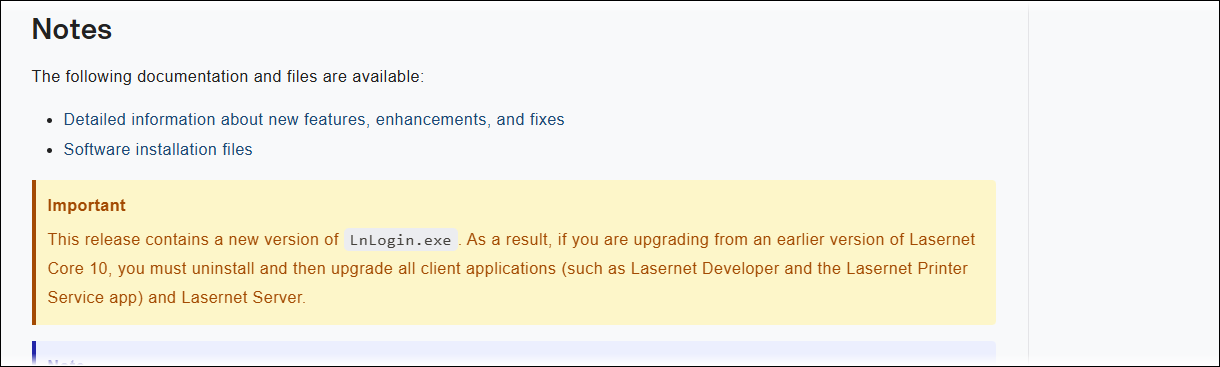
Uninstall Lasernet Core applications from the Windows applications list.
If
LnLogin.exehas been updated: Uninstall all Lasernet Core applications.If
LnLogin.exehas not been updated: Uninstall Lasernet Server only. In the application list, Lasernet Server is labeled Lasernet 10 or Lasernet 11.
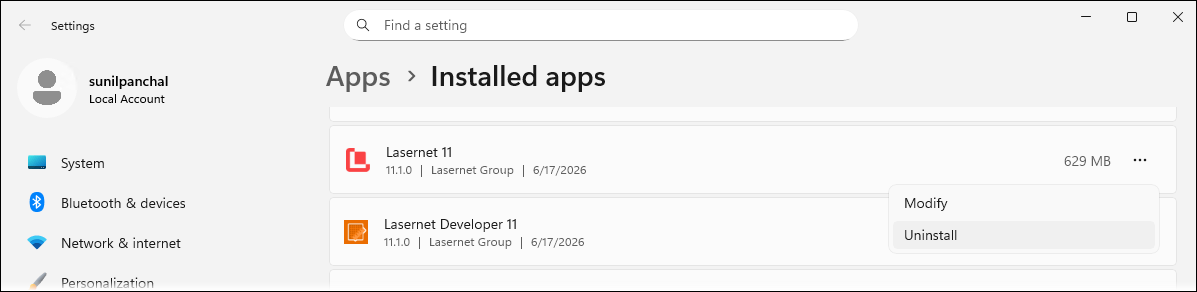
Download and then install the new Lasernet Core version.
If
LnLogin.exehas been updated: Install all Lasernet Core applications that your solution requires.If
LnLogin.exehas not been updated: Install Lasernet Server only.
If the Lasernet Config server previously ran as a user account (and not the Local System account):
Open the Windows Services window.
Double-click the Lasernet Config 10 or Lasernet Config 11 service.
On the Log On tab, select This account.
Select a user account and enter its password.
Click OK.
Restart the service.
If the Lasernet Config service and other Lasernet services (such as Lasernet Core environment/server services) are not running, manually start them.
Start Lasernet Monitor and verify that Lasernet Core environments/services have successfully started and loaded the Lasernet Core configuration.
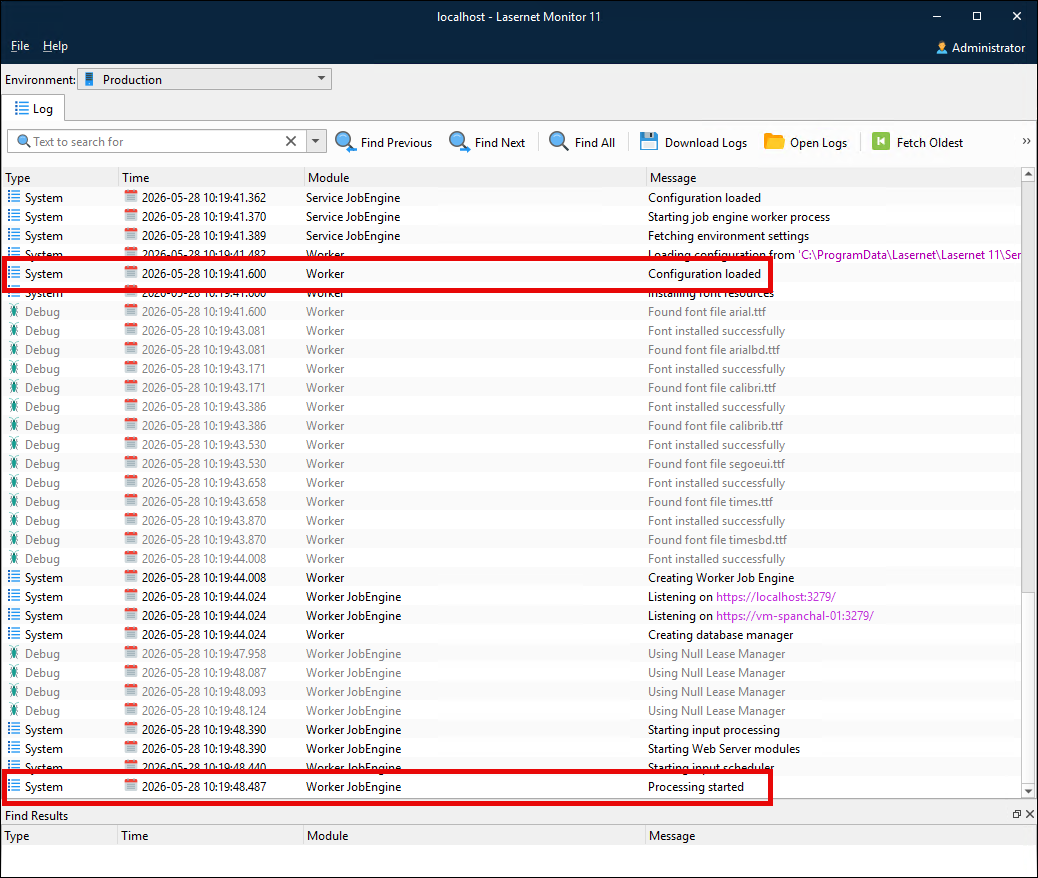
Note
If
LnLogin.exehas been updated, you must also uninstall and then install Lasernet Core client applications such as Lasernet Developer and Lasernet Printer Service on other computers, such as developer workstations and print servers.