Applies to: Lasernet Core 11
The SharePoint output module enables Lasernet Core to deliver documents and associated metadata to Microsoft SharePoint.
The module is used to insert a new document in SharePoint with metadata or to update the metadata of an existing document. Supported connection types are Web Services and REST API (Legacy or Graph).
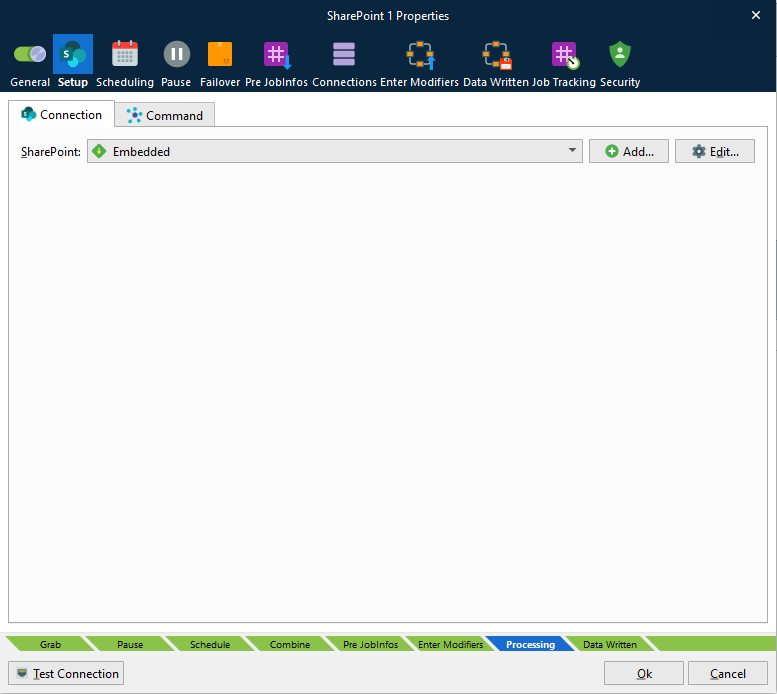
On the Connection tab, you have the following options:
Create an “embedded” connection: Embedded connection settings apply only to this module.
To do this, select Embedded from the SharePoint list, then click Edit to configure the connection.
Create a new global connection: Multiple modules in this Lasernet Core configuration can share the same “global” Connection item (to centralize management of connection configuration).
To create a global Connection item, click Add beside the SharePoint list.
Use an existing global connection
To use an existing global Connection item, select it from the SharePoint list.
To edit its connection properties, click Edit.
Next, select a connection type.
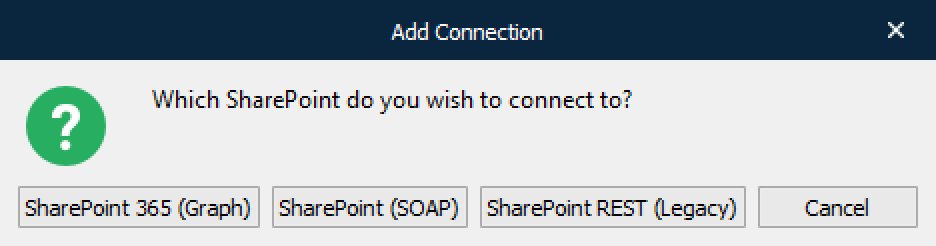
Supported API versions are:
SharePoint 365 (Graph)
SharePoint (SOAP)
SharePoint REST (Legacy)
Connect to SharePoint via Graph, SOAP (Web Service) or REST (Legacy). An advantage of using Graph (which is the latest Microsoft API) or REST is that you do not have to add references to any SharePoint 365 libraries or client assemblies. Instead, you make HTTP requests to the appropriate endpoints to retrieve or update SharePoint 365 entities, such as webs, lists, and list items.
Note
Supported command types and properties can vary between the protocols because not all types are supported by the Graph and REST interfaces.
Connection: Web Services (SOAP)
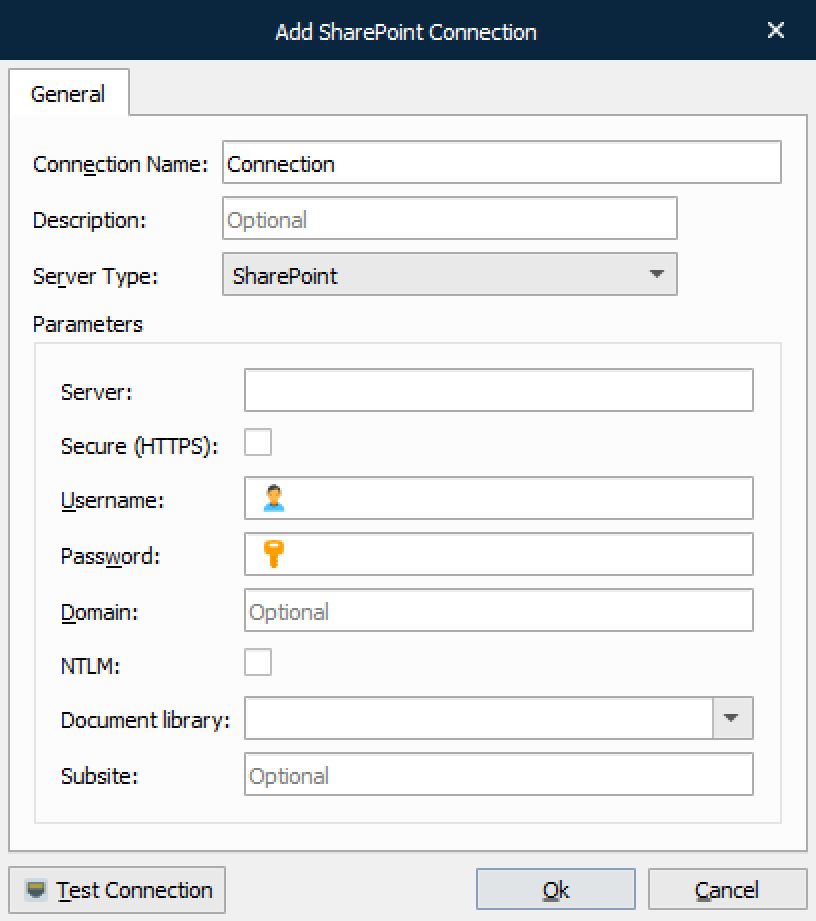
Property | Description |
|---|---|
Server | The name of the server. Do not enter an IP address or |
Username | The user name of a SharePoint user that has appropriate permissions. The domain can be specified using the format: |
Password | Password of the SharePoint user. |
Domain | Domain name for SharePoint server. |
NTML | Windows network protocol for security. |
Document library | (Optional) The library where insert or update is done. The library can be specified as part of the destination path. This property supports JobInfo substitution. |
Subsite | If SharePoint is set up with subsites, a subsite must be specified. This property supports JobInfo substitution. |
Click Test Connection to validate the connection between the Lasernet Core module and SharePoint.
Connection: REST API (Legacy or Graph)
Choose Legacy or Graph as the REST API connection type.
Important
In August 2025, Microsoft stopped allowing the use of legacy authentication with SharePoint 365. As a result, Lasernet Core must authenticate via Graph API.


Connection: Legacy
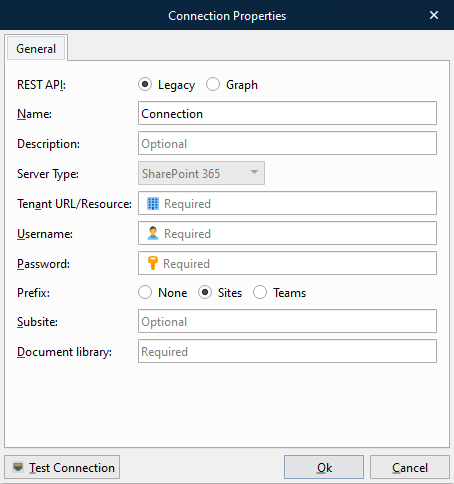
Property | Description |
|---|---|
REST API | Select Legacy. |
Tenant URL/Resource | The tenant URL for your resource, like https://microsoft.sharepoint.com |
Username | A SharePoint user with appropriate rights. The domain can be specified using the format: |
Password | Password for the SharePoint user. |
Prefix | Select Sites to connect to SharePoint. However, some SharePoint sites have a URL that does not contain Select Teams to connect to Teams instead of SharePoint. |
Subsite | If SharePoint is set up with subsites, a subsite must be specified. This property supports JobInfo substitution. |
Document library | (Optional) The library where insert / update is done. Library can be specified as part of the destination path. This property supports JobInfo substitution. |
Click Test Connection to validate the connection between the Lasernet Core module and SharePoint.
Connection: Graph
To set up the module to use Graph API, follow this process:
Configure Authentication
Note
Lasernet Core 11.2 and later do not support user authentication.
Refer to the information for the version of Lasernet Core that you are using.
Lasernet Core 11.0 and 11.1
The module can use user authentication or application authentication.
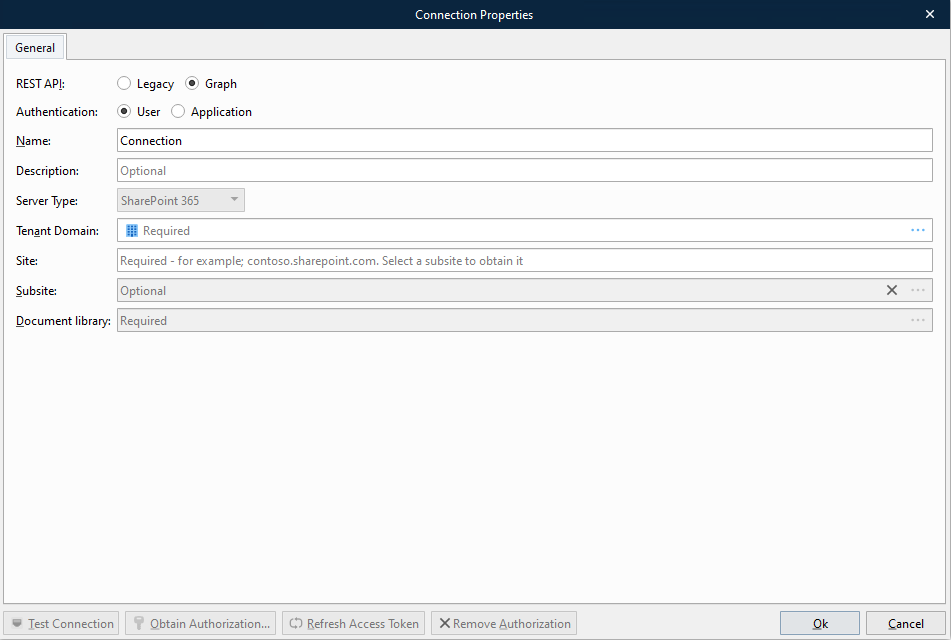
Set Up User Authentication for a Graph Connection
Follow these steps:
Set REST API to Graph.
Enter a Name and Description for the connection.
Set Authentication to User. This option authenticates using a user account in your organization.
In the Tenant Domain box, click the … (three dots) button to specify your domain (for example, microsoft.com).
Click Obtain Authorization and log in with user credentials to connect to an account in your organization.
Provide values for Site, Subsite, and Document library. For more information, see Provide Values for Other Module Properties.
Click Test Connection.
Set Up Application Authentication for a Graph Connection
Application authentication for SharePoint Graph communication requires that:
Lasernet Core is registered as an app by an Entra ID admin.
The Entra ID admin has provided a client ID and client secret for the module to use to authenticate.
Important
Before implementing application authentication for this module, see Understand the Security Implications of Application Authentication for Outlook Mail, OneDrive, and SharePoint Modules. Although that article primarily applies to Lasernet Core 11.2 and later, the Delegated vs. Application Authentication, Permissions Required by Each Module, and Reducing the Scope of Access sections also apply to Lasernet Core 11.0 and 11.1.
To set up application authentication, follow these steps:
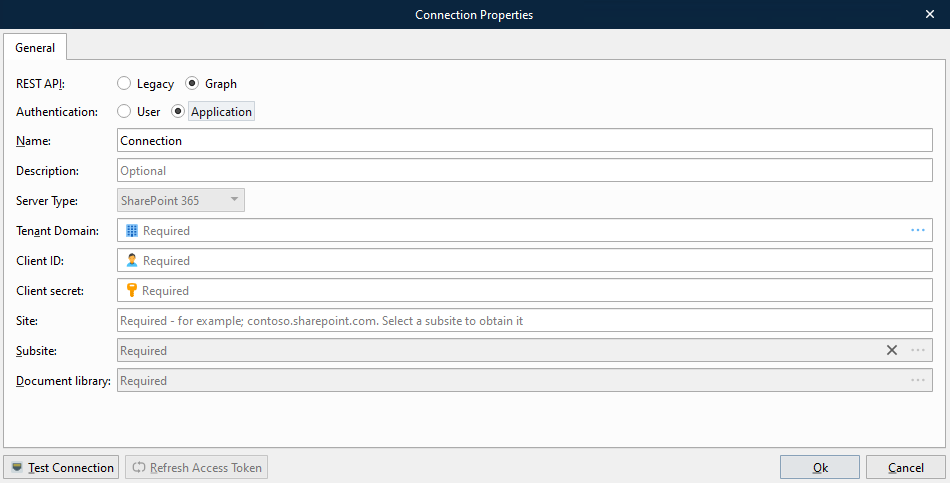
Set REST API to Graph.
Enter a Name and Description for the connection.
Set Authentication to Application. This option authenticates as a registered application in Entra ID.
In the Tenant Domain box, click the … (three dots) button to specify your domain (for example, microsoft.com).
Enter the correct Client ID and Client Secret.
Click Refresh Access Token to validate the Client ID and Client Secret.
Provide values for Site, Subsite, and Document library. For more information, see Provide Values for Other Module Properties.
Click Test Connection to validate the connection between the Lasernet Core module and SharePoint. This button is enabled only when all required properties have values.
Note
If the client ID and client secret change in the future, repeat the step above, then commit and deploy the Lasernet Core configuration.
At any time, you can click Refresh Access Token to test that the currently provided credentials are valid. When you click the button, Lasernet Developer attempts to use those credentials to obtain a new access token.
Refresh Access Token
If Lasernet Core experiences issues connecting to SharePoint, there might be a problem with its current security tokens. In some cases, the Refresh Access Token button can resolve connection issues.
Connection issues can occur for a number of reasons, including:
More than 90 days of inactivity (user authentication).
The user changed their password (user authentication).
Permission or security changes to the user (user authentication).
Revocation of permissions (user authentication or application authentication).
If Lasernet Core experiences connection issues, try the following steps (depending on the authentication method used).
User Authentication
Click Refresh Access Token to obtain new tokens, then commit and deploy the Lasernet Core configuration.
If doing this does not resolve the issue, click Remove Authorization to remove the currently stored security tokens, then click Obtain Authorization to reauthenticate using the user account (which will also refresh the security tokens). Then, commit and deploy the Lasernet Core configuration.
Application Authentication
Click Refresh Access Token to obtain new tokens, then commit and deploy the Lasernet Core configuration.
Lasernet Core 11.2 and later
Application authentication for SharePoint Graph communication requires that:
Lasernet Core is registered as an app by an Entra ID admin.
The Entra ID admin has provided a client ID and client secret for the module to use to authenticate.
Important
Before implementing application authentication for this module, see Understand the Security Implications of Application Authentication for Outlook Mail, OneDrive, and SharePoint Modules.
To set up application authentication, follow these steps:
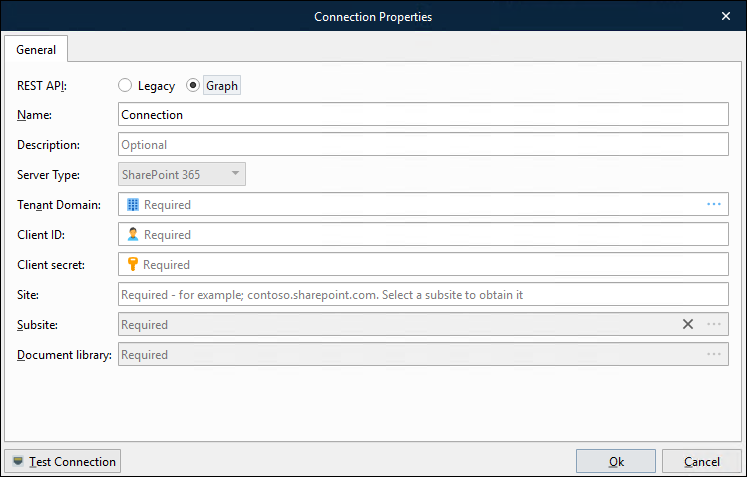
Set REST API to Graph.
Enter a Name and Description for the connection.
In the Tenant Domain box, click the … (three dots) button to specify your domain (for example, microsoft.com).
Enter the correct Client ID and Client Secret.
Provide values for Site, Subsite, and Document library. For more information, see Provide Values for Other Module Properties.
Click Test Connection.
Note
If the client ID and client secret change in the future, repeat the steps above, then commit and deploy the Lasernet Core configuration.
At any time, you can click Test Connection to test that the currently provided credentials are valid. When you click the button, Lasernet Developer attempts to use those credentials to obtain a new access token.
Provide Values for Other Module Properties
Use the following information to finish configuring the module’s connection.
Property | Description |
|---|---|
Site | The organization site for your SharePoint. |
Subsite | (Optional) If SharePoint is set up with subsites, a subsite must be specified. Click the … (three dots) button to get a list of your available subsites, then select a subsite. You might experience a short wait while Lasernet Developer downloads the list of subsites. This property supports JobInfo substitution. |
Document library | (Required) The library where the insert or update is done. The library can be specified as part of the destination path. Click the … (three dots) button to get a list of your available document libraries. This property supports JobInfo substitution. |
Configure the Command
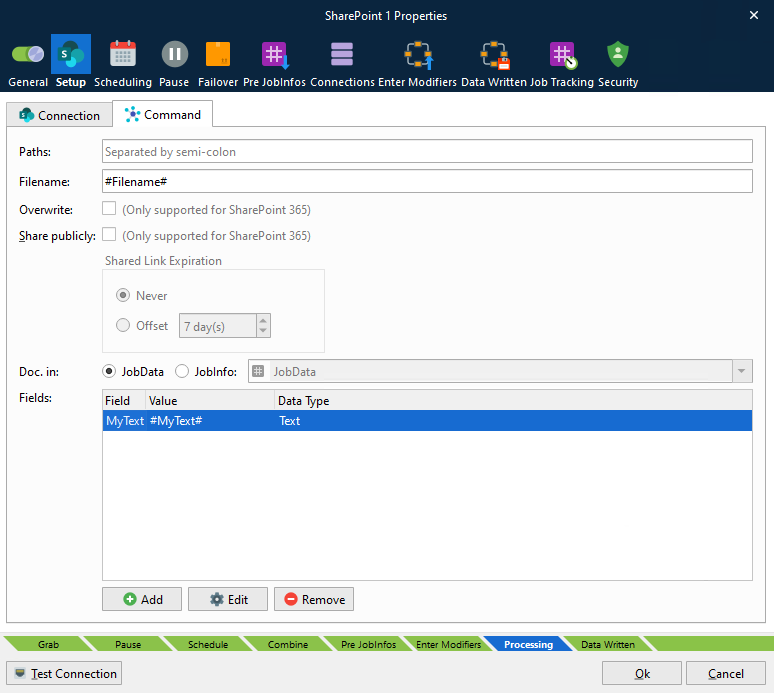
On the Command tab of the module’s Setup tab, enter your Insert properties. Information about the properties are listed in the information about the Insert command in the SharePoint Commands page.
Insert Document
Documents can be inserted from JobData or another JobInfo.
Setting | Description |
|---|---|
Paths | You can insert the same document in multiple paths in SharePoint. To do this, each path must be separated with a semicolon. |
Doc. in | Specifies where document data comes from.
|
Fields | A list of metadata to be inserted along the document. These fields must exist in the SharePoint library.
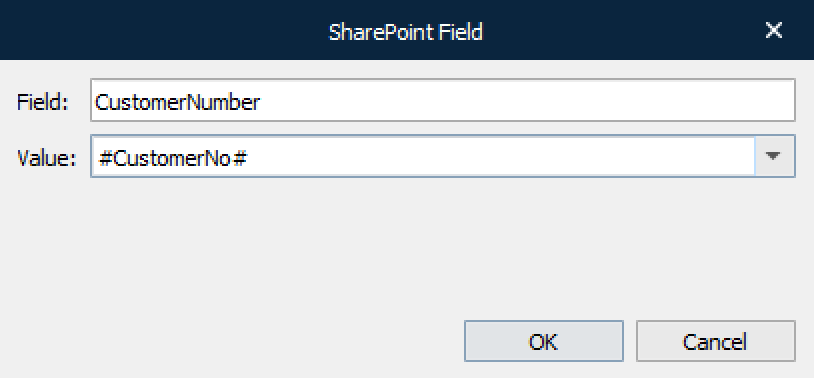
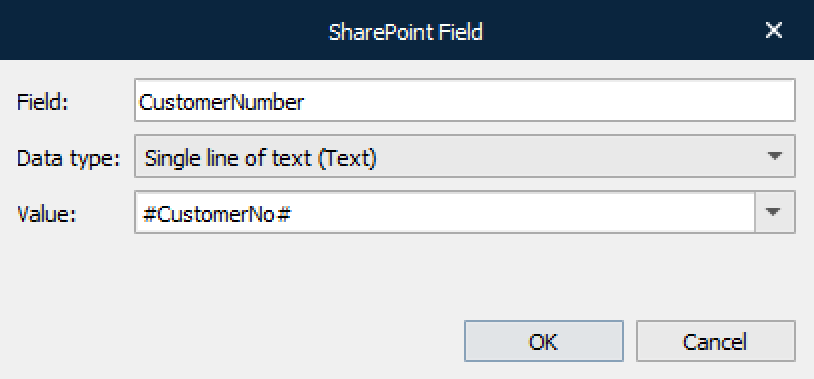
The data type of a field must match the data type of the field in SharePoint. You can use JobInfo substitution, as seen above, in the example with #CustomerNo# JobInfo. The data type field is required for Web Services only and is therefore hidden for REST.
|