
Back Up
Before upgrading, users must back up their configuration by using the backup tools provided by the Lasernet Group.
Always perform a backup before upgrading the Lasernet Extension.
Follow these steps:
Sign in to the Dynamics 365 Business Central application.
Click Lasernet Document Management and select the Export/Import tile from the Miscellaneous group.
(8).png)
The Manage Lasernet Connector Data page is displayed.
Select all elements from the page except for Copy Data Between Companies, and then click the Export button.
(15).png)
The Company Selector page is displayed.
Select all companies from the list and click OK.
.png)
Save the exported file.
Your backup is complete.
Uninstall and Re-Install Lasernet Connector
After the backup is complete, uninstall or update the Lasernet Connector, depending on your BC environment.
Business Central Online
Sign in to Business Central Admin Center.
Locate the Manage Apps page.
Locate the Lasernet app.
Click Install update from the Available Update Action column.
Once you have completed these steps, jump to the Lasernet Configuration section of this guide.
Business Central OnPrem
Consult this link to learn Microsoft's best practices on unpublishing an extension.
Uninstall Lasernet Connector by opening PowerShell and using the following prompt:
(10).png)
Example:
Uninstall-NAVApp -ServerInstance BC -Name "Lasernet Connector OnPrem" -Version 4.3.2.0
Unpublish Lasernet Connector by using the following prompt:
(17).png)
Example:
Unpublish-NAVApp -ServerInstance BC -Name "Lasernet Connector OnPrem" -Version 4.3.2.0
Publish Lasernet Connector by using the following prompt:
(12).png)
Example:
Publish-NAVApp -ServerInstance bc -Path "C:\ProgramData\BcContainerHelper\Extensions\bcserver\my\Lasernet.app" -skipverification
We recommend consulting this link to learn Microsoft's best practices on installing and publishing an extension.
Install Lasernet Connector by using the following prompt:
(15).png)
Example:
Install-NAVApp -ServerInstance bc -Name "Lasernet Connector OnPrem" –Tenant Default
Lasernet Configuration
The Lasernet Group needs to change the Lasernet Configuration to support new features in the Lasernet Connector (such as improved archive report structure). Always double-check if your Lasernet Configuration has undergone any changes.
If you are in doubt, contact your Lasernet reseller.
Open your Lasernet Configuration.
The following steps (2-6) need to be repeated for all reports.
Open a form and click the PDF sheet.
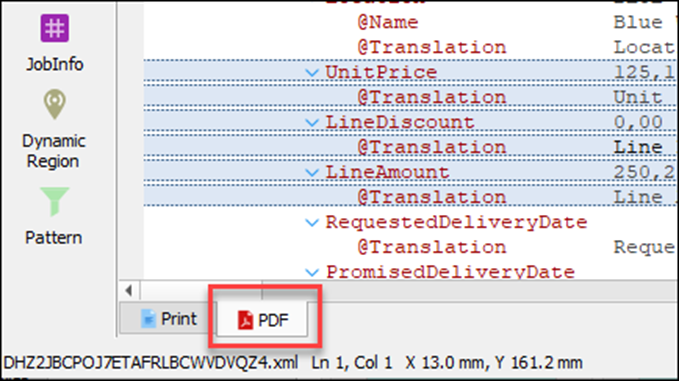
From the top menu, click Sheet and then select Sheet Options.
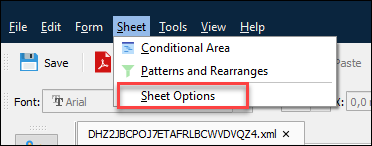
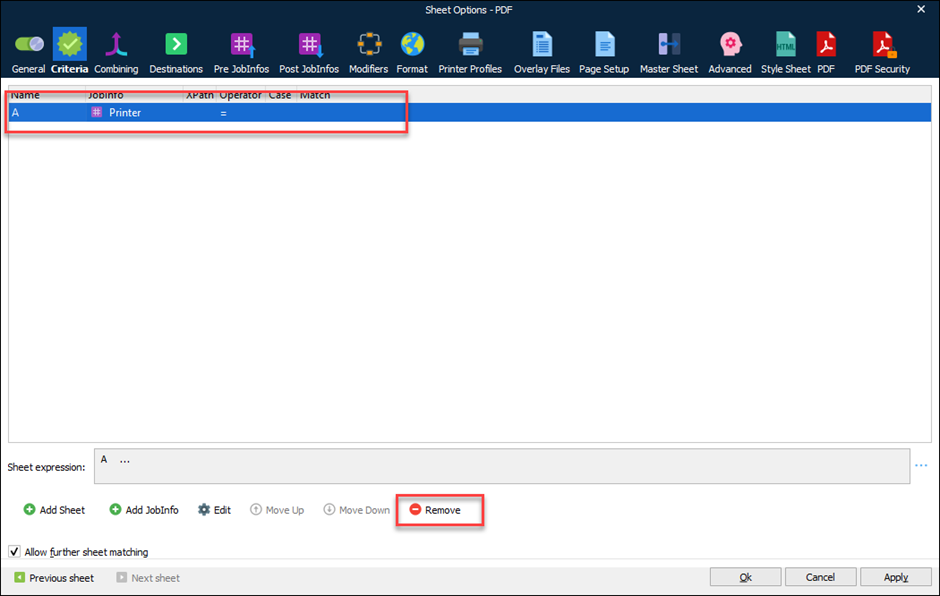
Open the Criteria FastTab.

Remove the criteria and close the form.
Close the report Form.
Repeat this process (steps 2-6) on all reports.
Select Modules from the menu on the left side and open Destination Selection.

Open the Destination FastTab.

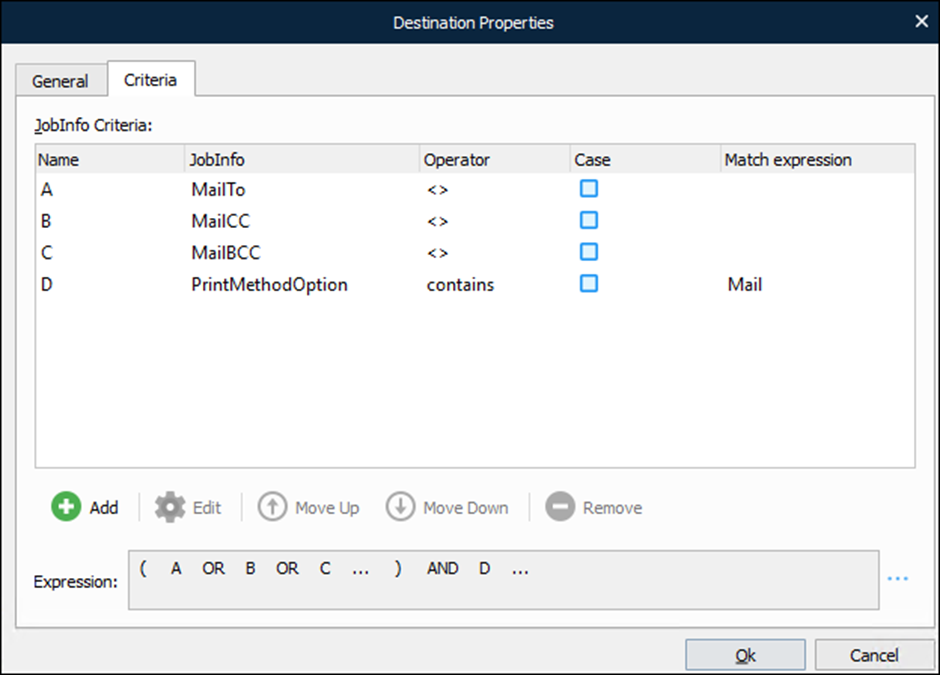
Change all your Destinations Criteria so that they match the following images. Note that you might have other destinations and criteria because you have different output modules. In this case, merge the new criteria so they will still work with your configuration.
Destination: Azure Storage
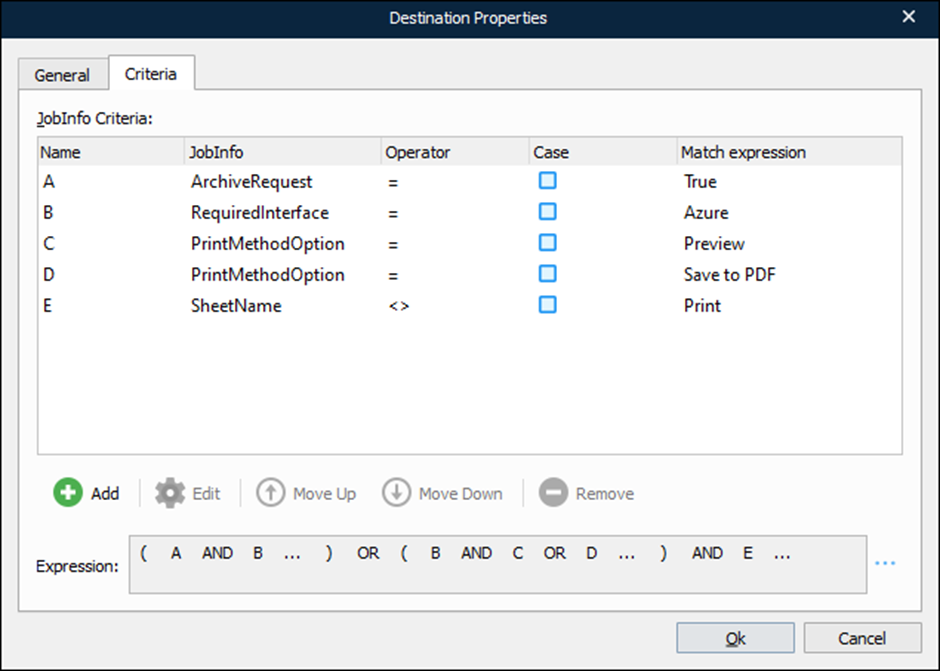
Destination: #Printer#
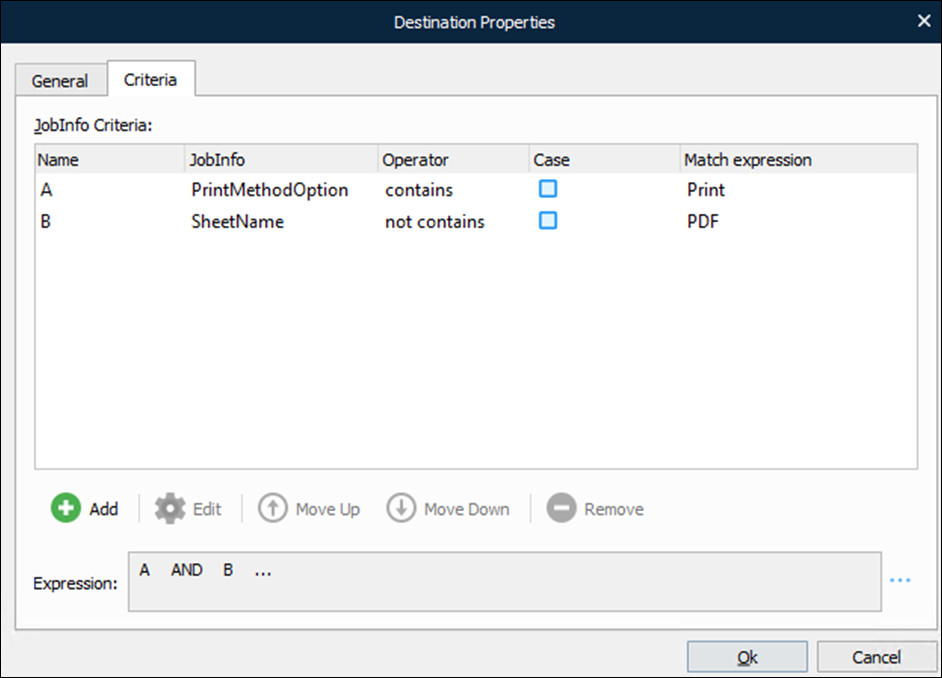
Destination: Mail Output
Destination: Archive

Destination: Null
Add the destination.

Select Forms from the left menu and open the Transformer Form called General Transformation from all forms.
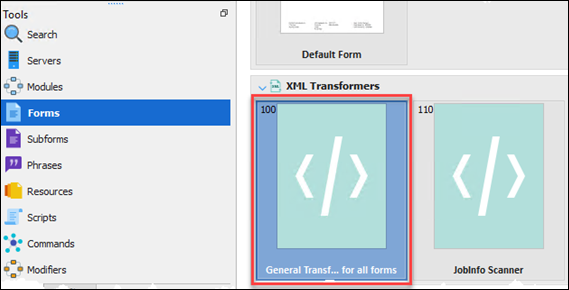
Deactivate the following two actions in the Actions window.

Save and close the form.
XML Structure
In 4.0.0.x, we have changed the way we create the XML file. Therefore, we were also forced to change the XML structure slightly, but that has an impact on your Rearranges on your reports/Forms. Check all your forms if the rearrange matches the new structure.
The following has been changed:
CustomLineFields and CustomHeaderFields
If you are adding additional data via Document Layout, then you need to change the rearranges. If not, you can skip this part.
Old XML structure

New structure

Note
The data itself is moved from the ValueHeader element to the Parent, in this case, Picture.
Tip
Work on an older grab file and then simply locate the rearrange and then drag the rearrange from ValueHeader to the Parent. This keeps the rearrange in the right window/output so that has not changed.
ItemAttributes
Old structure

New structure

Dimensions
Old structure

New structure
(42).png)