

Applies to: Lasernet Core 11
Lasernet Core uses “security roles” to manage permissions for users. Lasernet Core security roles are bound to app roles in Microsoft Entra ID through Lasernet Core “external roles”. Microsoft Entra ID users and groups can be assigned any number of app roles (that correspond to external roles), thereby enabling granular permission management directly in Microsoft Entra ID.
Note
For more information about Lasernet Core users, groups, and security roles, see Configure Users, Groups, and Security Roles.
The process of binding users to specific permissions requires the following steps:
Add an app role to the app registration in Microsoft Entra ID.
Add a corresponding external role in Lasernet Config Server.
Add and configure a security role in Lasernet Config Server (if necessary).
Add the external role to one or more security roles in Lasernet Config Server.
The following sections describe how to complete each stage of this process. The example described in the following sections involves configuring Lasernet Core and Microsoft Entra ID to allow specific users to only edit forms in Lasernet Developer.
Add a New App Role to the Azure App Registration
Follow these steps:
Navigate to the app registration for Lasernet Core by going to Azure Portal > Microsoft Entra ID > App registrations.
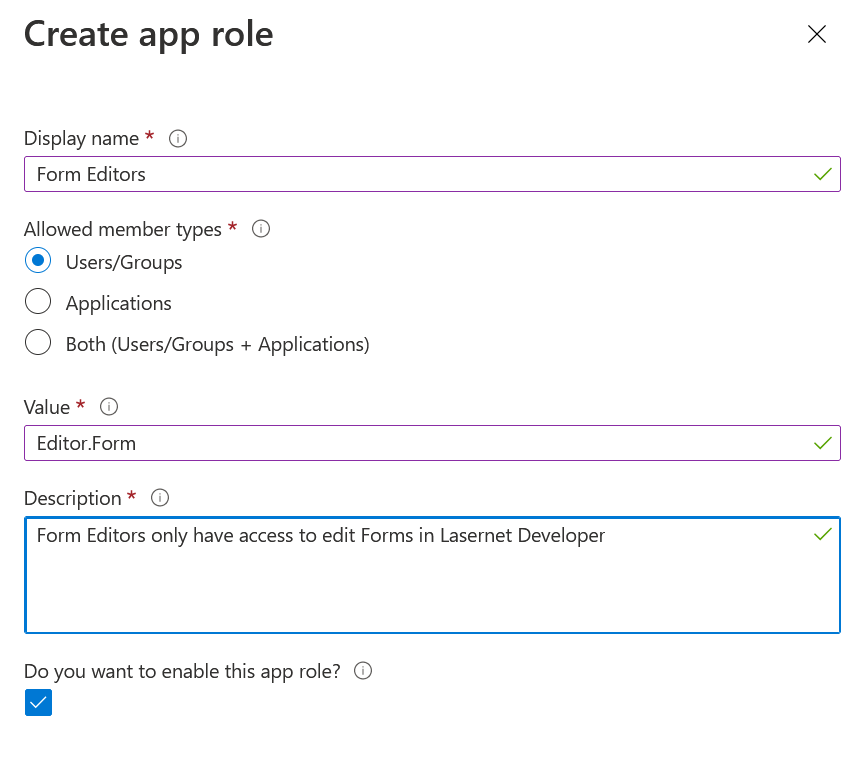
After selecting the app registration, navigate to the App Roles page and click Create app role.
Fill in the information as shown.
Note
The name you enter into the Value field must match the name that you enter when you later add an external role in Lasernet Config Server.
Click Apply.
Assign Users and Groups to the New App Role
Follow these steps:
Navigate to Azure Portal > Microsoft Entra ID > Enterprise applications.
Use the search function to locate the Lasernet Core enterprise application.
Click the Lasernet Core enterprise application to modify it.
Click Manage > Users and groups, then click Add user/group.
Select the users and groups that you want to allow to edit forms in Lasernet Core.
Select the Form Editors role.
Click Assign.
Add a New External Role in Lasernet Config Server
The “external role” in Lasernet Core is the glue that binds Azure app roles to Lasernet Core security roles. Every app role you define in the Azure app registration must have a corresponding external role in Lasernet Core. The binding between an Azure app role and a Lasernet Core external role is done by name, so it is important that the Name field of the external role matches the Value field of the corresponding Azure app role.
An external role can be assigned to one or more security roles.
The steps for adding an external role depend on which tool you are using.
Manage
In the User Management menu (see 1 in the image below), click External Roles.
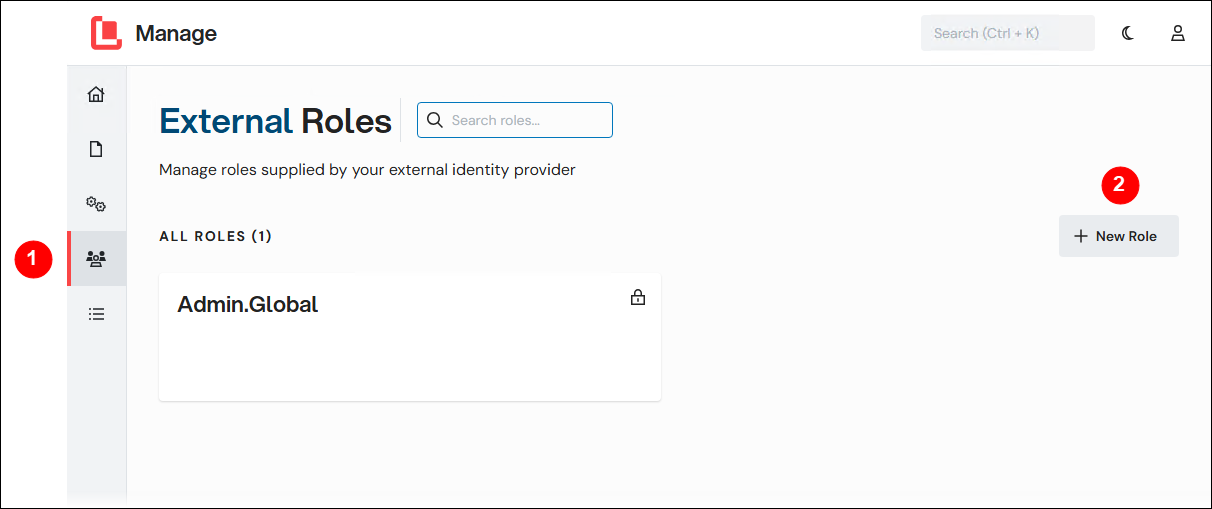
Click New Role (2).
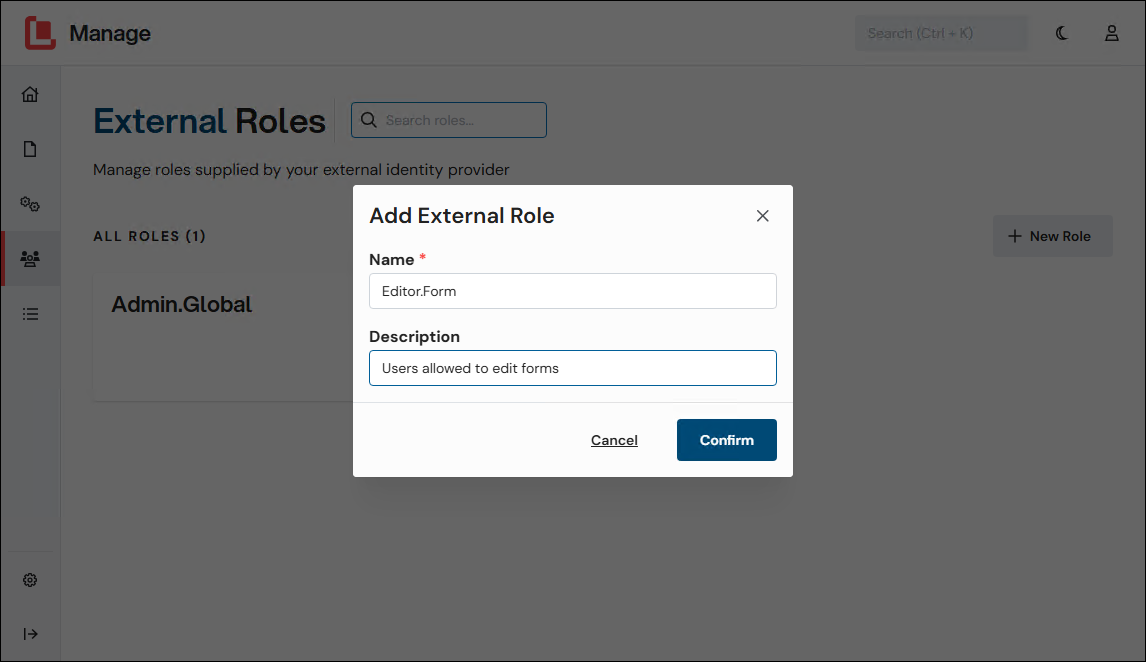
Enter a Name and Description for the external role.
Important
Ensure that Name matches the Value that you entered when you created the app role.
Click Confirm.
Lasernet Config Web App
Note
The Lasernet Config web app was provided with earlier versions of Lasernet Core. It is a legacy web app and will be deprecated in a future version of Lasernet Core.
Expand for information
Navigate and log in to the Lasernet Config Server web app.
Go to the External Roles page then click Add.
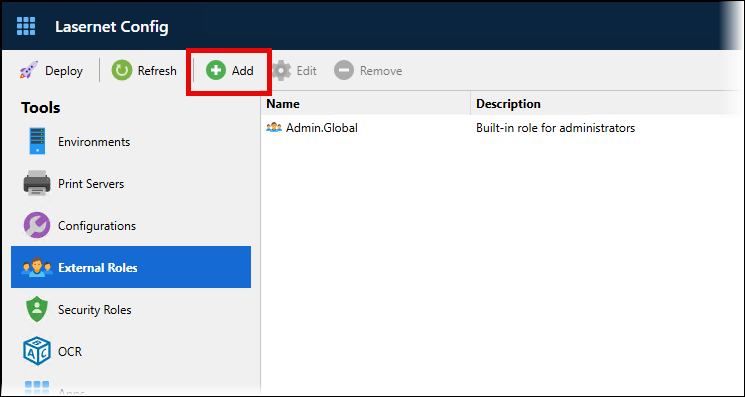
Add a Name and Description for the external role.
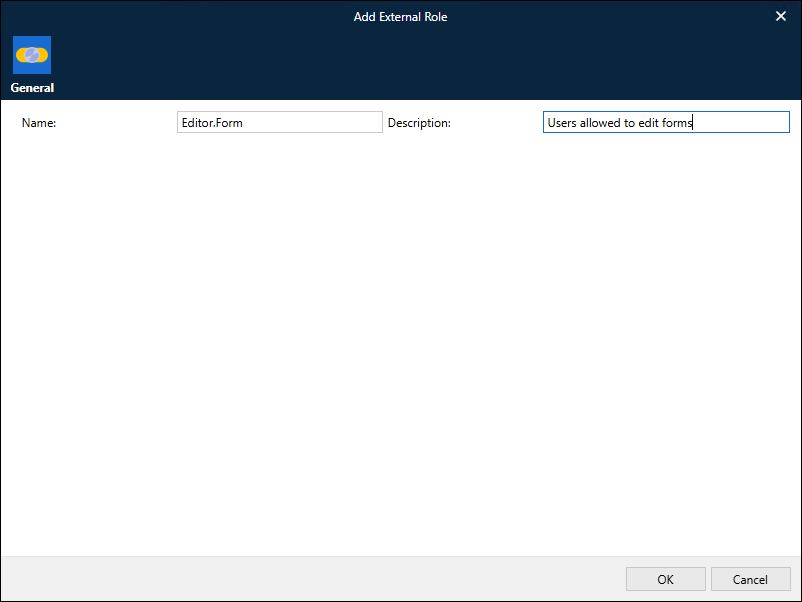
Important
Ensure that Name matches the Value that you entered when you created the app role.
Click OK.
Add a New Security Role in Lasernet Config Server
A security role defines which permissions are granted to its members. Security roles are separated into areas corresponding to the different Lasernet Core applications.
The steps for adding a security role depend on which tool you are using.
Manage
In the User Management menu, click Security Roles.
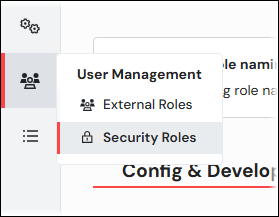
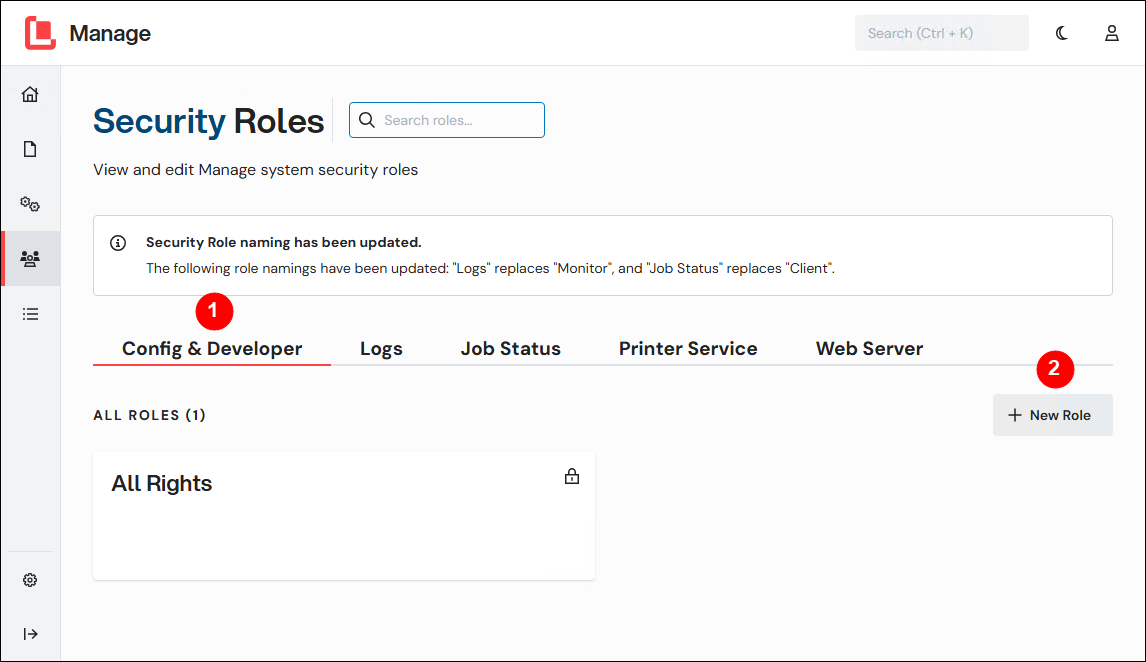
Click the Config & Developer tab (see 1 in the image below).
Click New Role (2).
Enter a Name and Description for the security role.
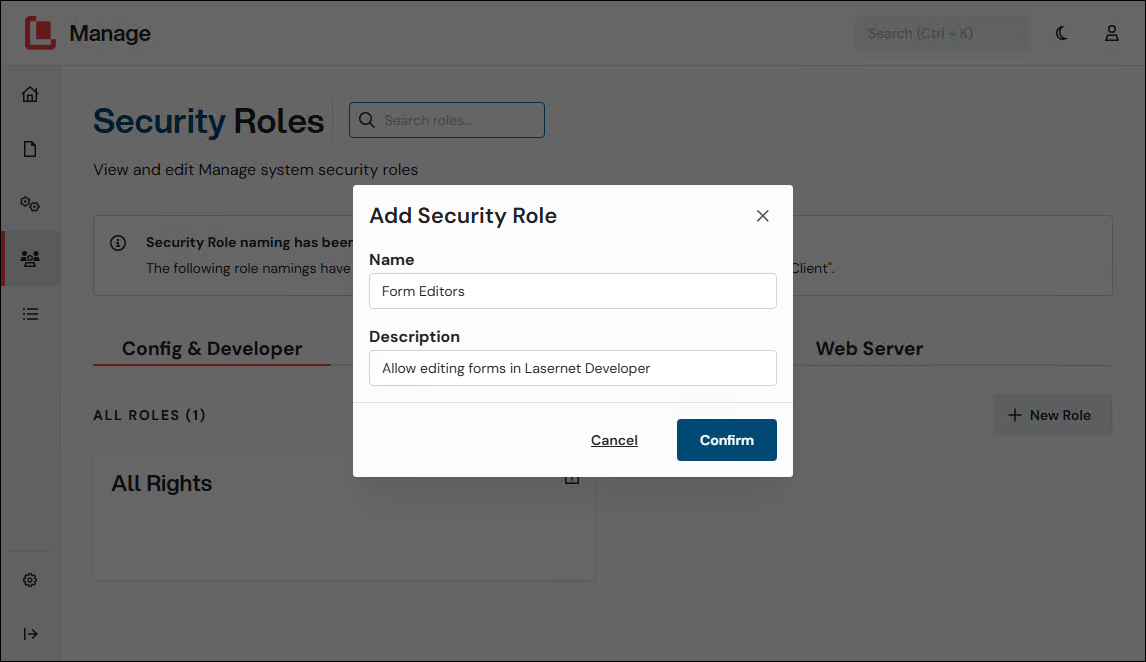
Click Confirm to create the security role.
Lasernet Config Web App
Note
The Lasernet Config web app was provided with earlier versions of Lasernet Core. It is a legacy web app and will be deprecated in a future version of Lasernet Core.
Expand for information
Navigate to the Security Roles page, click Config Server and Developer, then click Add.
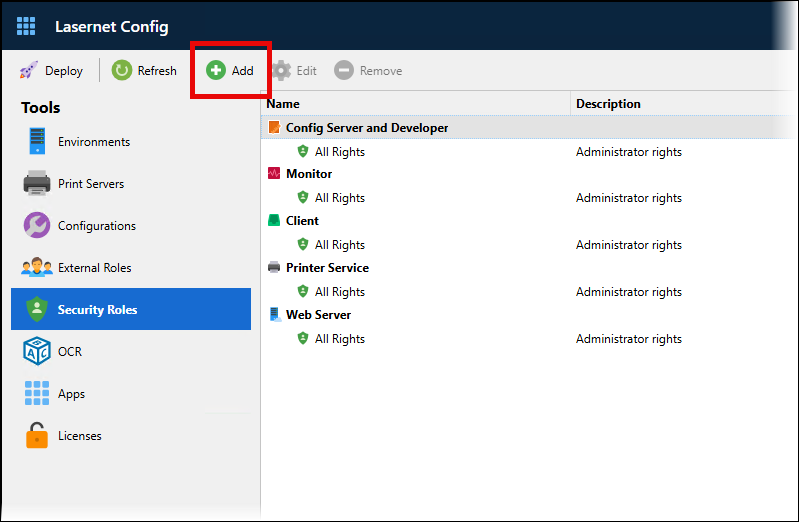
Enter a Name and Description for the role.
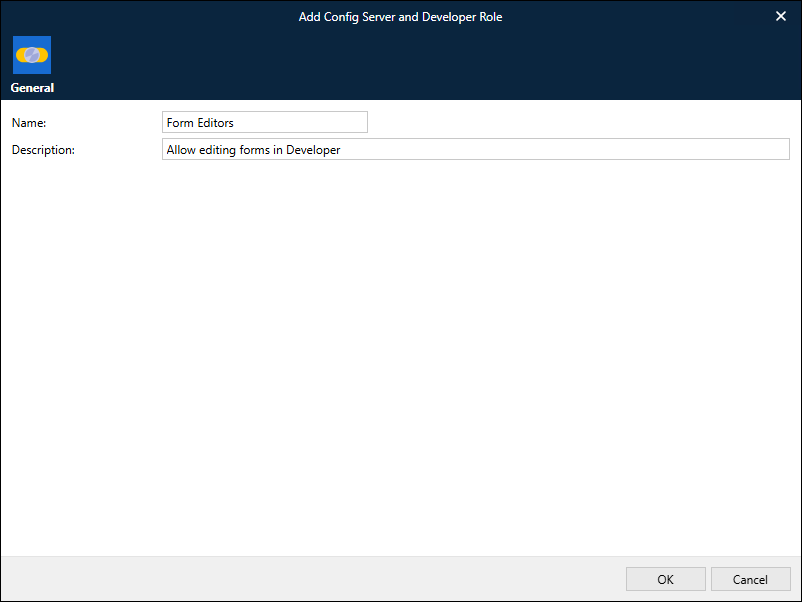
Click OK.
Configure the New Security Role
In this example, the newly created security role must be configured to only allow access to edit forms. The users assigned this role will be able to edit forms, but will be unable to do any tasks in Manage (or the Lasernet Config web app), and will be unable deploy configurations to environments. They will also be unable to access any part of a configuration in the Lasernet Developer other than the forms (in that configuration).
The steps for configuring a security role depend on which tool you are using.
Manage
Click the newly added security role.
In the Security area of the role editing pane for the Form Editors role:
Remove all items from the Administrative Rights list.
Remove all items except Forms from the Lasernet Developer list.
In the Deployment area, remove all items from the Environment Deployment Access list.
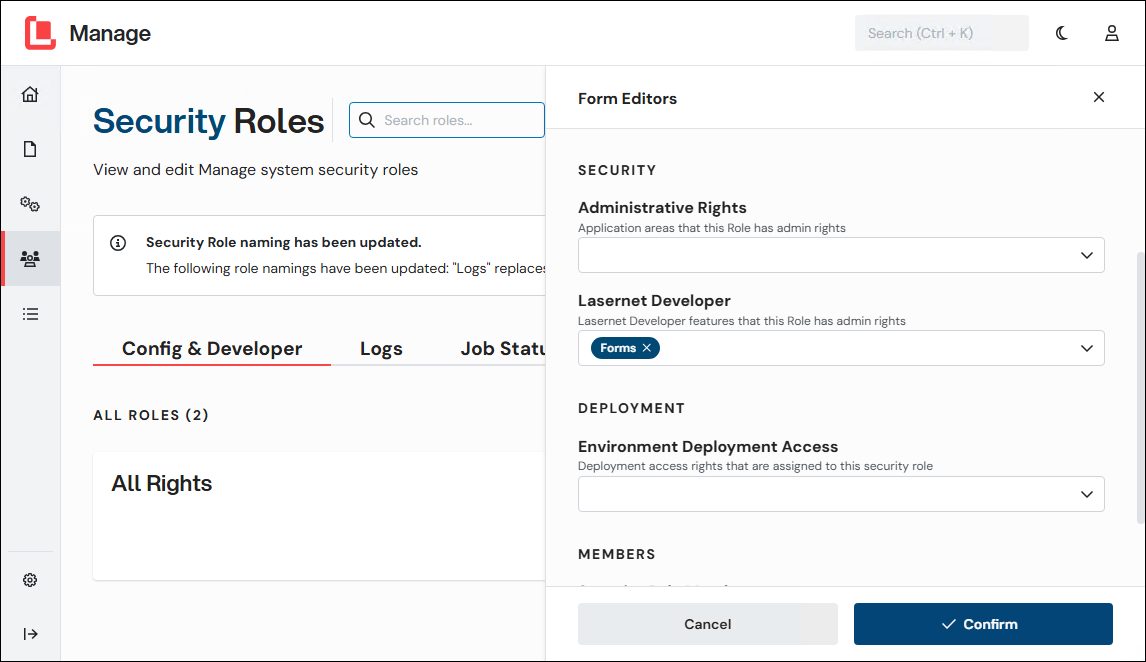
In the Members area, add Editor.Form to the Security Role Members list.
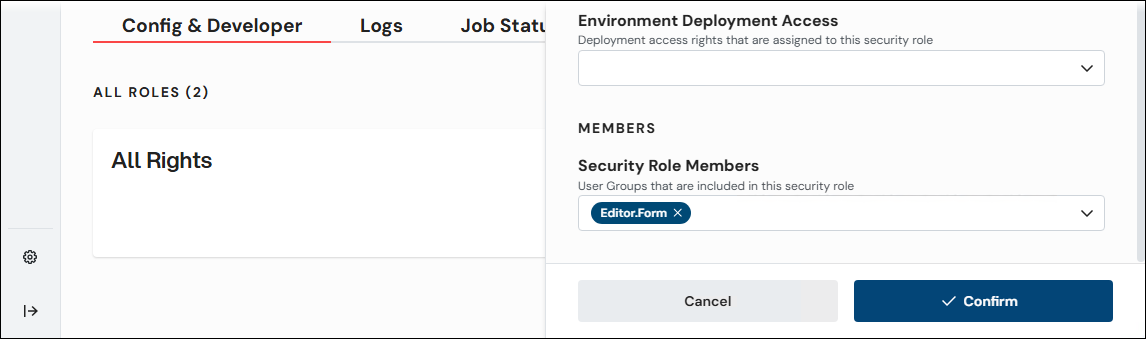
Click Confirm.
The users that you selected when you assigned users and groups to the new app role will now be asked for their Microsoft Entra ID credentials when they start Lasernet Developer. After they sign in, they will be able to edit forms.
Lasernet Config Web App
Note
The Lasernet Config web app was provided with earlier versions of Lasernet Core. It is a legacy web app and will be deprecated in a future version of Lasernet Core.
Expand for information
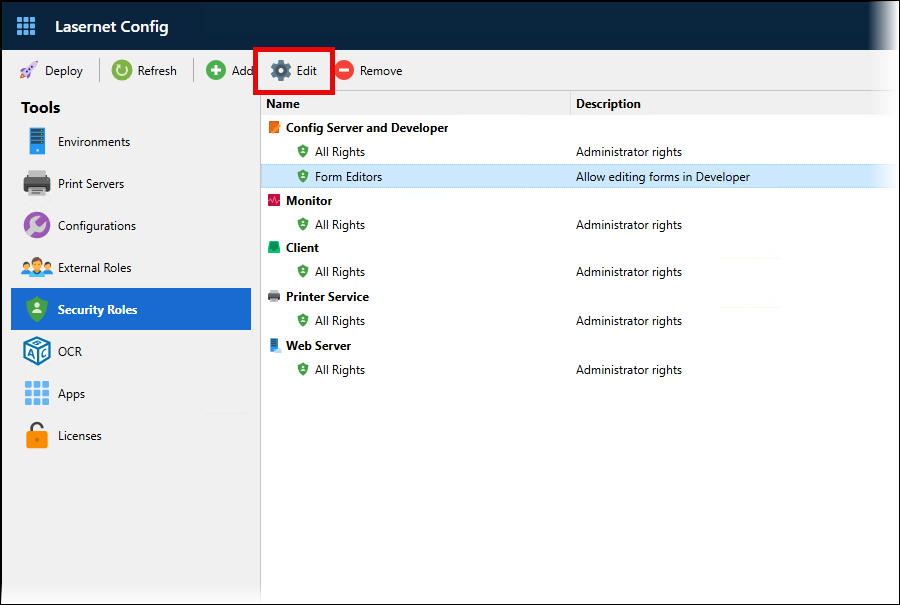
Select the newly added security role, then click Edit.
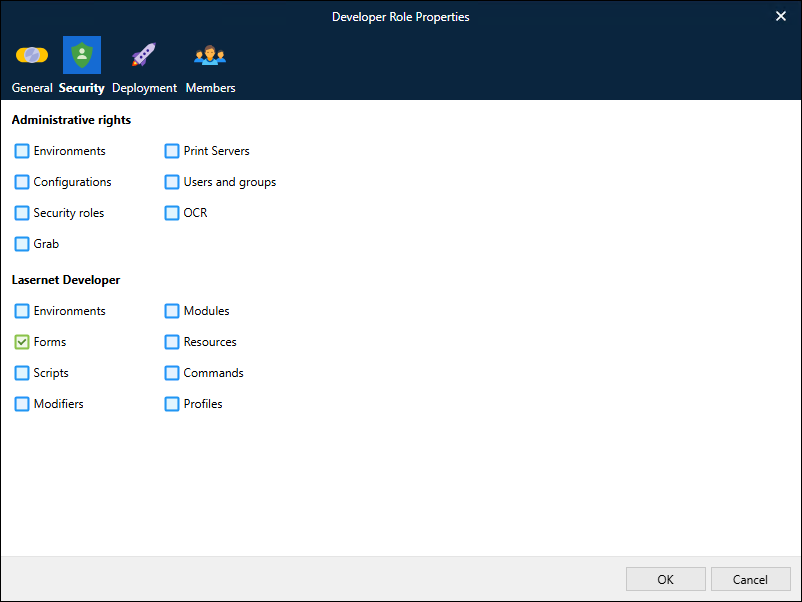
On the Security tab, clear all checkboxes except Forms.
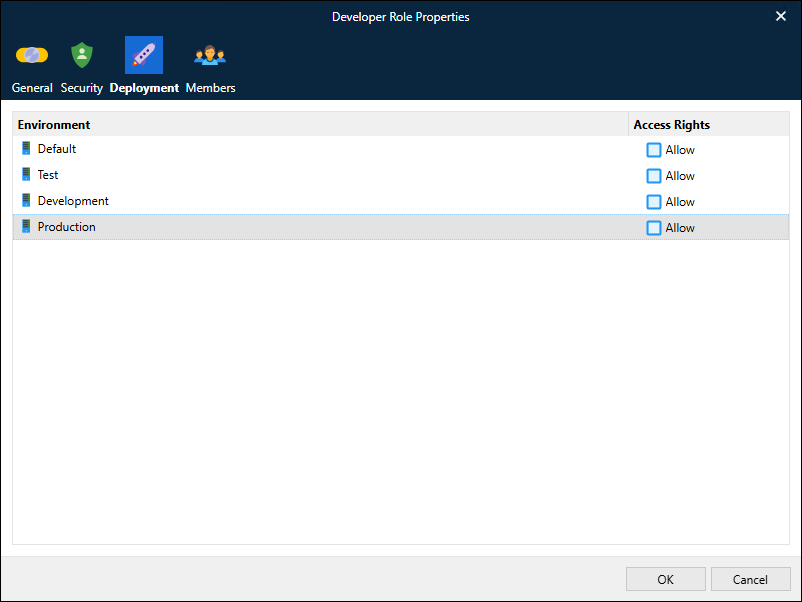
On the Deployment tab, clear all checkboxes.
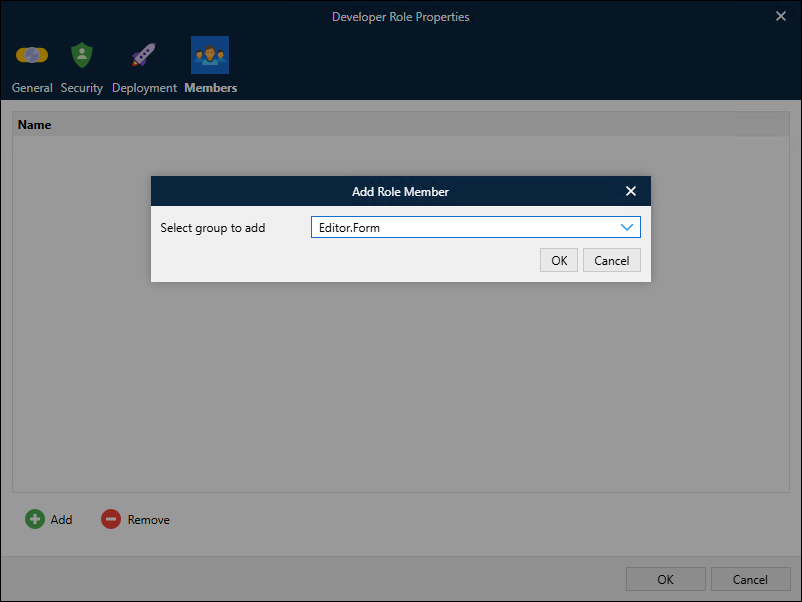
On the Members tab:
Click Add
Select Editor.Form (the newly created Lasernet Core external role) from the Select group to add list.
Click OK.
Click OK in the security role editing window to save your changes to the security role.
The users that you selected when you assigned users and groups to the new app role will now be asked for their Microsoft Entra ID credentials when they start Lasernet Developer. After they sign in, they will be able to edit forms.