
To build a Lasernet query to extract data from Dynamics 365 Finance and Operations, it is first necessary to determine where that data is located in the system. Once the data location is known, the query must be built so it can access the data. This requires knowing how tables are linked together within FO.
Sometimes, this information is already known or can be easily worked out. For example, customer information is stored in the CustTable. However, when it is not so obvious, there are ways to find out.
How to Find the Table and Field Names
When building a query, the first step is to find the data. Below are some suggestions for finding the exact location of the data your customer wants to see in their report.
Ask for Specific Requirements
The best way to ensure the query returns exactly what the customer wants is to ask them to specify the exact table and field. An example of a common request from a customer would be:
“Add the date to the Free Text Invoice report.”
However, in the Free Text Invoice header, we can see that there are actually six possible dates:
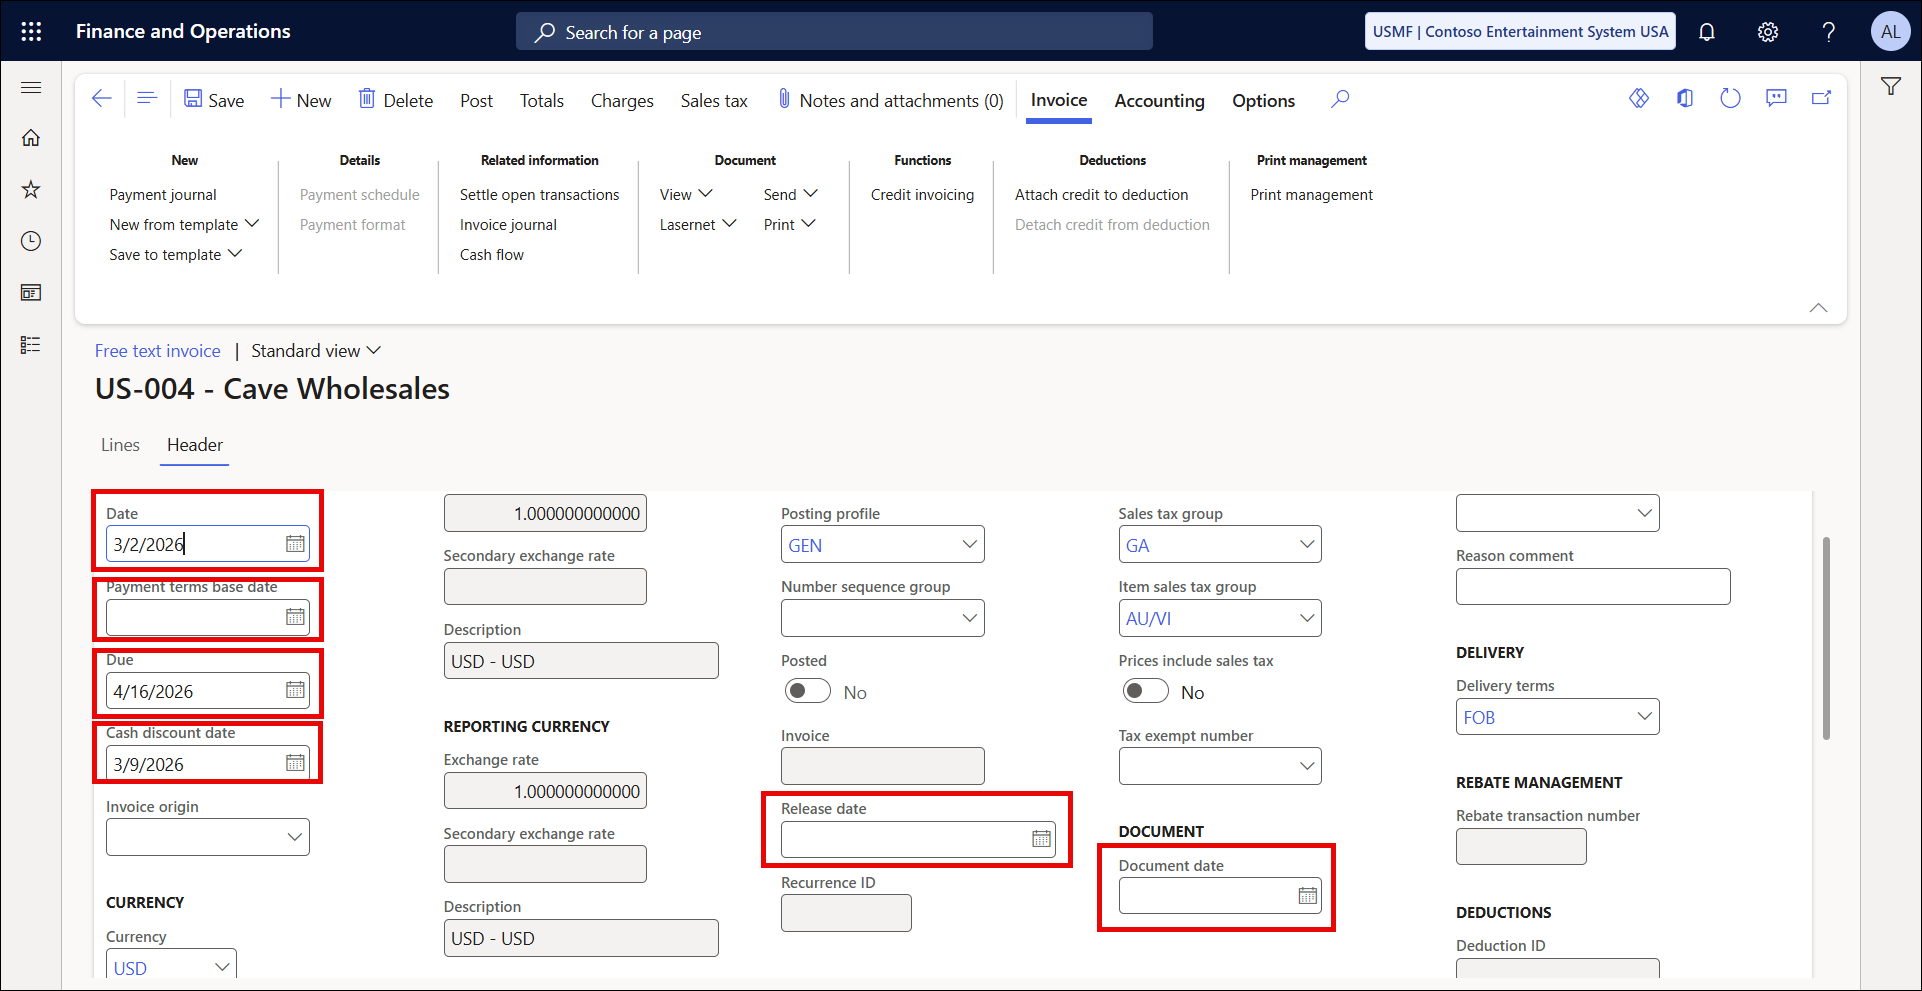
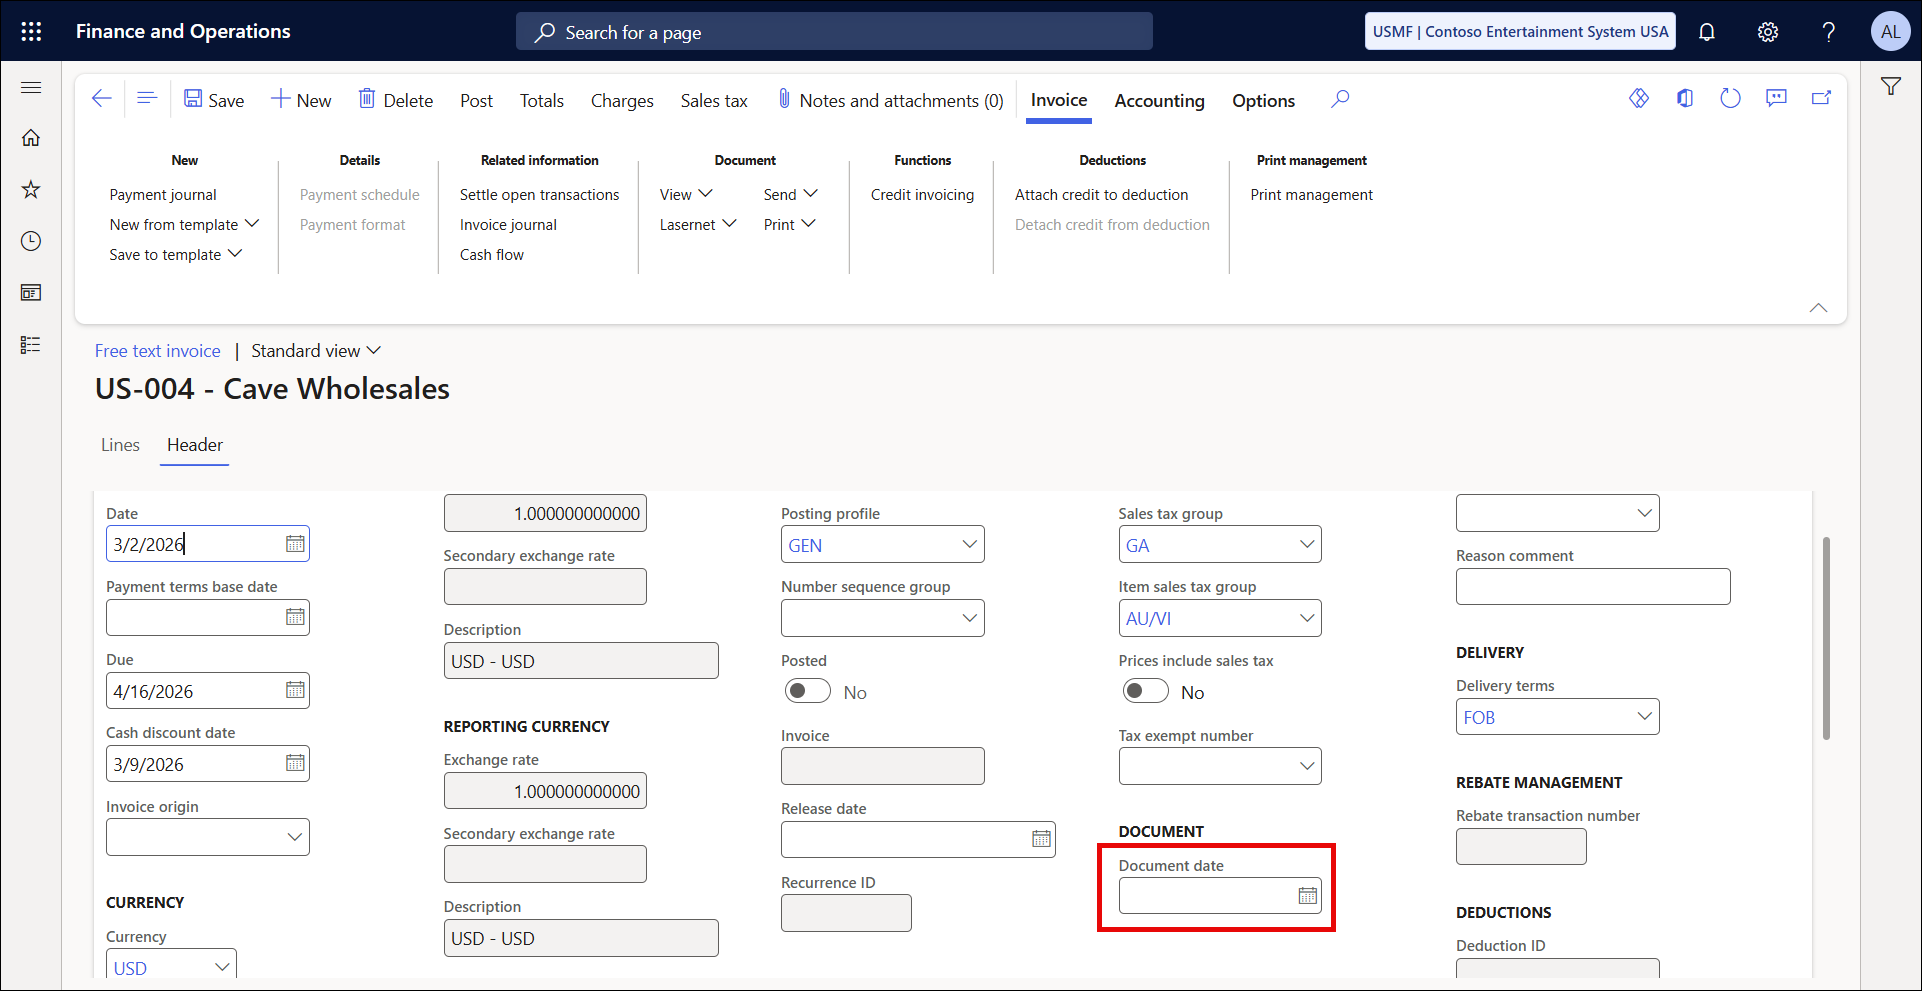
What we should be asking for, instead, is a more specific requirement. The requirement should show the table name, field name, and, where possible, a screenshot showing the location of the field in the user interface:
“Add CustInvoiceTable.DocumentDate field to the FreeTextInvoiceReplacement query.”
Having a well-defined requirement, the extra effort needed to work out field names and relations is avoided.
Right-Click the User Interface
If the customer cannot provide detailed requirements, it is possible to determine which tables and field names are needed from a screenshot the customer provides. For example, if the customer needs to add the Invoice Text to a Free Text Invoice, the customer's requirement would read:
“Add the Invoice text to the Invoice lines on the Free Text Invoice replacement report, as indicated in the screenshot.”

In this case, it is easy to get the table and field information.
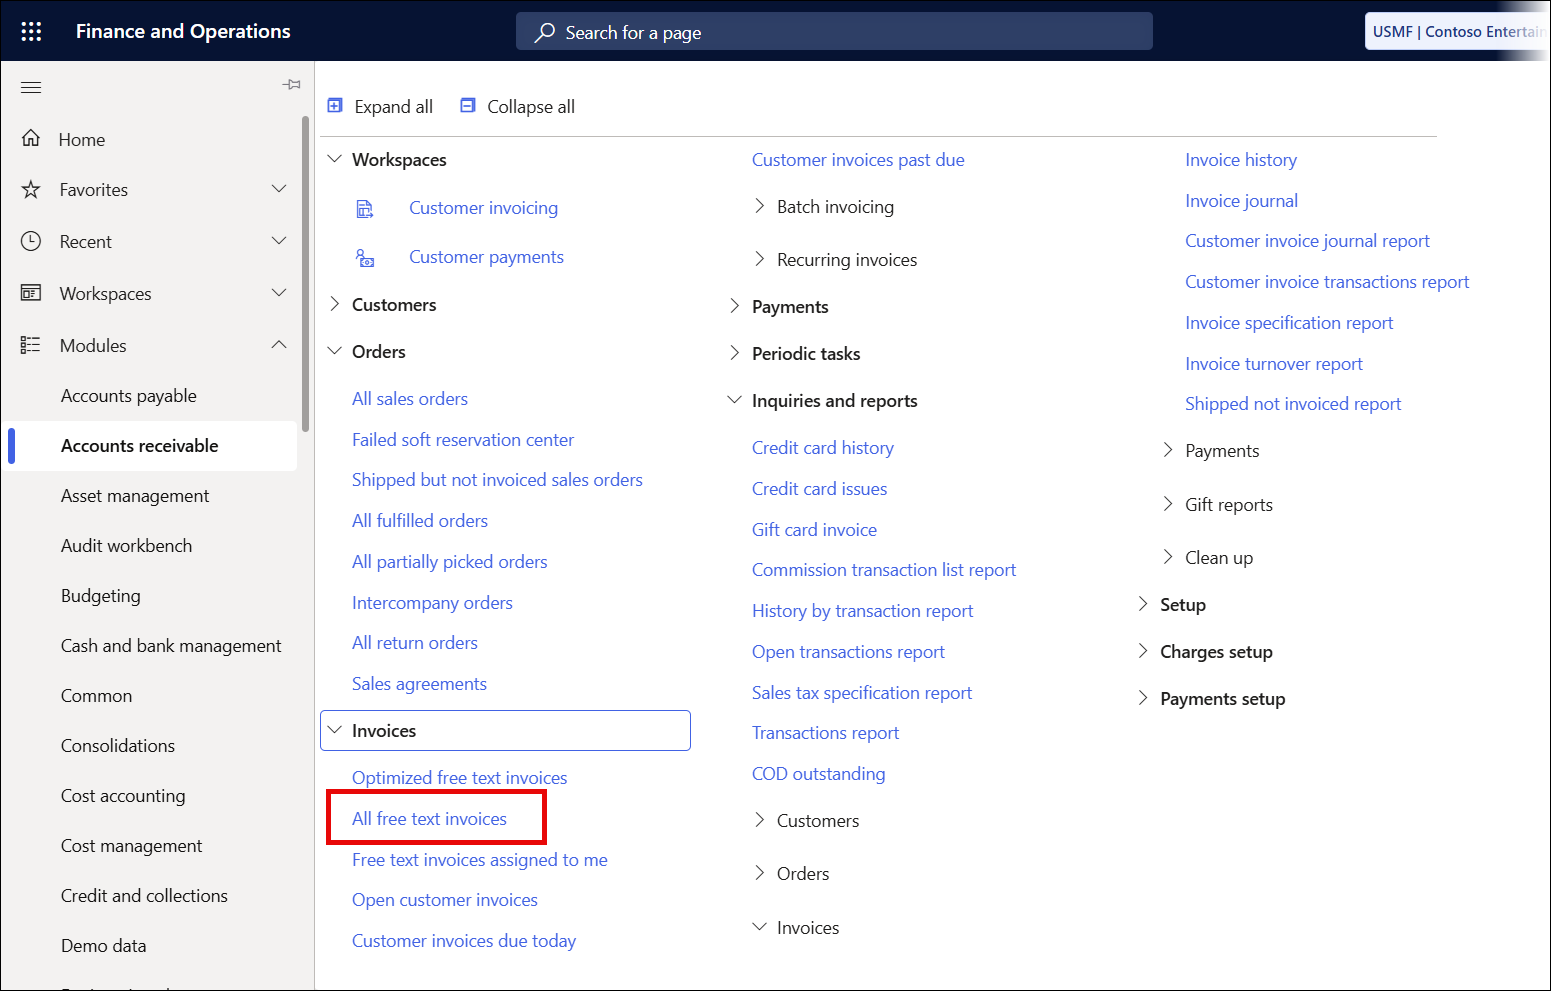
Navigate to the screen shown in the customer’s screenshot. In this case, navigate to Accounts Receivable > Invoices > All Free Text Invoices.
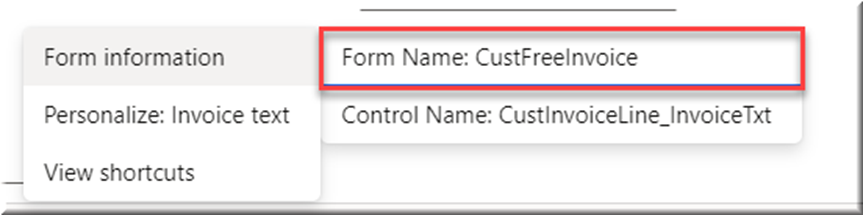
Find the field on the form, and right-click it.
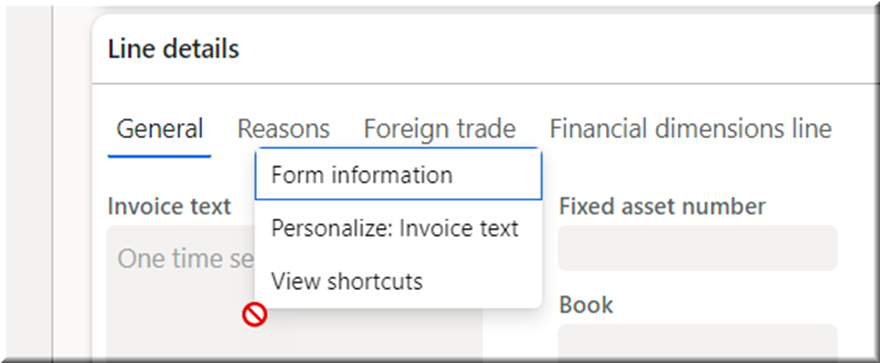
Place the cursor on Form Information and, when the flyout is shown, click Form Name:xxxx.
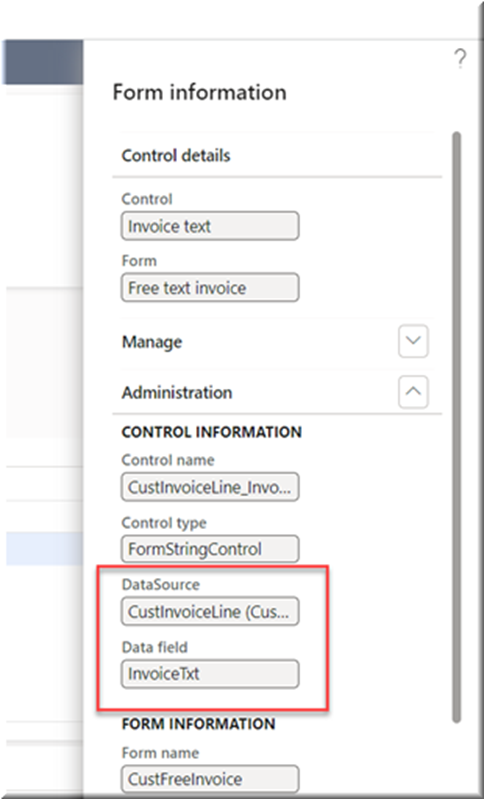
The Form Information dialog will be displayed, showing the DataSource and Data field fields.
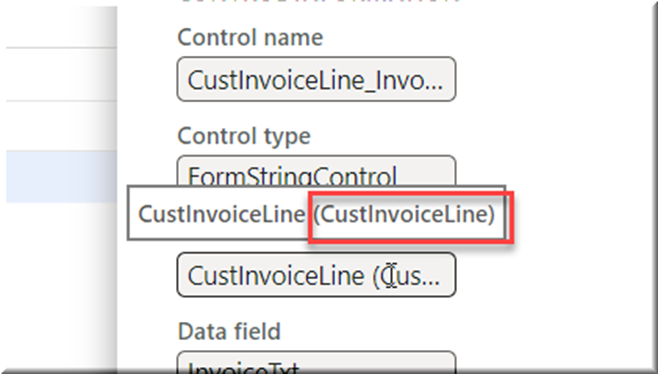
Warning
The name of the DataSource is the value between brackets. The two values are normally the same, but can sometimes vary. Therefore, ensure that you look at the value between brackets:
How to Find Table Relations
The table and field names can be found by right-clicking in the system to find the data, or by asking the customer for specific details. However, once these tables are identified, it is necessary to know how to link them in the query.
Browser Add-in Table Browser
Browser add-ins are available to access tables in the FO back end. This one, for example, works for Google Chrome:
https://chrome.google.com/webstore/detail/table-browser-caller-for/khhnlfooiiffofchhdhjopgpegcjlodk
It will enable you to provide a URL, an entity, and log in, in order to see the tables in an environment.
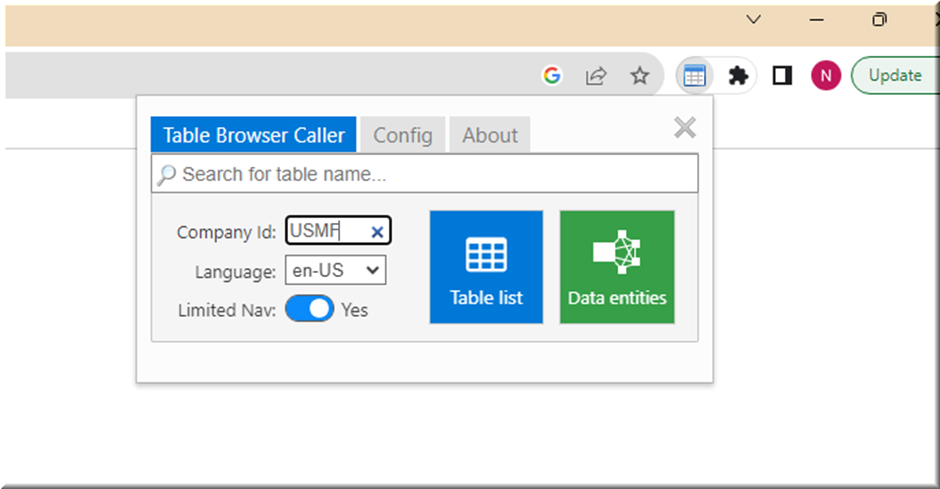
The user can then either search for a specific table or click Table List to view a list of all the different tables in the system.
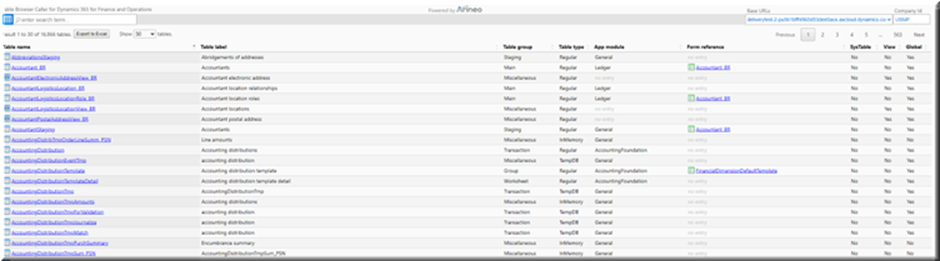
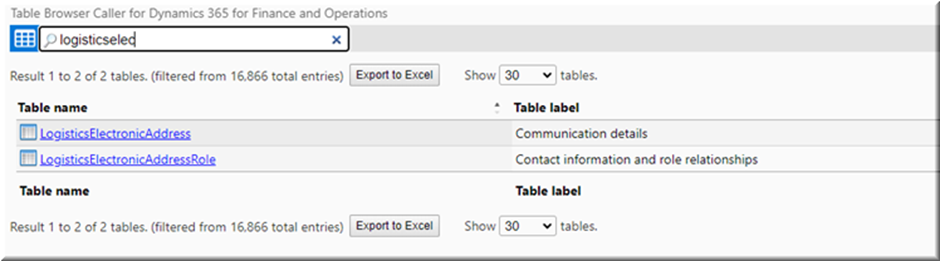
This can be useful when trying to understand and build relations, as it also includes a search function that makes the process of finding intermediate tables easier. For instance, between logistics tables: a relation may have been built to get an email address from the LogisticsElectronicAddress table, but the Role referenced in that table is just a RecID. By searching for “Logisticselec” in the table browser, we find another table specifically for this Role, from which we can get the label we need.
By opening the two tables, it is possible to cross-reference the data and identify common features to determine how the tables are linked.
Native Table Browser
While a browser add-in is useful, some people are not able to or do not wish to install one. In this case, you can use the native table browser in Finance and Operations. To do so, append the following text to the URL of your FO environment:
SysTableBrowser&tableName=<tableName>
Example
If the URL of an internal test environment were:
https://deliverytest-2-pu561bfff4965d53dee0aos.axcloud.dynamics.com/?cmp=usmf&mi=
To view the contents of the VendTable, it would be necessary to use the following URL:
Which would display the contents of the VendTable as:
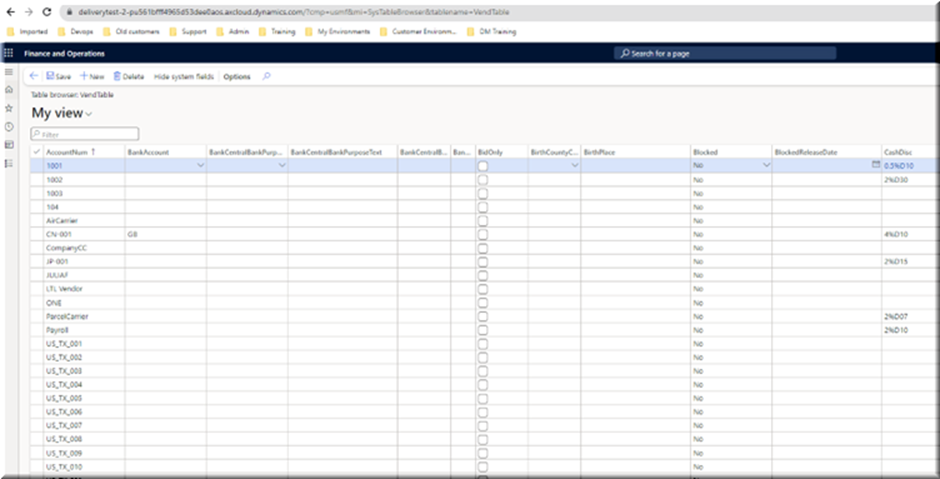
This option is useful if the table name is known. However, it is not possible to search for a table as shown for the browser add-in.
Access to Visual Studio/SQL
One easy way to find the table relations is to ask a developer or someone with access to Visual Studio or SQL. They will be able to tell you the relation between tables. This can save a lot of work if many relations must be defined, or it can be a good solution if the user already has access.
Most Used Relations
1. Customer
A. Full name
DirPartyTable.Party
Example from CustTable:
CustTable.RecId <-> DirPartyTable.RecId.
B. First name, middle name last name
DirPersonName.FirstName
DirPersonName.MiddleName
DirPersonName.LastName
From CustTable
CustTable.Party <-> DirPartyTable.RecId
DirPartyTable.RecId <->DirPerson.RecId
DirPerson.RecId <->DirPersonName.Person
C. Customer title (Mr. Mrs. Ms)
DirNameAffix.Affix
Example from CustTable
CustTable.Party <-> DirPartyTable.RecId
DirPartyTable.RecId <->DirPerson.RecId
DirPerson.PersonalTitle <-> DirNameAffix.RecId
Eksempel
Custaccount 122590
CustTable.Party=5637198169
DirPartyTable.RecId=5637198169 (It's therefore possible to jump directly from CustTable to DirPerson)
DirPerson.RecId=5637198169
DirPerson.PersonalTitle =5637146084
DirNameAffix.RecId=5637146084
CustAccount 122590 == Ms J
D. Contact information (Email, phone number)
DirPartyTable.PrimaryContactEmail
DirPartyTable.PrimaryContactPhone
(The ones with checkmark in primary)
Example from CustTable
CustTable_Party <-> DirPartyTable_RecId
DirPartyTable.PrimaryContactPhone
E. Address
LogisticsPostalAddress.Address (Address in one string)
LogisticsPostalAddress.Street
LogisticsPostalAddress.ZipCode
LogisticsPostalAddress.City
LogisticsPostalAddress.CountryRegionId
Example from CustTable
CustTable_Party <-> DirPartyTable_RecId
DirPartyTable_PrimaryAddressLocation <-> LogisticsPostalAddress.Location
Country name (Russia instead of RUS)
LogisticsAddressCountryRegionTranslation.ShortName
LogisticsPostalAddress.CountryRegionId <-> LogisticsAddressCountryRegionTranslation.CountryRegionId
F. Delivery address
DirPartyPostalAddressView.Address (Address in one string)
(PartyLocation == 5637145327 (hardcodet for type “delivery” se knytning til type længere nede)
DirPartyPostalAddressView.City
DirPartyPostalAddressView.Street
DirPartyPostalAddressView.ZipCode
Knytning fra CustTable
CustTable.Party <-> DirPartyPostalAddressView.Party
Type (Delivery, Business etc)
LogisticsLocationRole_Type
DirPartyPostalAddresView_PartyLocation <-> LogisticsLocationRole_RecId
2. Translations
LanguageTxt.Txt
Example from CashDiscCode description added to the ProjectInvoice:
ProjInvoiceJour.CashDiscCode == CashDisc.CashDiscCode
CashDisc.RecId == LanguageTxt.TxtRecId
CashDisc.TableId == LanguageTxt.TableRecId
Calculated.ReportLanguage == LanguageId
Example from DlvTerm description added on a report in report language
CustTable.DlvTerm == DlvTerm.Code
DlvTerm.RecId == LanguageTxt.TxtRecId
DlvTerm.TableId == LanguageTxt.TableRecId
Calculated.ReportLanguage == LanguageId
3. Prospects
In AX common everyone starts as prospects and thereefter promoted to either customer or vendor.
Relation from prospect to customer is therefore relevant:
SmmBusRelTable.Party == CustTable.Party
(SmmBusRelTable is table for relevant prospectfields)
Bonus information
The field ”BusRelTypeId” indicates if the prospect is still prospect or has been promoted to customer or vendor.
4. Contacts Title, Profession
ContactPerson.Title
ContactPerson .Profession
ContactPerson_Function
Example from CustTable:
CustTable.AccountNum <-> ContactPerson.CustAccount
Bonus info:
”JobTitle” is a dropdownfield and therefor better for datadiciplin, where as ”Proffesion” is a ”freetextfield”.
5. CompanyInfo Contact Information
CompanyInfo.invoiceAddress().Address
CompanyInfo.postalAddress().Address
CompanyInfo.email
Example from Ledger:
CompanyInfo.RecId == Ledger.PrimaryForLegalEntity
Example from SalesTable:
CompanyInfo.DataArea == SalesTable.dataAreaId
Example from CustTable:
CompanyInfo.DataArea == CustTable.dataAreaId
6. BankAccountTable Information
BankAccountTable.AccountNum
BankAccountTable.Name
BankAccountTable.CurrencyCode
BankAccountTable.SWIFTNo
BankAccountTable.IBAN
BankAccountTable.GiroContract
Example from CompanyInfo:
BankAccountTable.AccountId == CompanyInfo.Bank
BankAccountTable.dataAreaId == CompanyInfo.DataArea
7. Add Bomlines to Report
There can be several active BomVersions to the InvenDimId is key to getting the correct Bom.
From Quotation:
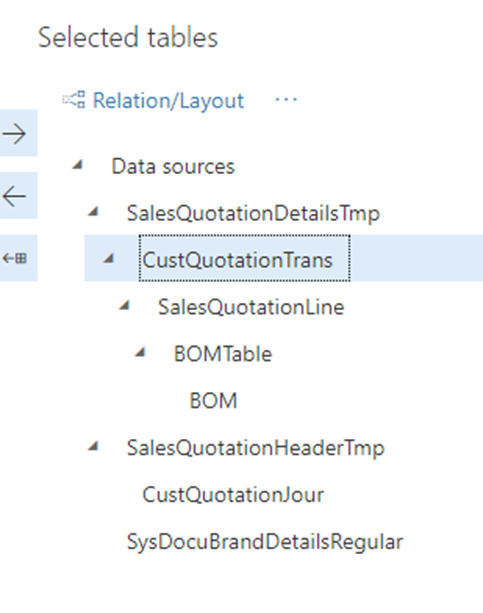
Add CustQuotationTrans
SalesQuotationDetailsTmp.LACTransRefRecId == CustQuotationTrans.RecId (OuterJoin 1:n)
CustQuotationTrans.InventDim == SalesQuotationLine.InventDim (OuterJoin 1:n)
CustQuotationTrans.InventTransId == SalesQuotationLine.InventTransId (OuterJoin 1:n)
(Cause BOMId is on that table)
SalesQuotationLine.ItemBOMId == BOMTable.BOMId (OuterJoin 1:n)
BOMTable.BOMId == BOM.BOMId (OuterJoin 1:n)
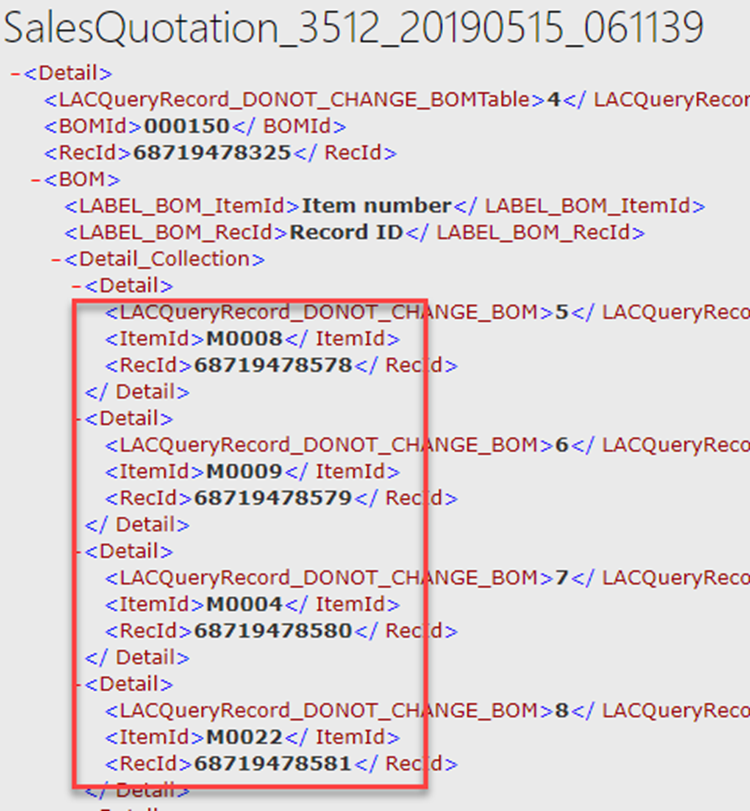
The BOM item number is called BOMTable.BOMId
The BOM lines Item number is called BOM.ItemId
Add the name to the bom:
BOM.ItemId == InventTable.ItemId
InventTable.Product == EcoResProductTranslation.Product
SalesQuotationTable.LanguageId == EcoResProductTranslation.languageId (SalesQuotationTable is added to SalesQuotationLine)
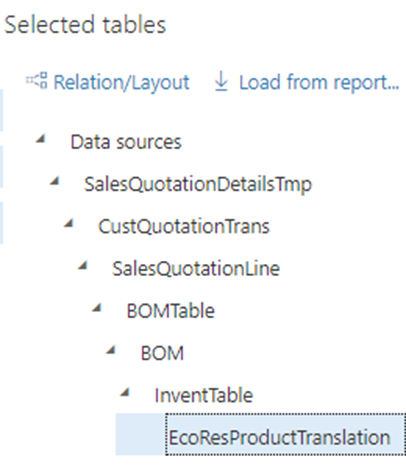
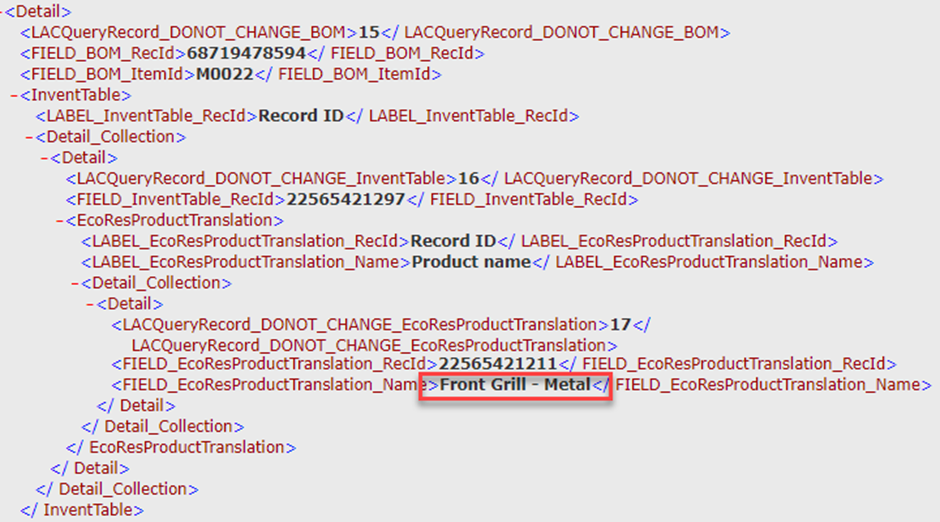
The name is EcoResProductTranslation.Name
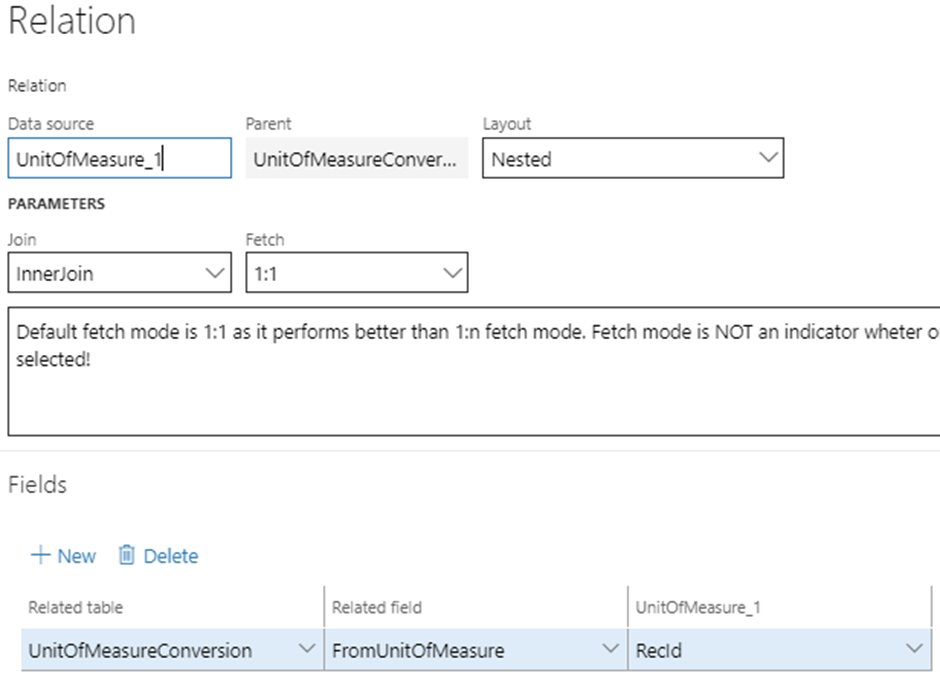
8. Add UnitOfmeasureConversion
Say you want to display the product from the unit and factor on a report:
(from unit) 1 box = 4 ea (to unit)
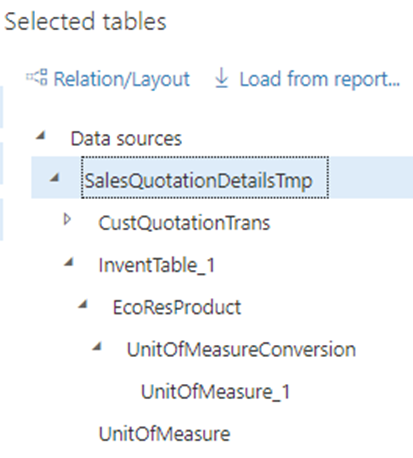
Add UnitOfMeasure
SalesQuotationDetailsTmp.SalesUnitTxt == UnitOfMeasure.Symbol(InnerJoin 1:1)
Add InventTable
SalesQuotationDetailsTmp.ItemId == InventTable.ItemId(InnerJoin 1:n)
EcoResProduct.RecId == InventTable.Product (InnerJoin 1:1)
UnitOfMeasureConversion.Product == EcoResProduct.RecId (InnerJoin 1:1)
UnitOfMeasure.RecId == UnitOfMeasureConversion.ToUnitOfMeasure (-||-)
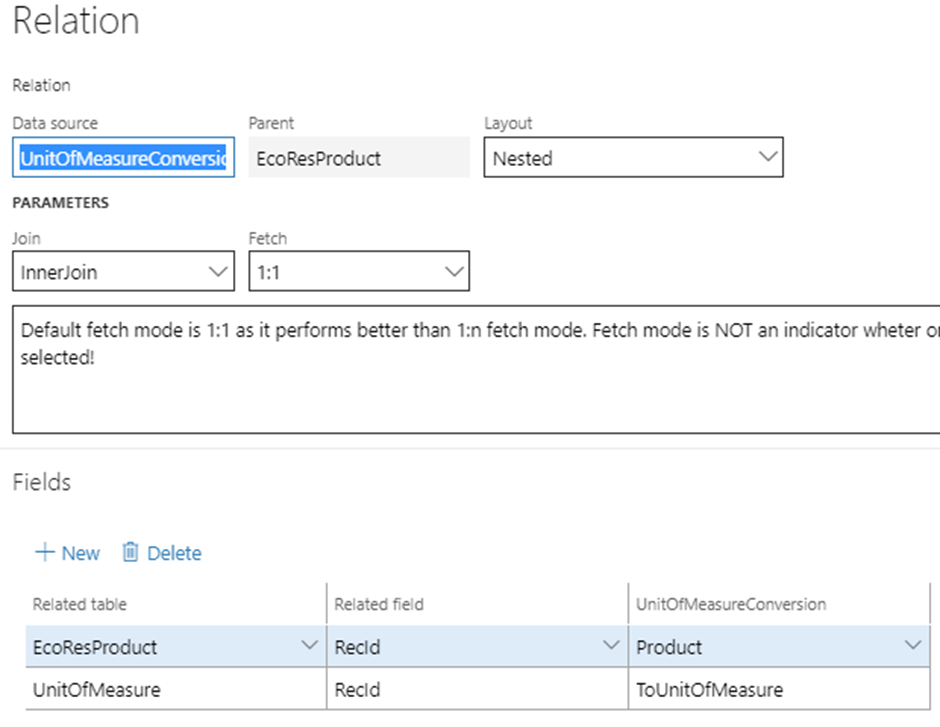
UnitOfMeasure_1.RecId == UnitOfMeasureConversion.FromUnitOfMeasure
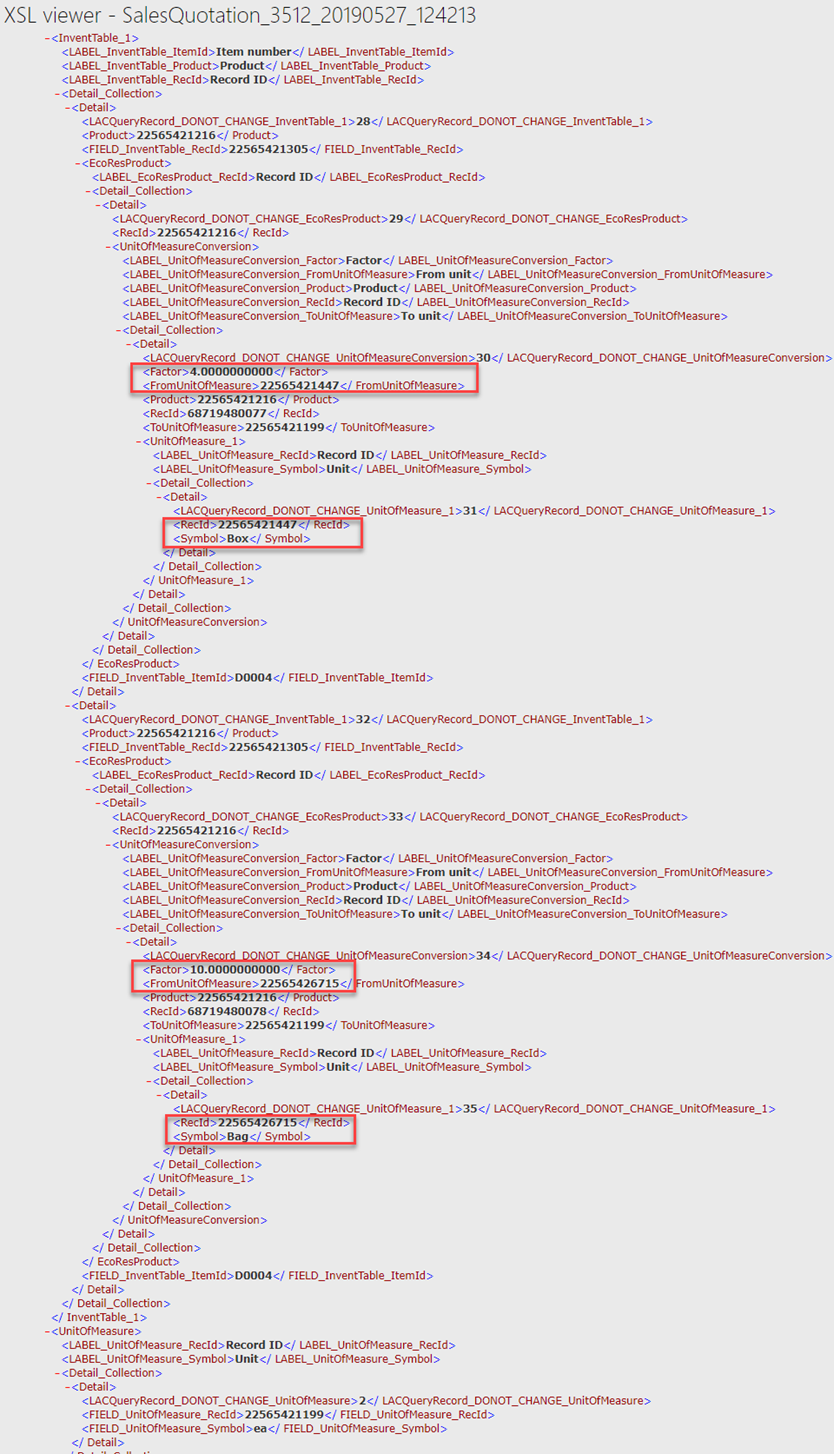
Result:
9. Add Reservation Status to Your SalesLine
Add SalesLine
Add InventTransOrigin
SalesLine.InvenTransId == InventTransOrigin.InventTransId
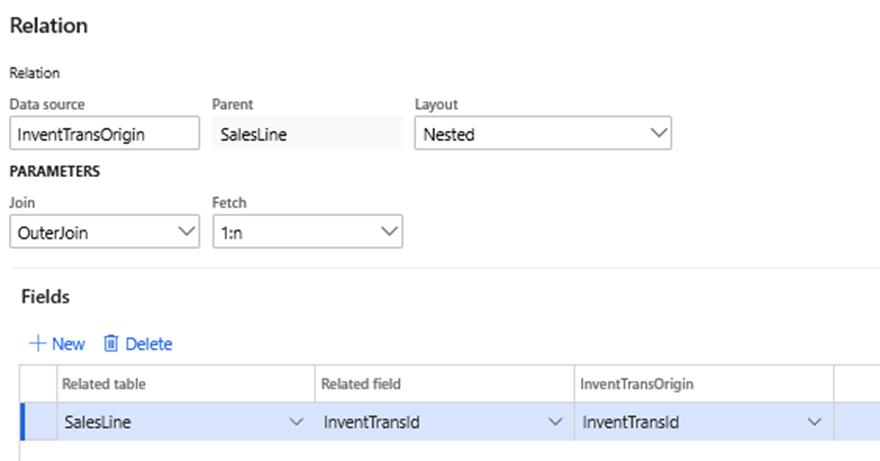
Add InventTrans
InventTransOrigin.RecId == InventTrans.InventTransOrigin
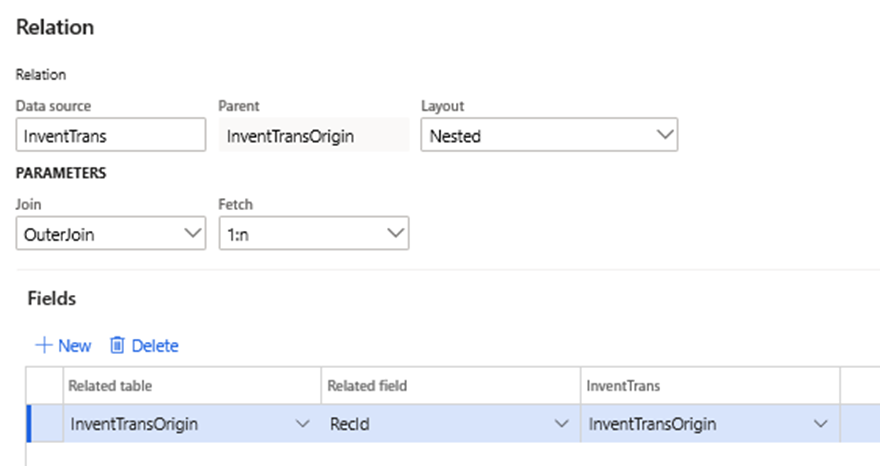
Add fields InventTrans.StatusIssue and InventTrans.StatusReceipt for reservation status.
Result:

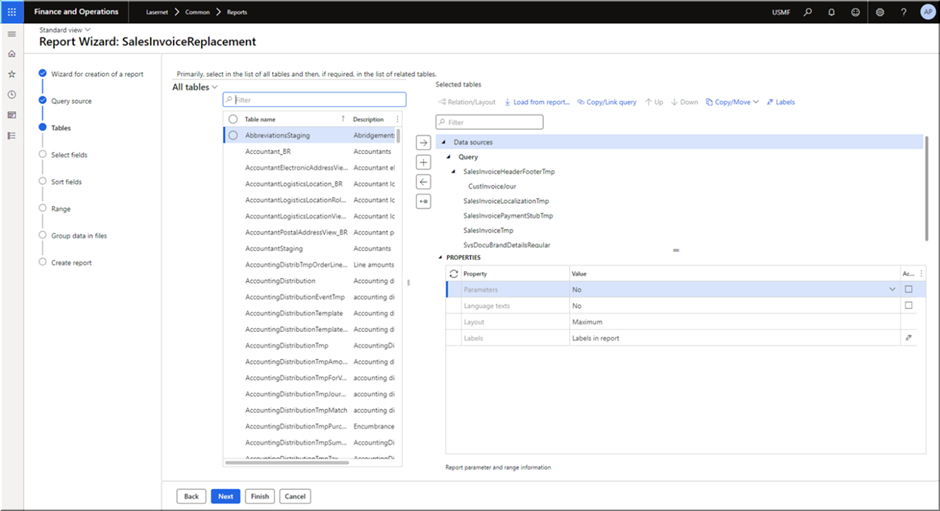
Example - How Do I Add Shipment Header to SalesInvoiceReplacement Report?
The SalesInvoiceReplacement report does not come with shipment data. To add it, we need to first add the following table to its data sources through the Query Wizard:
WHSShipmentTable
To do so, follow these steps:
Navigate to Lasernet > Common > Reports.
In the list, find SalesInvoiceReplacement and select the desired record.
Open the Query wizard.
Click Next until you get to Tables.
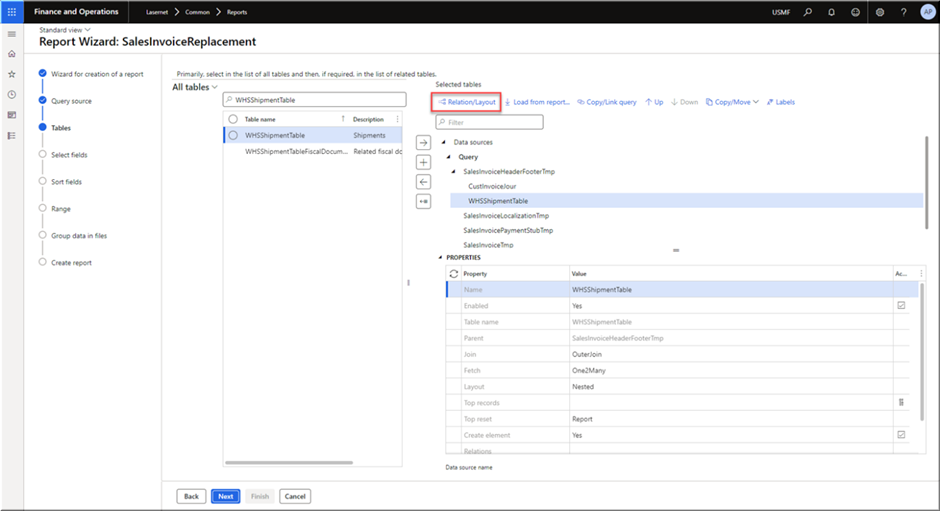
Use the quick filter to find records. In this case, search for “WHSShipmentTable”.
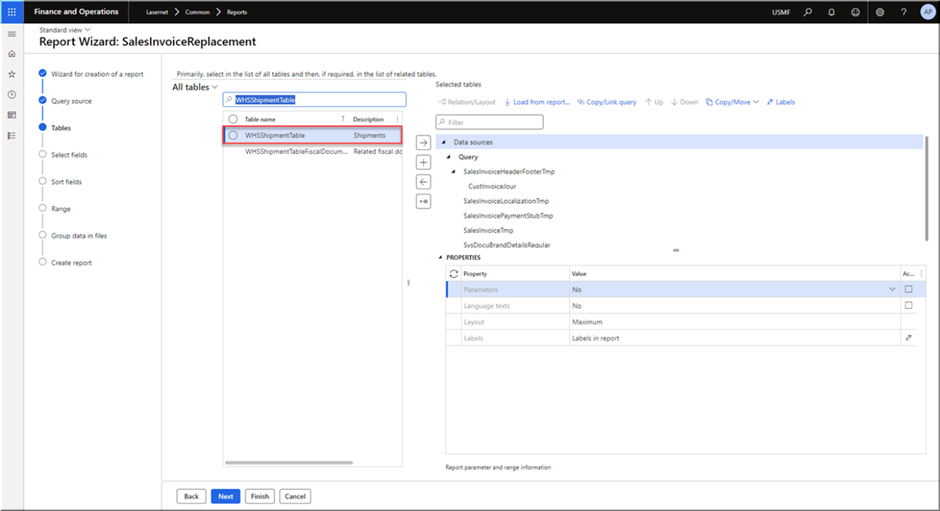
On the right-hand side pane, under Data sources > Query, select SalesInvoiceHeaderFooterTmp.
Click the right arrow button.
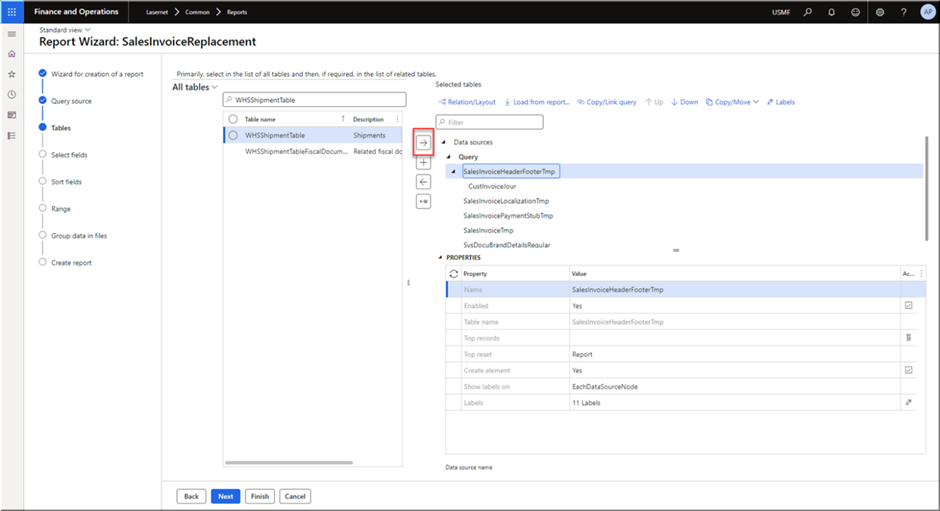
The WHSShipmentTable is added under the SalesInvoiceHeaderFooterTmp table.
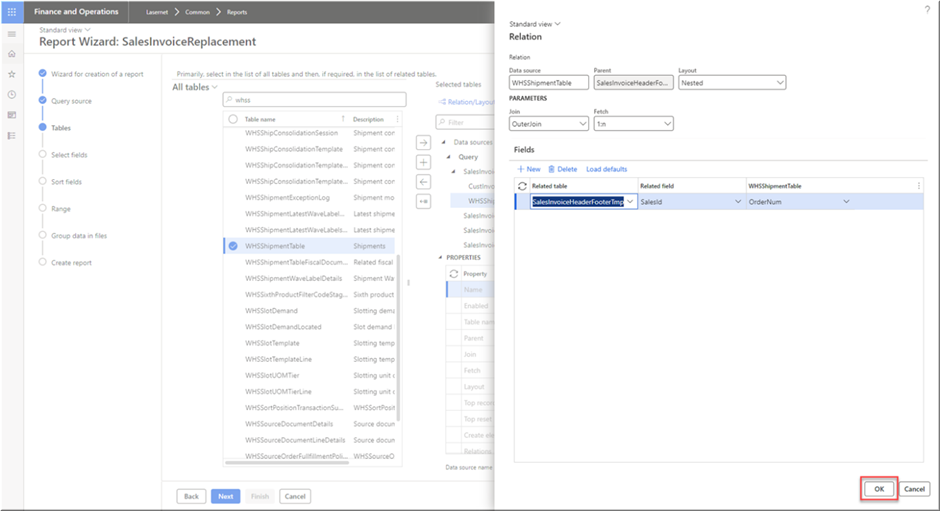
To set the relation between these two tables, click the Relation/Layout button in the top of the right pane.
On the Relation dialog, click New.
Set the following fields:
Related table: SalesInvoiceHeaderFooterTmp
Related field: SalesId
WHSShipmentTable: OrderNum
Click OK.
Click Next.
In the Available fields section, under the WHSShipmentTable table, select the desired fields, for example, ShipmentID, LoadID, OrderNum, ProNum, shipmentManifestTrackingNumber etc. Click the right arrow to move them to the Selected fields section.
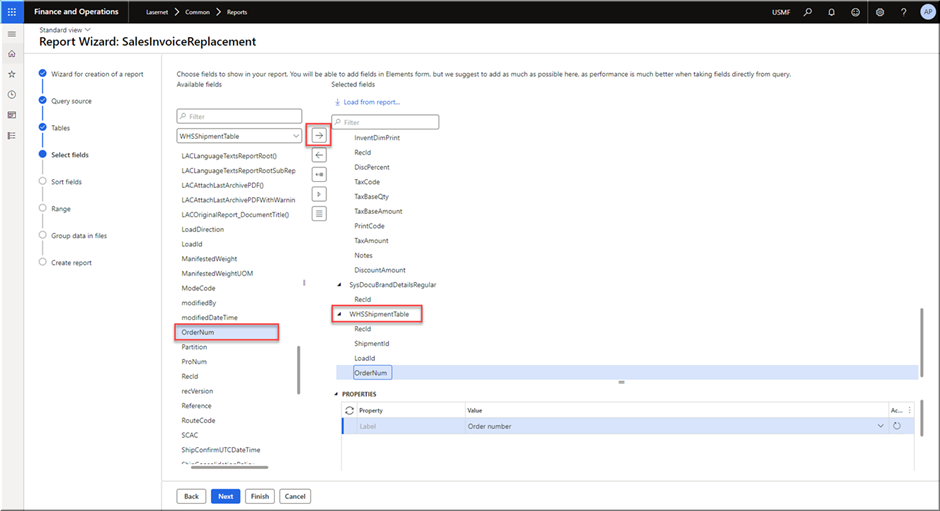
Click Finish and exit the Query Wizard.
Generate a Sales Invoice with shipment information.
In Lasernet Developer, for the SalesInvoiceReplacement form, grab the XML generated from the step above and update the form design to include the newly added fields.
Commit and deploy your changes.
In Dynamics 365 Finance and Operations, regenerate the Sales Invoice report.
You should be able to see the newly added fields on the report.