

In this walkthrough, you will learn how to handle letters that do not fit within the rearrange box horizontally when a word is too long.
Note
Use the Auto Y or Manual options in the Size type setting to handle horizontal overflow. Use Auto XY or Auto Y (to allow for any height) or Auto X or Manual (to restrict the height) options to handle vertical overflow.
Walkthrough
Before you start, download and import the attached 04.Rearrange Properties (Overflow) configuration in Lasernet Developer. Then, navigate to the Forms section and open the Sample form.
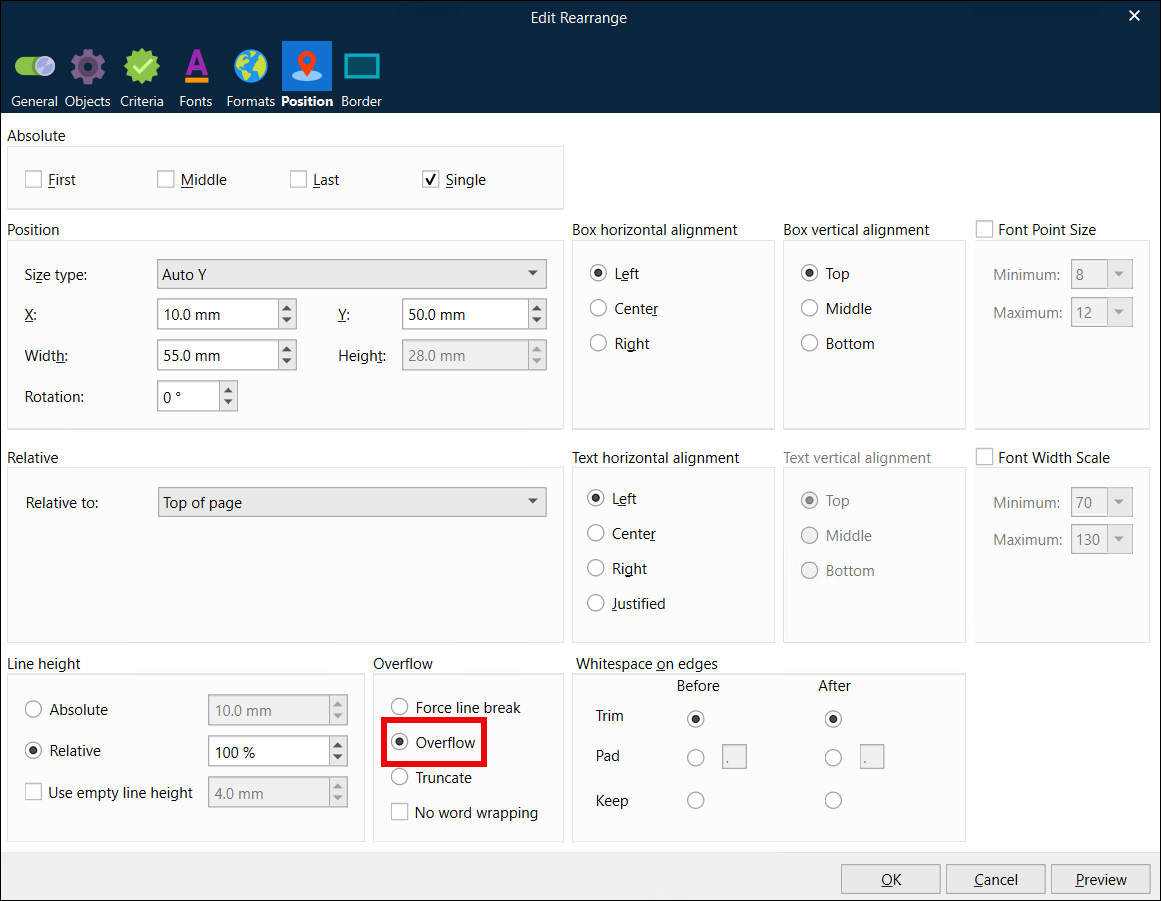
Open the Position tab of the Edit Rearrange dialog. By default, the Overflow property is set to Overflow, allowing a word to overflow the content box.
Exit the dialog and right-click the rearrange, then select Copy from the context menu.
Right-click anywhere in the output view, and then select Paste from the context menu. The rearrange is inserted in the selected spot.
Set the position of the new rearrange on the Property bar: X to 80.0 mm and Y to 50.0 mm.
Open the Position tab of the Edit Rearrange dialog. Select the No word wrapping checkbox of the Overflow section, then click OK.
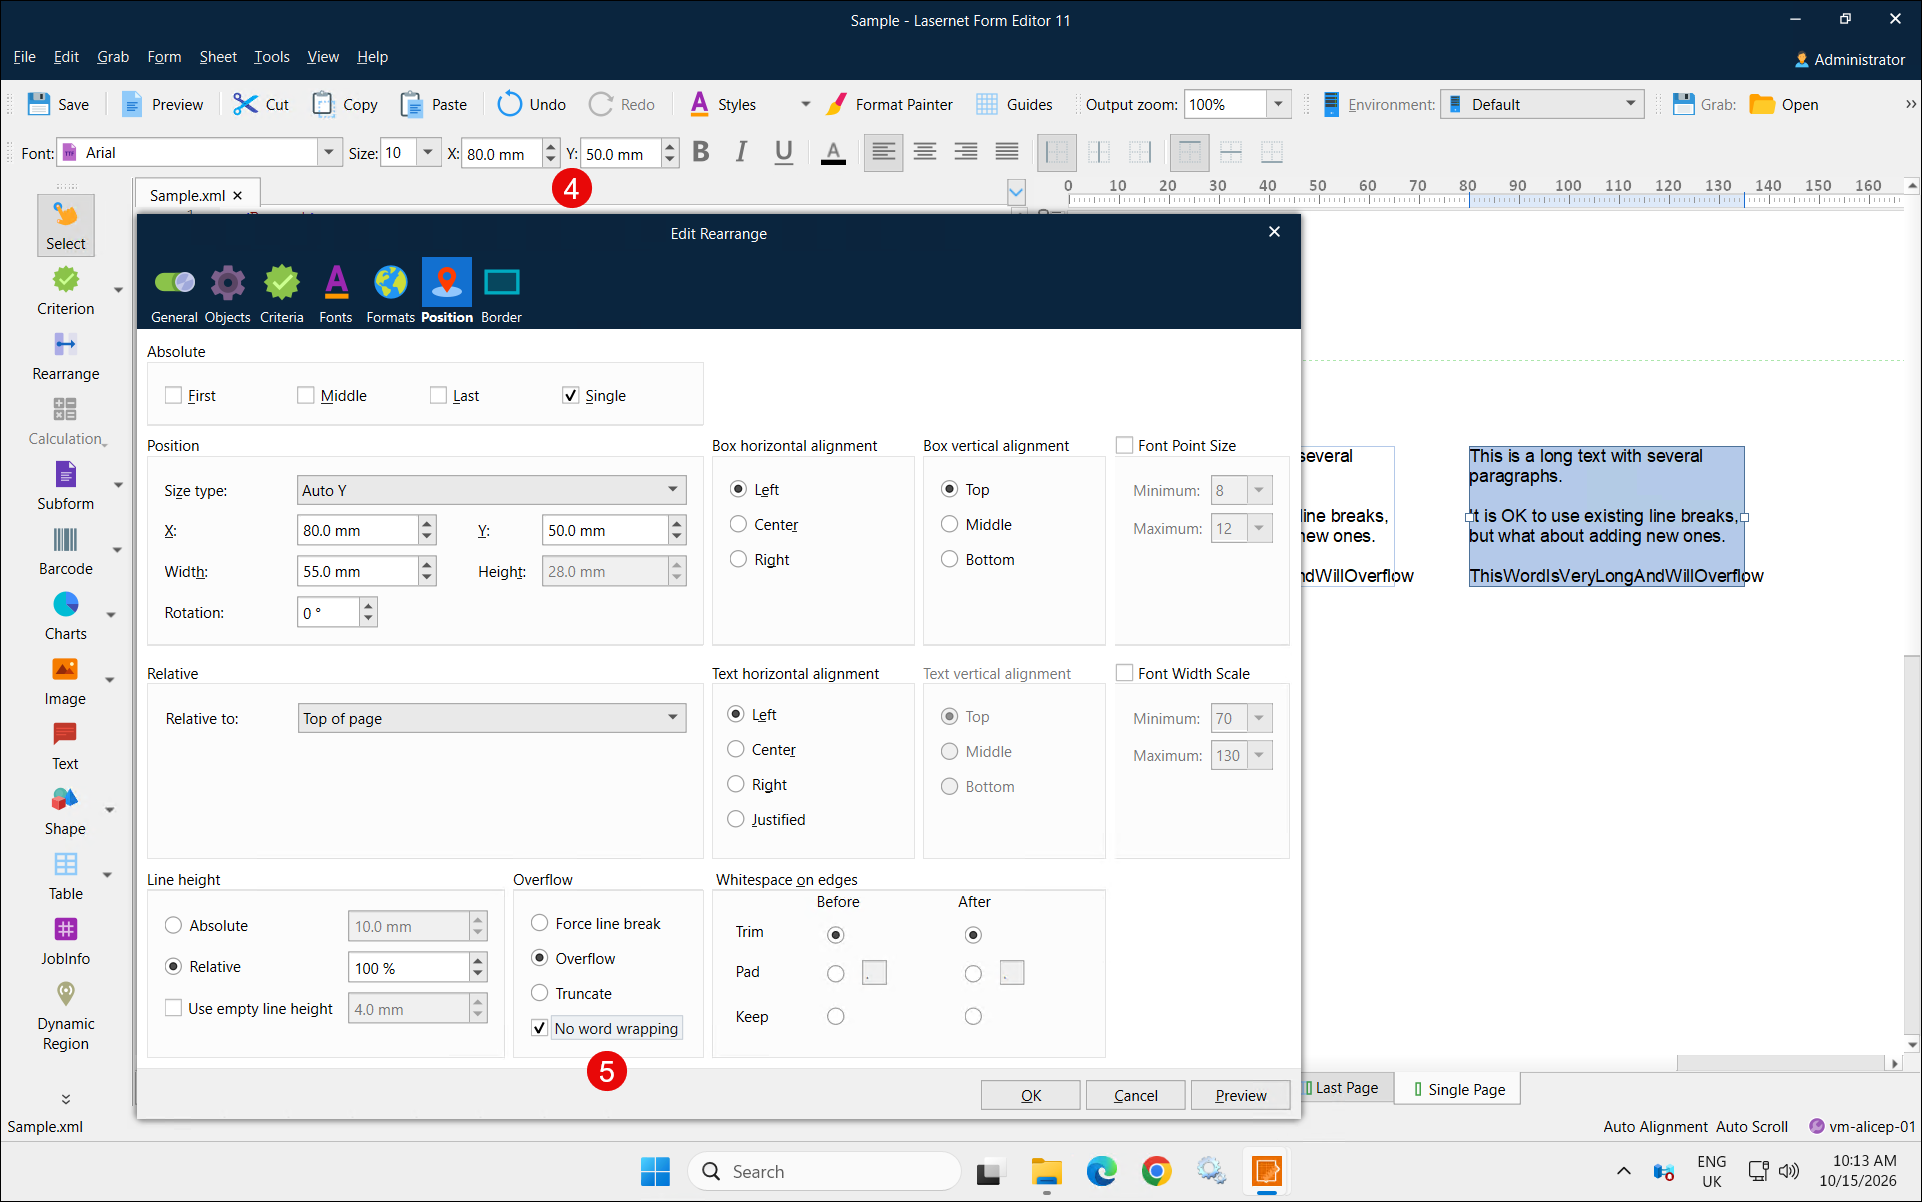
When the No word wrapping checkbox is selected, a word at the end of any line is allowed to overflow the content box.
Create four additional copies of the new rearrange by using Copy and Paste.
Set new values for the X and Y positions for the third rearrange: X to 10.0 mm and Y to 85.0 mm. Click the Force line break radio button and clear the No word wrapping checkbox in the Overflow section.

The Force line break setting cuts a word as close to the margin of the text box as possible and then inserts a new line for the rest of the word.
Set new values for the X and Y positions for the fourth rearrange: X to 80.0 mm and Y to 85.0 mm. Click the Force line break radio button and select the No word wrapping checkbox in the Overflow section.

When the No word wrapping checkbox is selected, the Force line break setting cuts the input line at the end of the rearrange, inserting as many new lines as needed to fit the remaining input line within the box.
Set new values for the X and Y positions for the fifth rearrange: X to 10.0 mm and Y to 125.0 mm. Click the Truncate radio button and clear the No word wrapping checkbox in the Overflow section.

Truncate cuts the word as close to the margin of the text box as possible and hides the last part.
Set new values for the X and Y positions for the sixth rearrange: X to 80.0 mm and Y to 125.0 mm. Click the Truncate radio button and select the No word wrapping checkbox in the Overflow section.

When the No word wrapping checkbox is selected, the Truncate setting cuts the input line at the edge of the rearrange box, hiding the rest of the line.