This short guide describes how to set up the integration between Lasernet FO Connector and Lasernet Keep, which is the new and improved version of Autoform DM.
For ease of use, this article is divided into three sections, each corresponding to a main step in the configuration:
For more information, consult the Lasernet Keep Integration for Dynamics 365 Finance and Operations guide.
1. Finance and Operations Setup
Connections
The first step to setting up the integration between Finance and Operations and Keep is to set up a connection and use Keep as storage.
Support for the Lasernet Keep 11 API has been implemented in Lasernet FO Connector 7.3. When creating a new connection and storage, the system checks whether Autoform DM or Lasernet Keep is being used and makes API calls accordingly. This enables it to support both versions of the software.
To create a new connection and Keep storage, follow these steps:
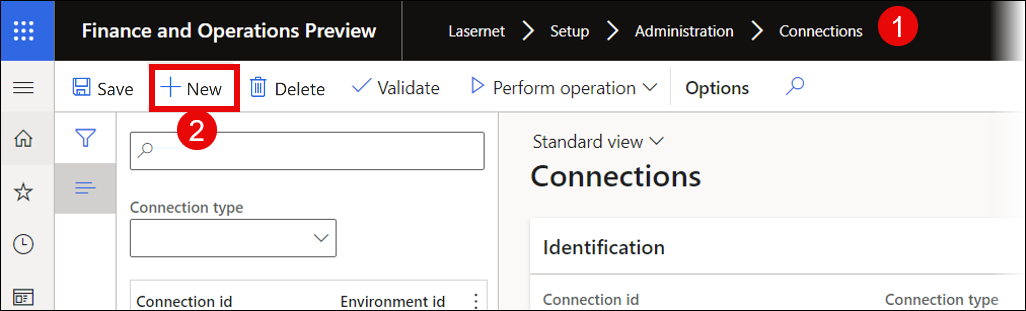
Navigate to Lasernet > Setup > Administration > Connections.
Click New.
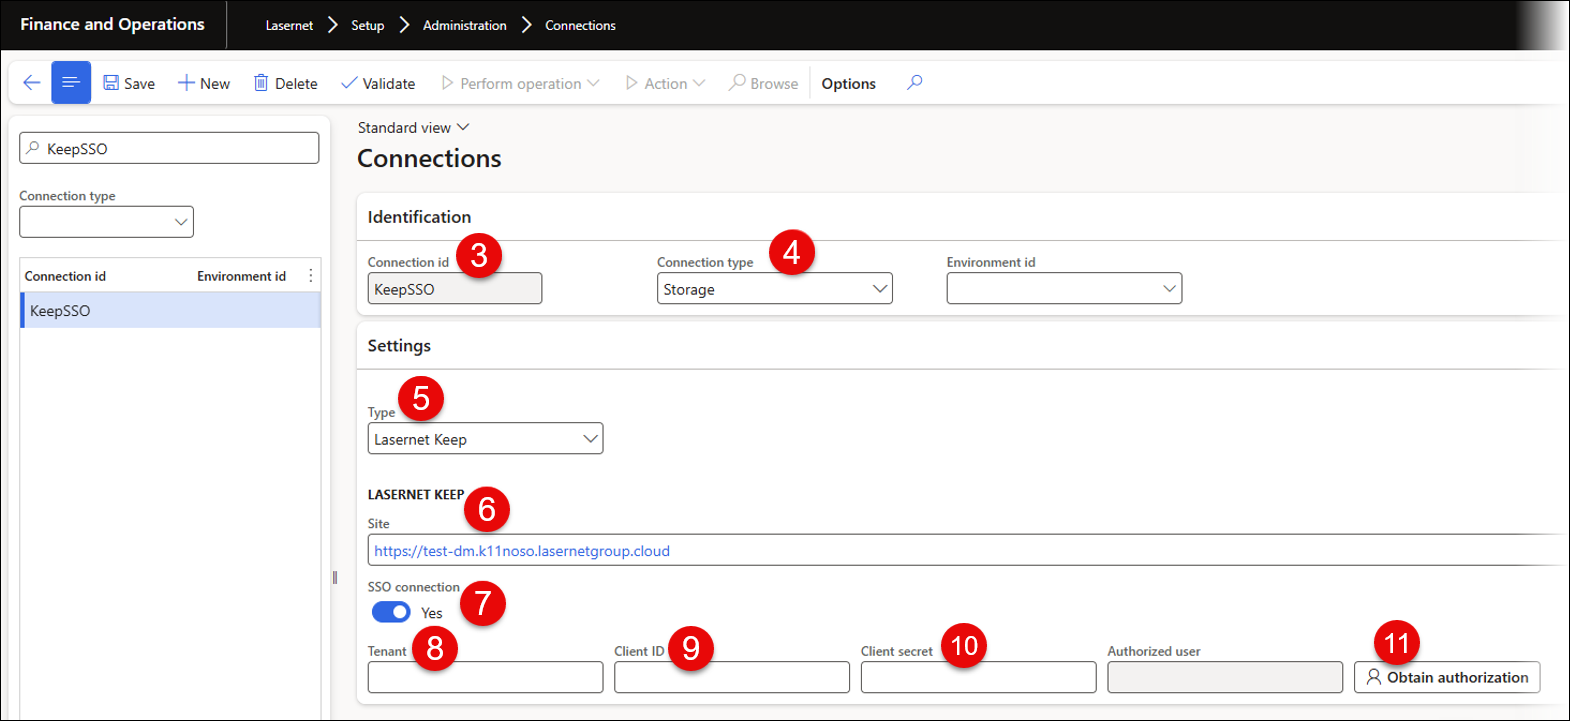
Use Connection id to give the connection a unique name.
Select Storage from the Connection type dropdown menu.
Select Lasernet Keep from the Type dropdown menu.
Add the Site corresponding to the URL where your Keep instance is installed. For example, https://test-dm.k11noso.lasernetgroup.cloud/.
Toggle the SSO connection button to Yes.
After enabling SSO, more fields will become available:
Add the Tenant name.
Add the Client ID from the SSO.
Add the Client secret from the SSO.
Click Obtain authentication to authenticate the connection.
Once you are done, create an Azure Service Bus instance that will serve as the outgoing connection for Lasernet.
Lasernet Servers
After creating a new Keep storage, you need to create the connection from Finance and Operations to your Lasernet Server to the Keep archive. The following image provides an example:
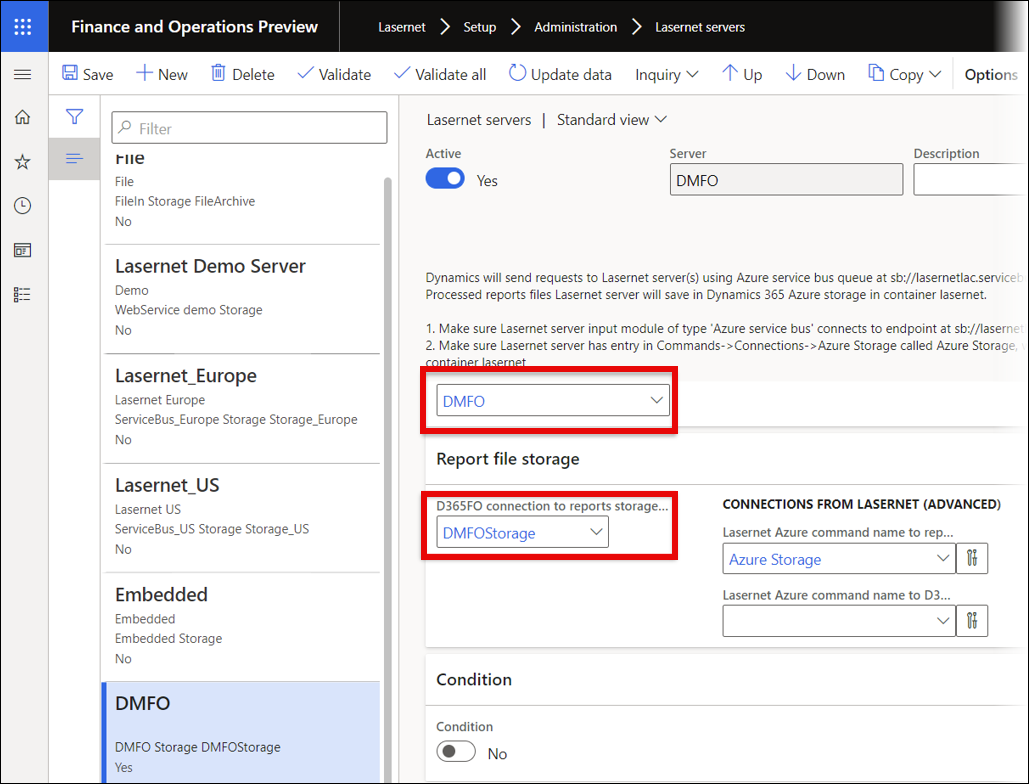
For a step-by-step explanation on how to add a new server, follow this guide.
2. Lasernet Developer Setup
Warning
The Lasernet Connectors for Microsoft Dynamics 365 are currently not compatible with Lasernet Core 11. We are working towards launching these two products together, but until then, current customers and partners with the Dynamics 365 connectors should continue to use Lasernet Core 10.
Note
The output module used in this section is called DM Upload because the software version used is Lasernet 10. Lasernet 10 is compatible with Lasernet Keep 11.
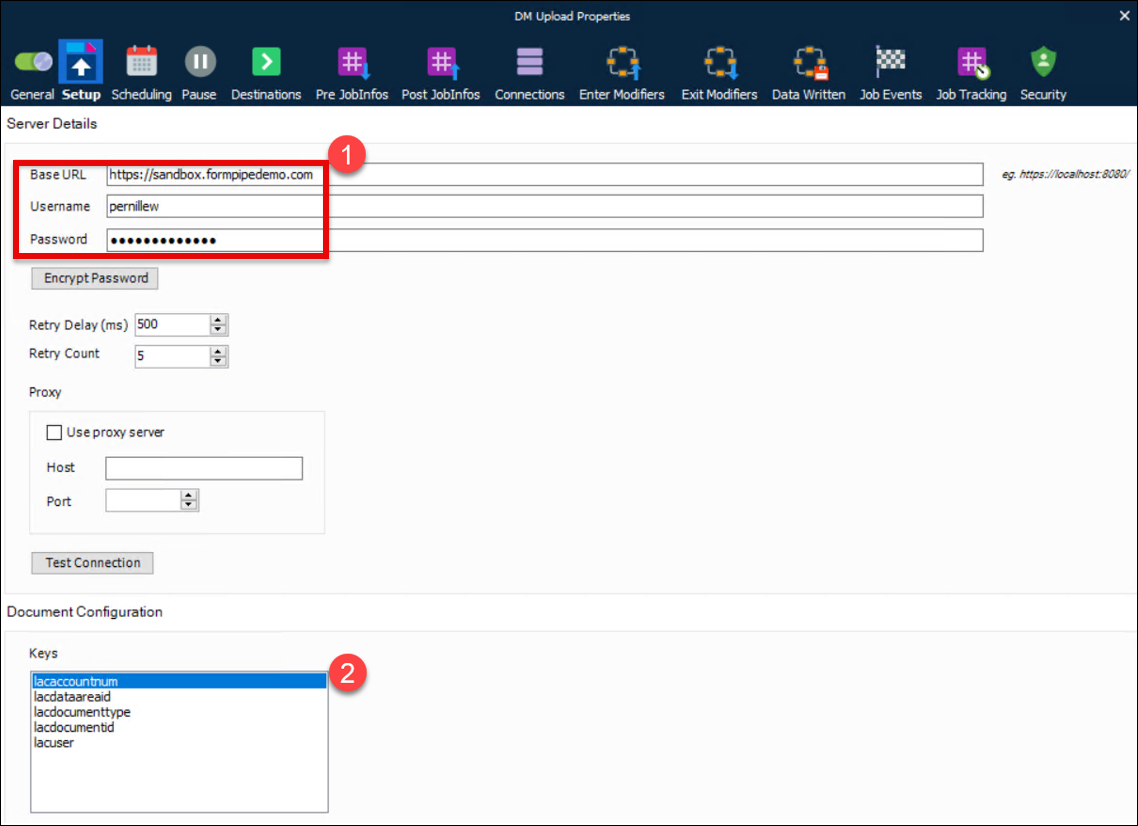
To complete your setup in Lasernet Developer, add the DM Upload output module to your configuration and follow these steps:
Open the DM Upload Properties window and set up your connection to Lasernet Keep as explained in this guide.
Add the metadata keys needed for your document definitions.
3. Lasernet Keep Setup
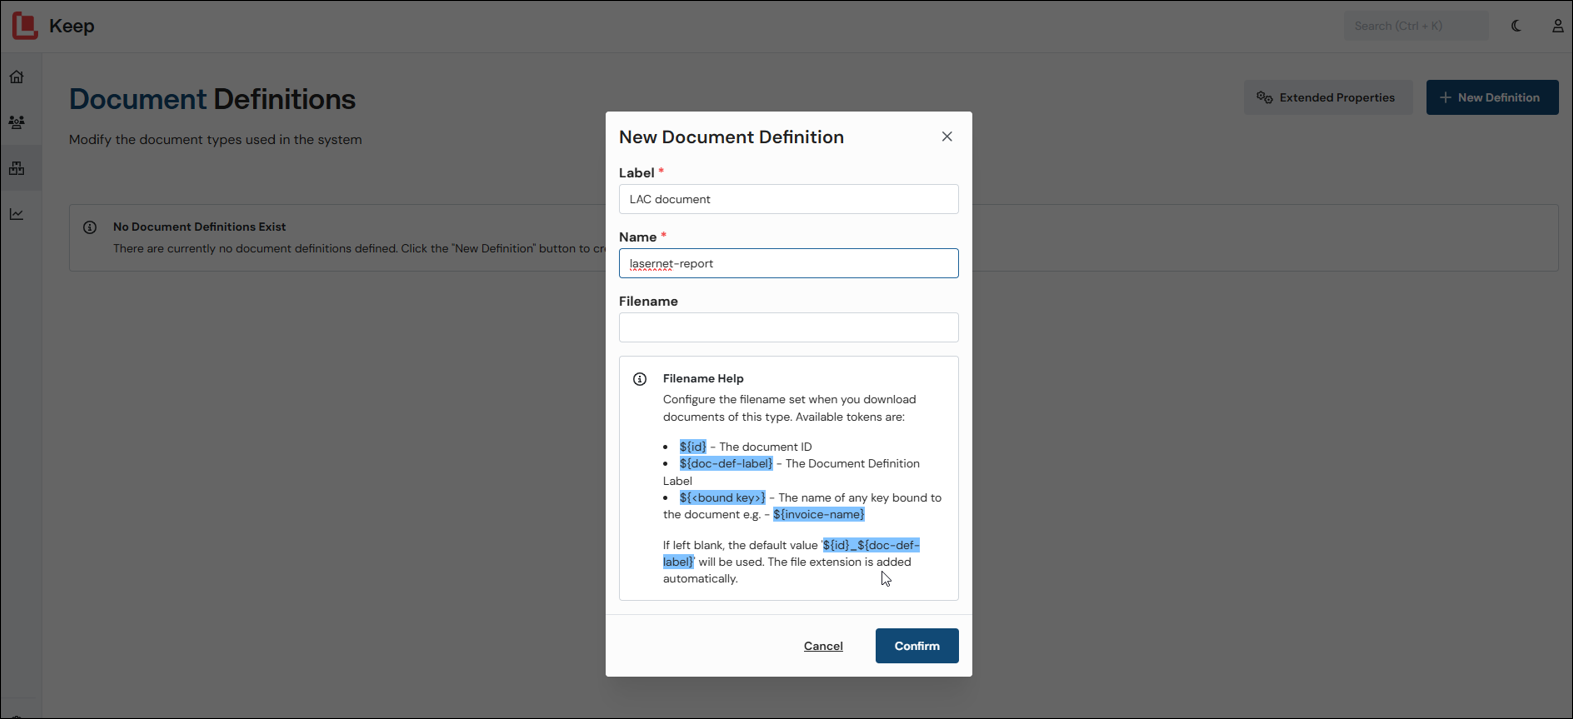
Document Definitions
For a document created in Finance and Operations to be stored in Lasernet Keep, a Lasernet JobInfo must reference the document definition. For a detailed explanation on how to manage document definitions, refer to this guide.
When using Lasernet Keep’s integration with Dynamics 365 Finance and Operations, we recommend creating one document definition for the customer and another for the vendor, to differentiate between sales and purchase documents from Dynamics that pass through Lasernet Developer before being archived in Lasernet Keep.
The two document definitions correspond to different account numbers in Dynamics, one for the customer and one for the vendor. In Lasernet Keep, this difference is also reflected in the Search feature, which works through document definitions.
There is a limit on the number of keys that can be displayed in the document viewer:
Maximum two Date type keys.
Maximum two Number type keys.
Maximum nine String type keys.
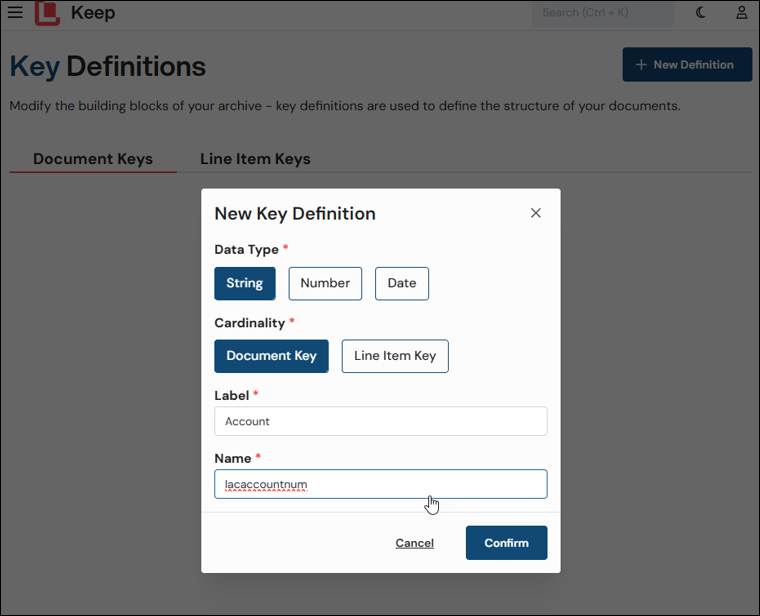
Key Definitions
For a detailed explanation on how to manage key definitions, refer to this guide.
The following is an example of a set of document keys used for the integration with Lasernet FO Connector:
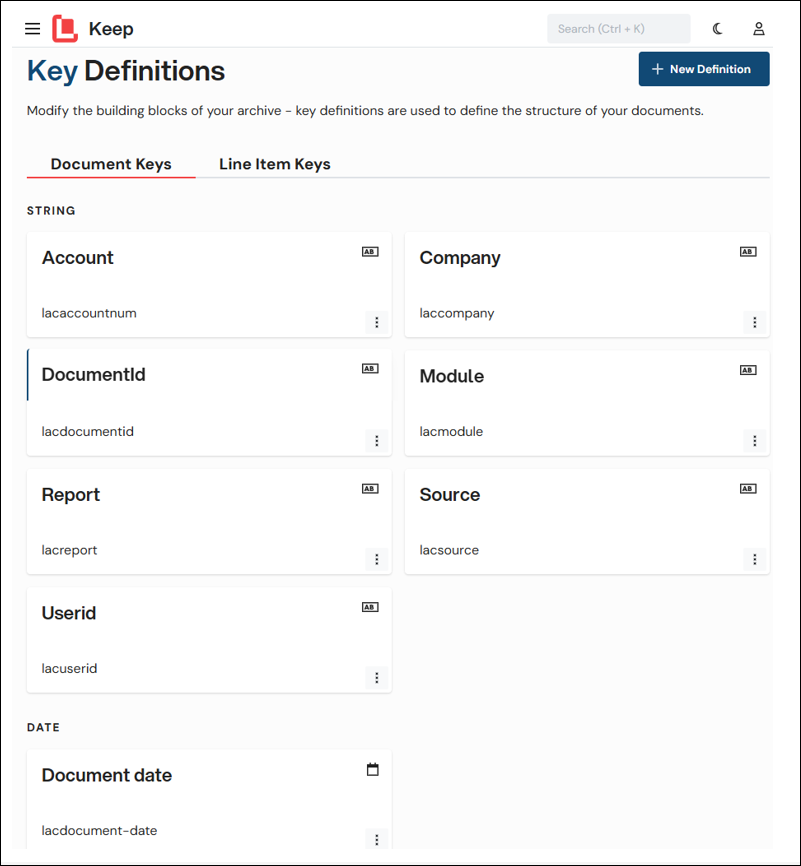
The document key name used in the DM Upload module, and that you have to set JobInfos for, is highlighted in red:
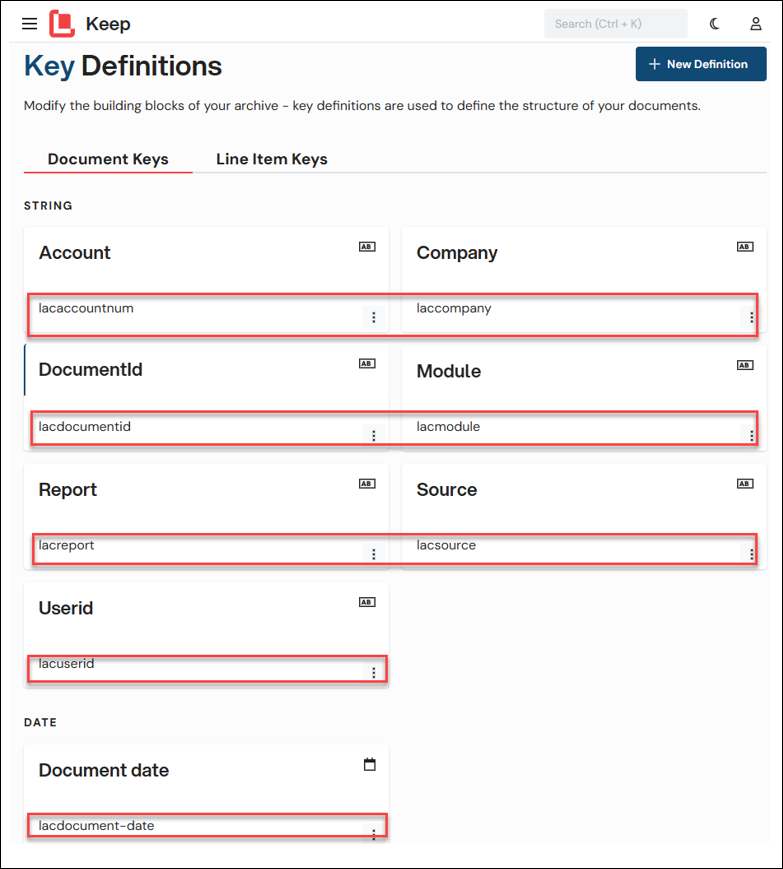
It is recommended to set the following document keys in Lasernet Keep, as they correspond to the existing JobInfos from the Dynamics configuration:
Label | Key name | JobInfo name | Example |
|---|---|---|---|
Company | laccompany | CompanyId | USMF |
Report | lacreport | Report | PurchPurchaseReplacement |
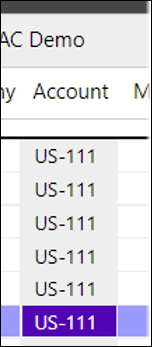
Account | lacaccountnum | Account | US-111 |
DocumentId | lacdocumentid | DocumentId | INV-123456 |
UserId | lacuserid | UserId | James.smith |
Source | lacsource | Lacsource | From Lasernet |
When creating more keys, a corresponding JobInfo must be created and added to the XPath in the Lasernet Developer form.
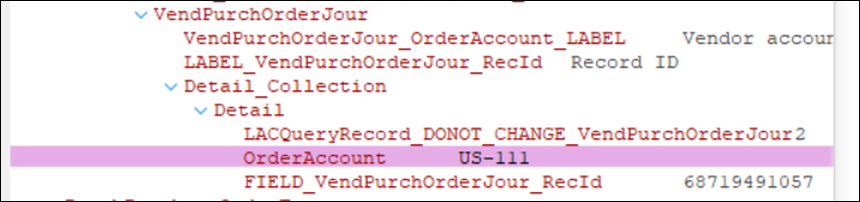
For example, when creating the Account key, a corresponding JobInfo is created in the Pre JobInfos tab of the DM Upload Properties window: