Applies to: Lasernet Core 10
This is where all input modules, engines and output modules are managed. The server bar shows which server has been selected as the active server.
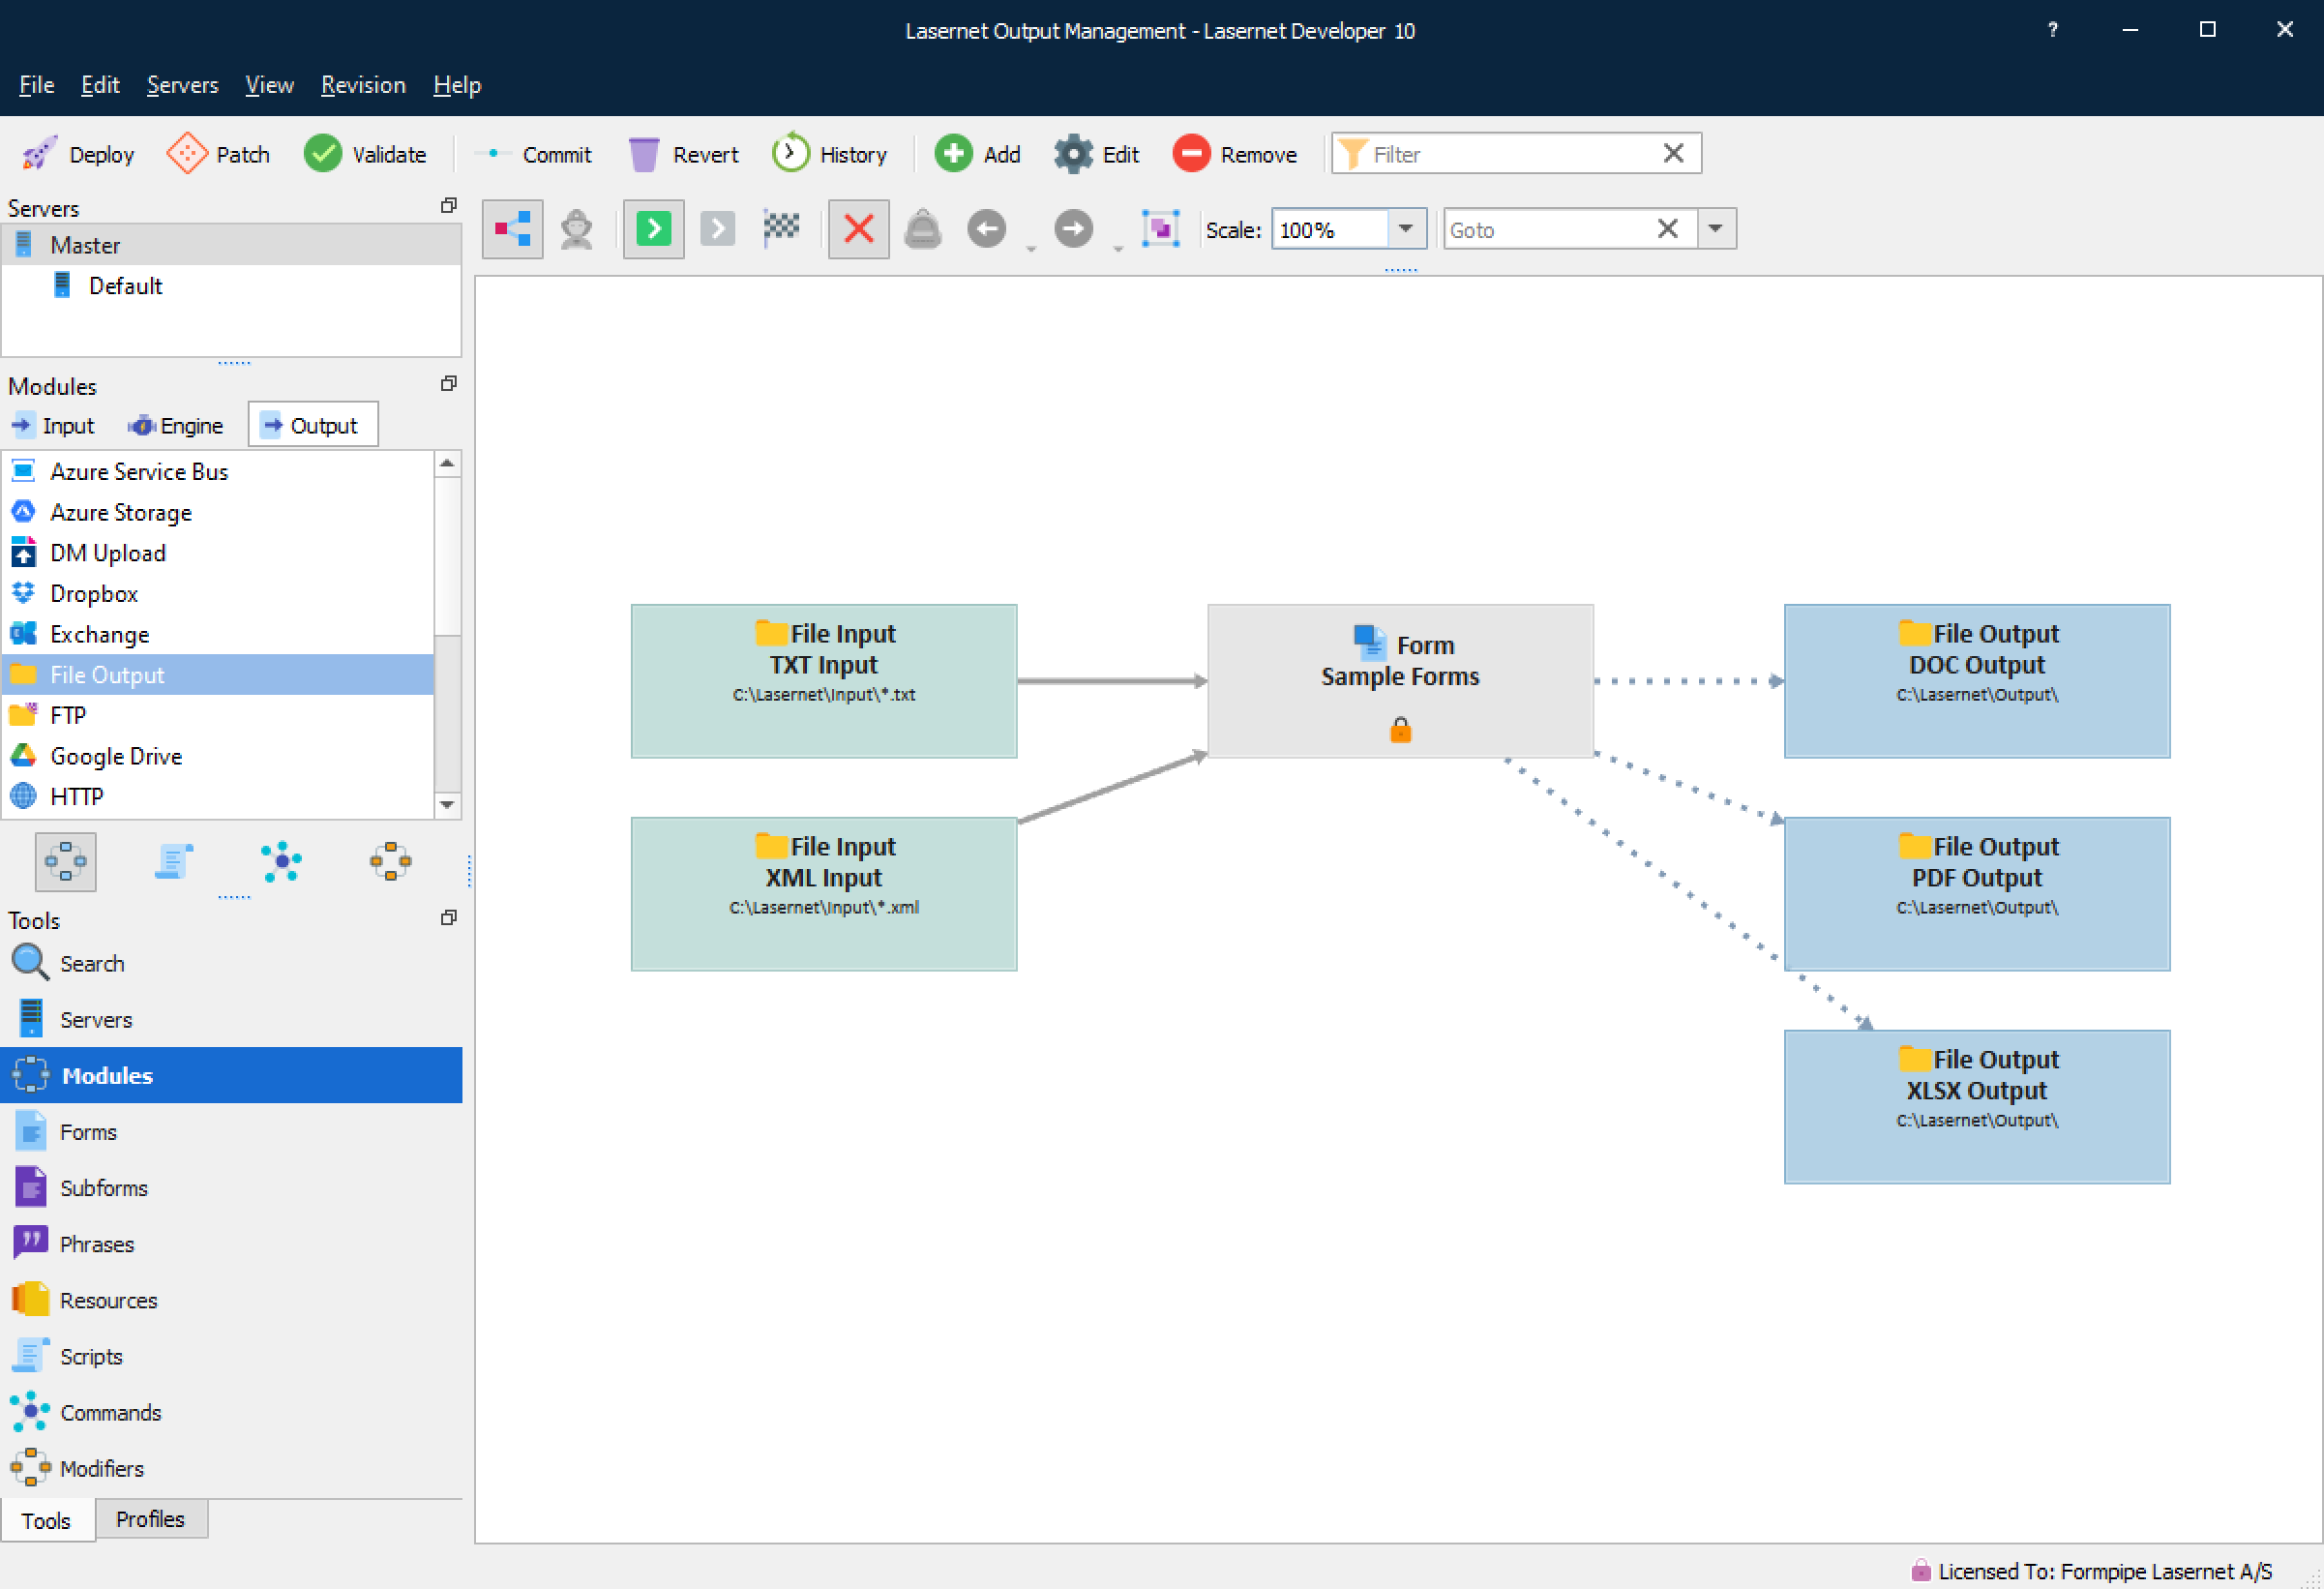
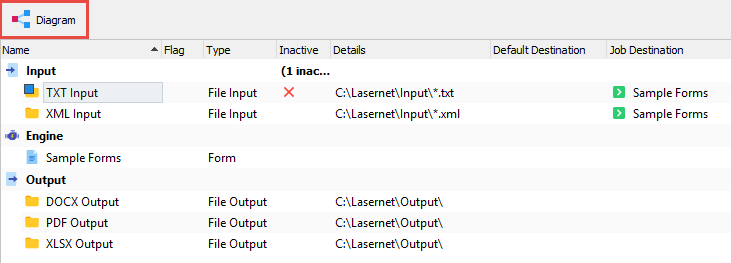
You can view and maintain the modules in two modes. By clicking the Diagram button, you can switch between Diagram mode (Default) and List mode. In both modes you are able to manage all modules and maintain their settings, either by double-clicking on the module or by setting the properties from the property editor.
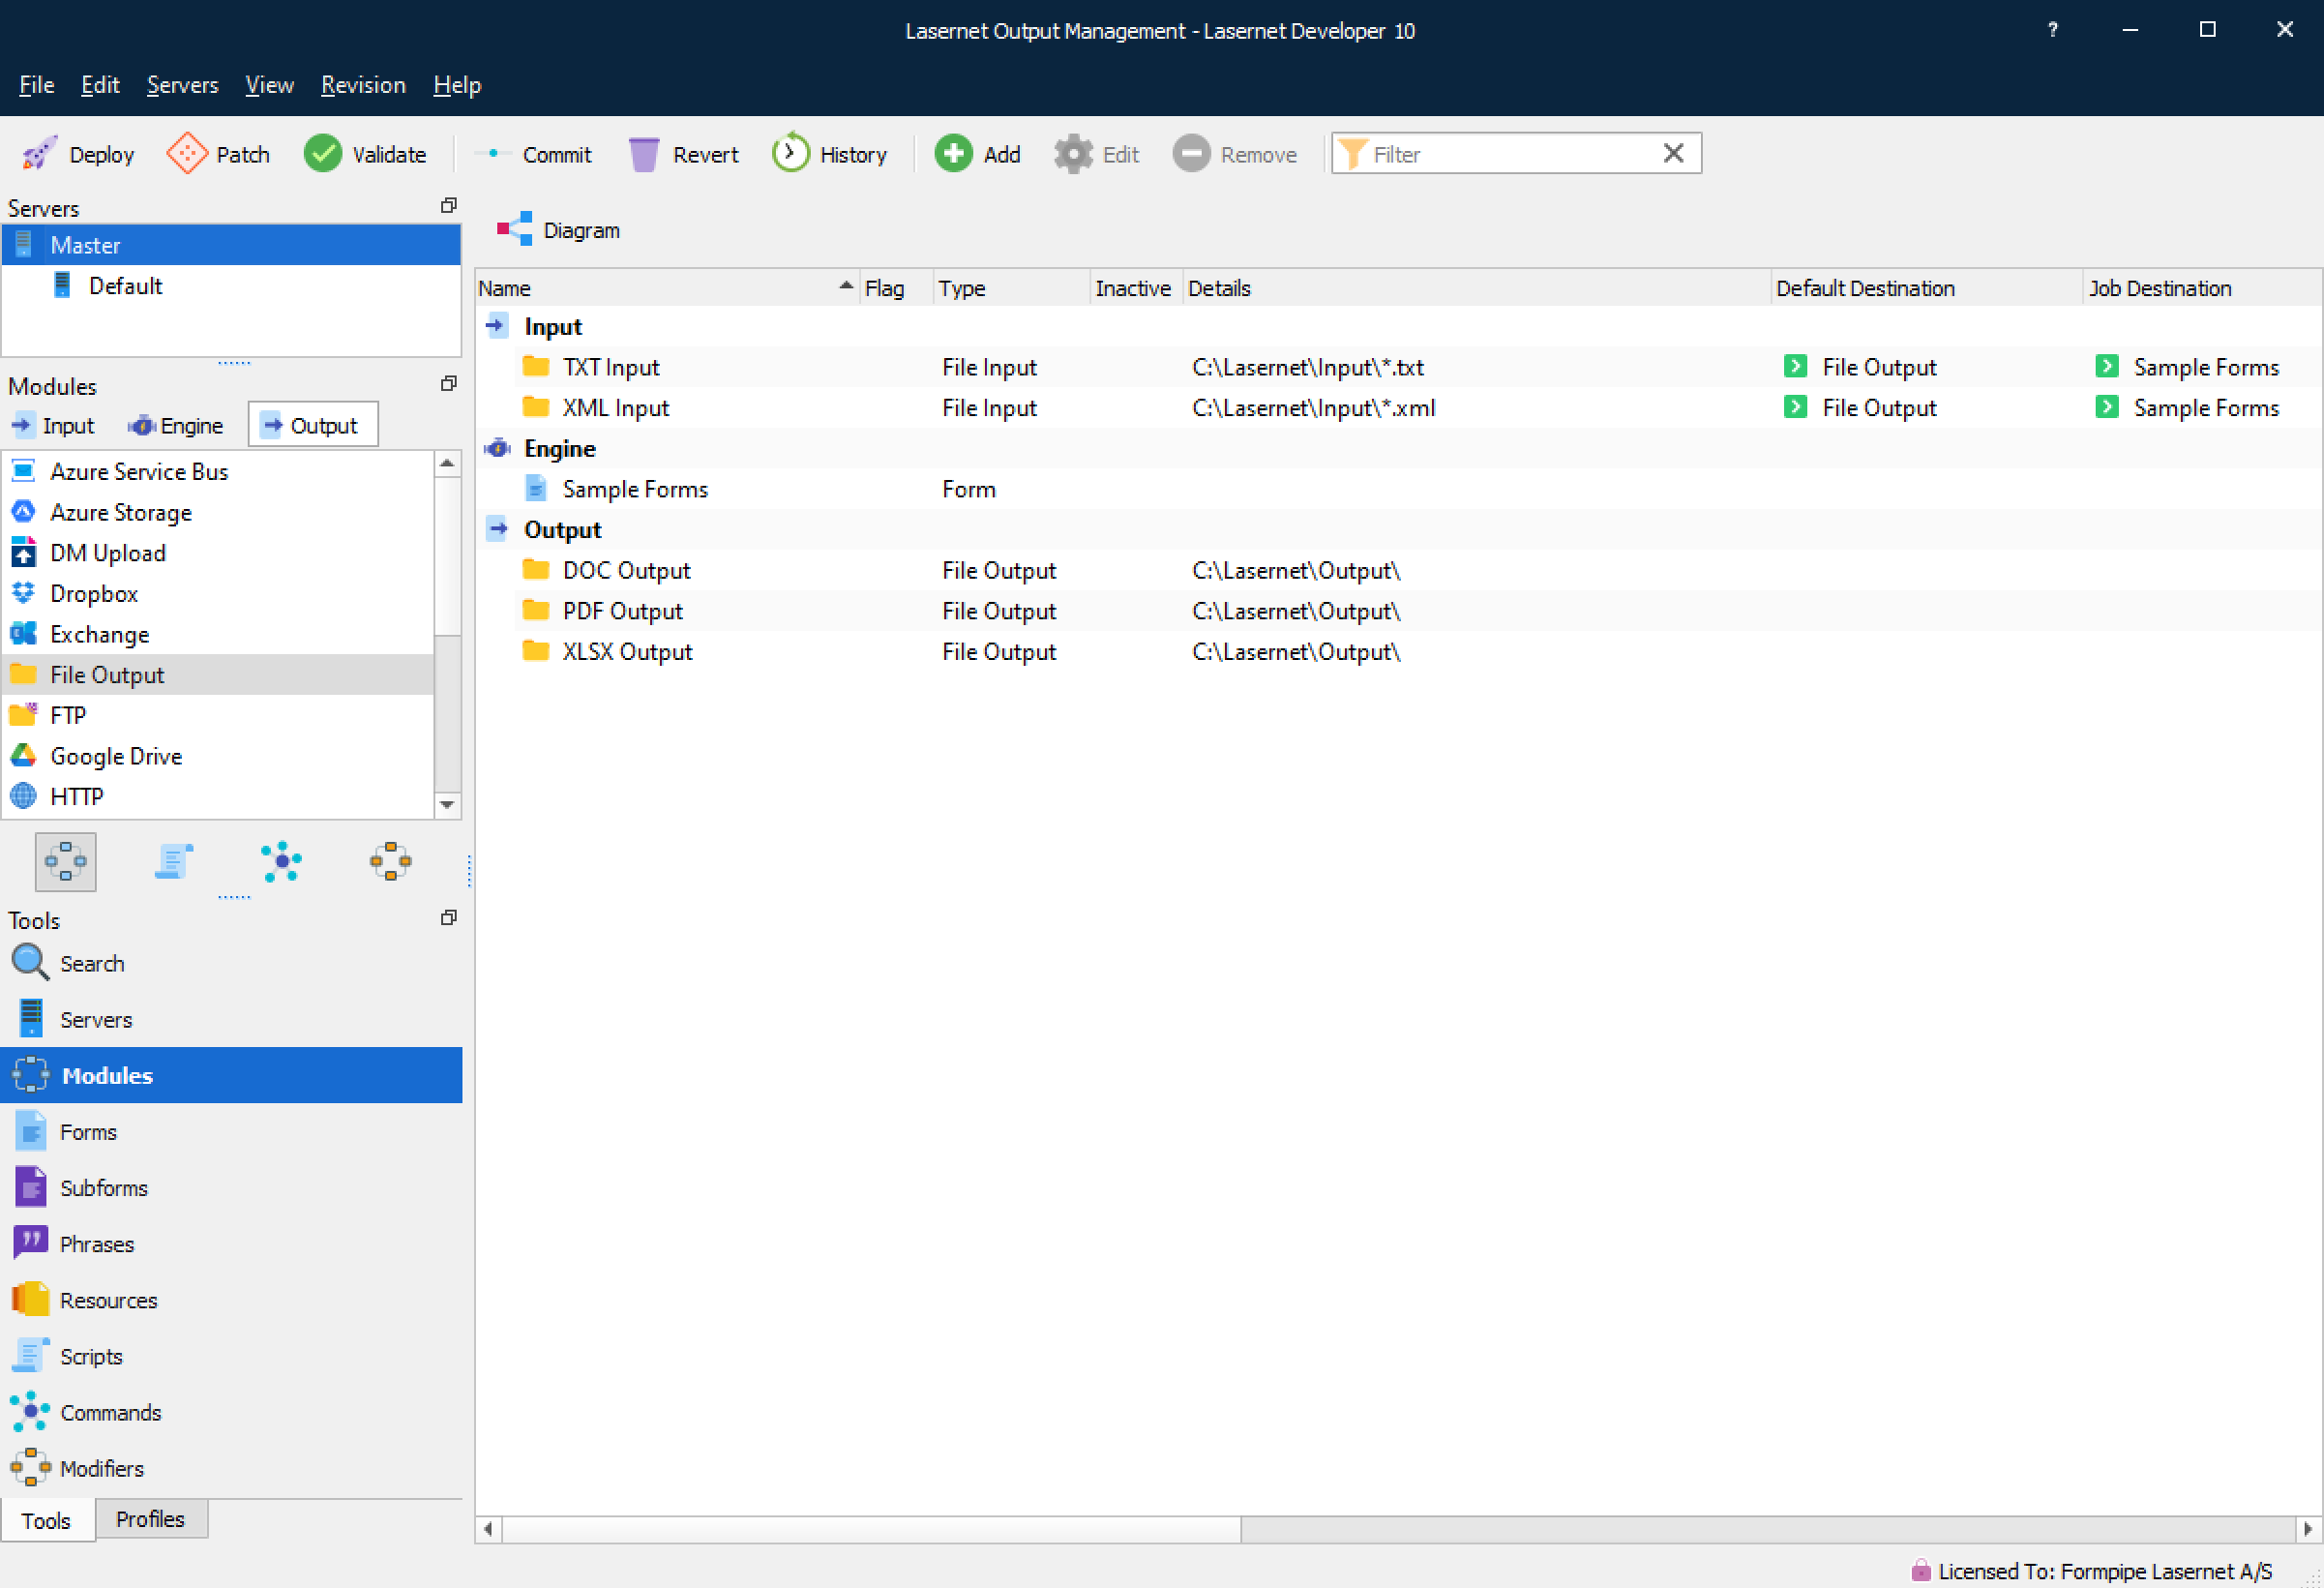
The Master server is the template server.
In this particular setup, all modules exist for Master server and will be inherited by any server added to the list.
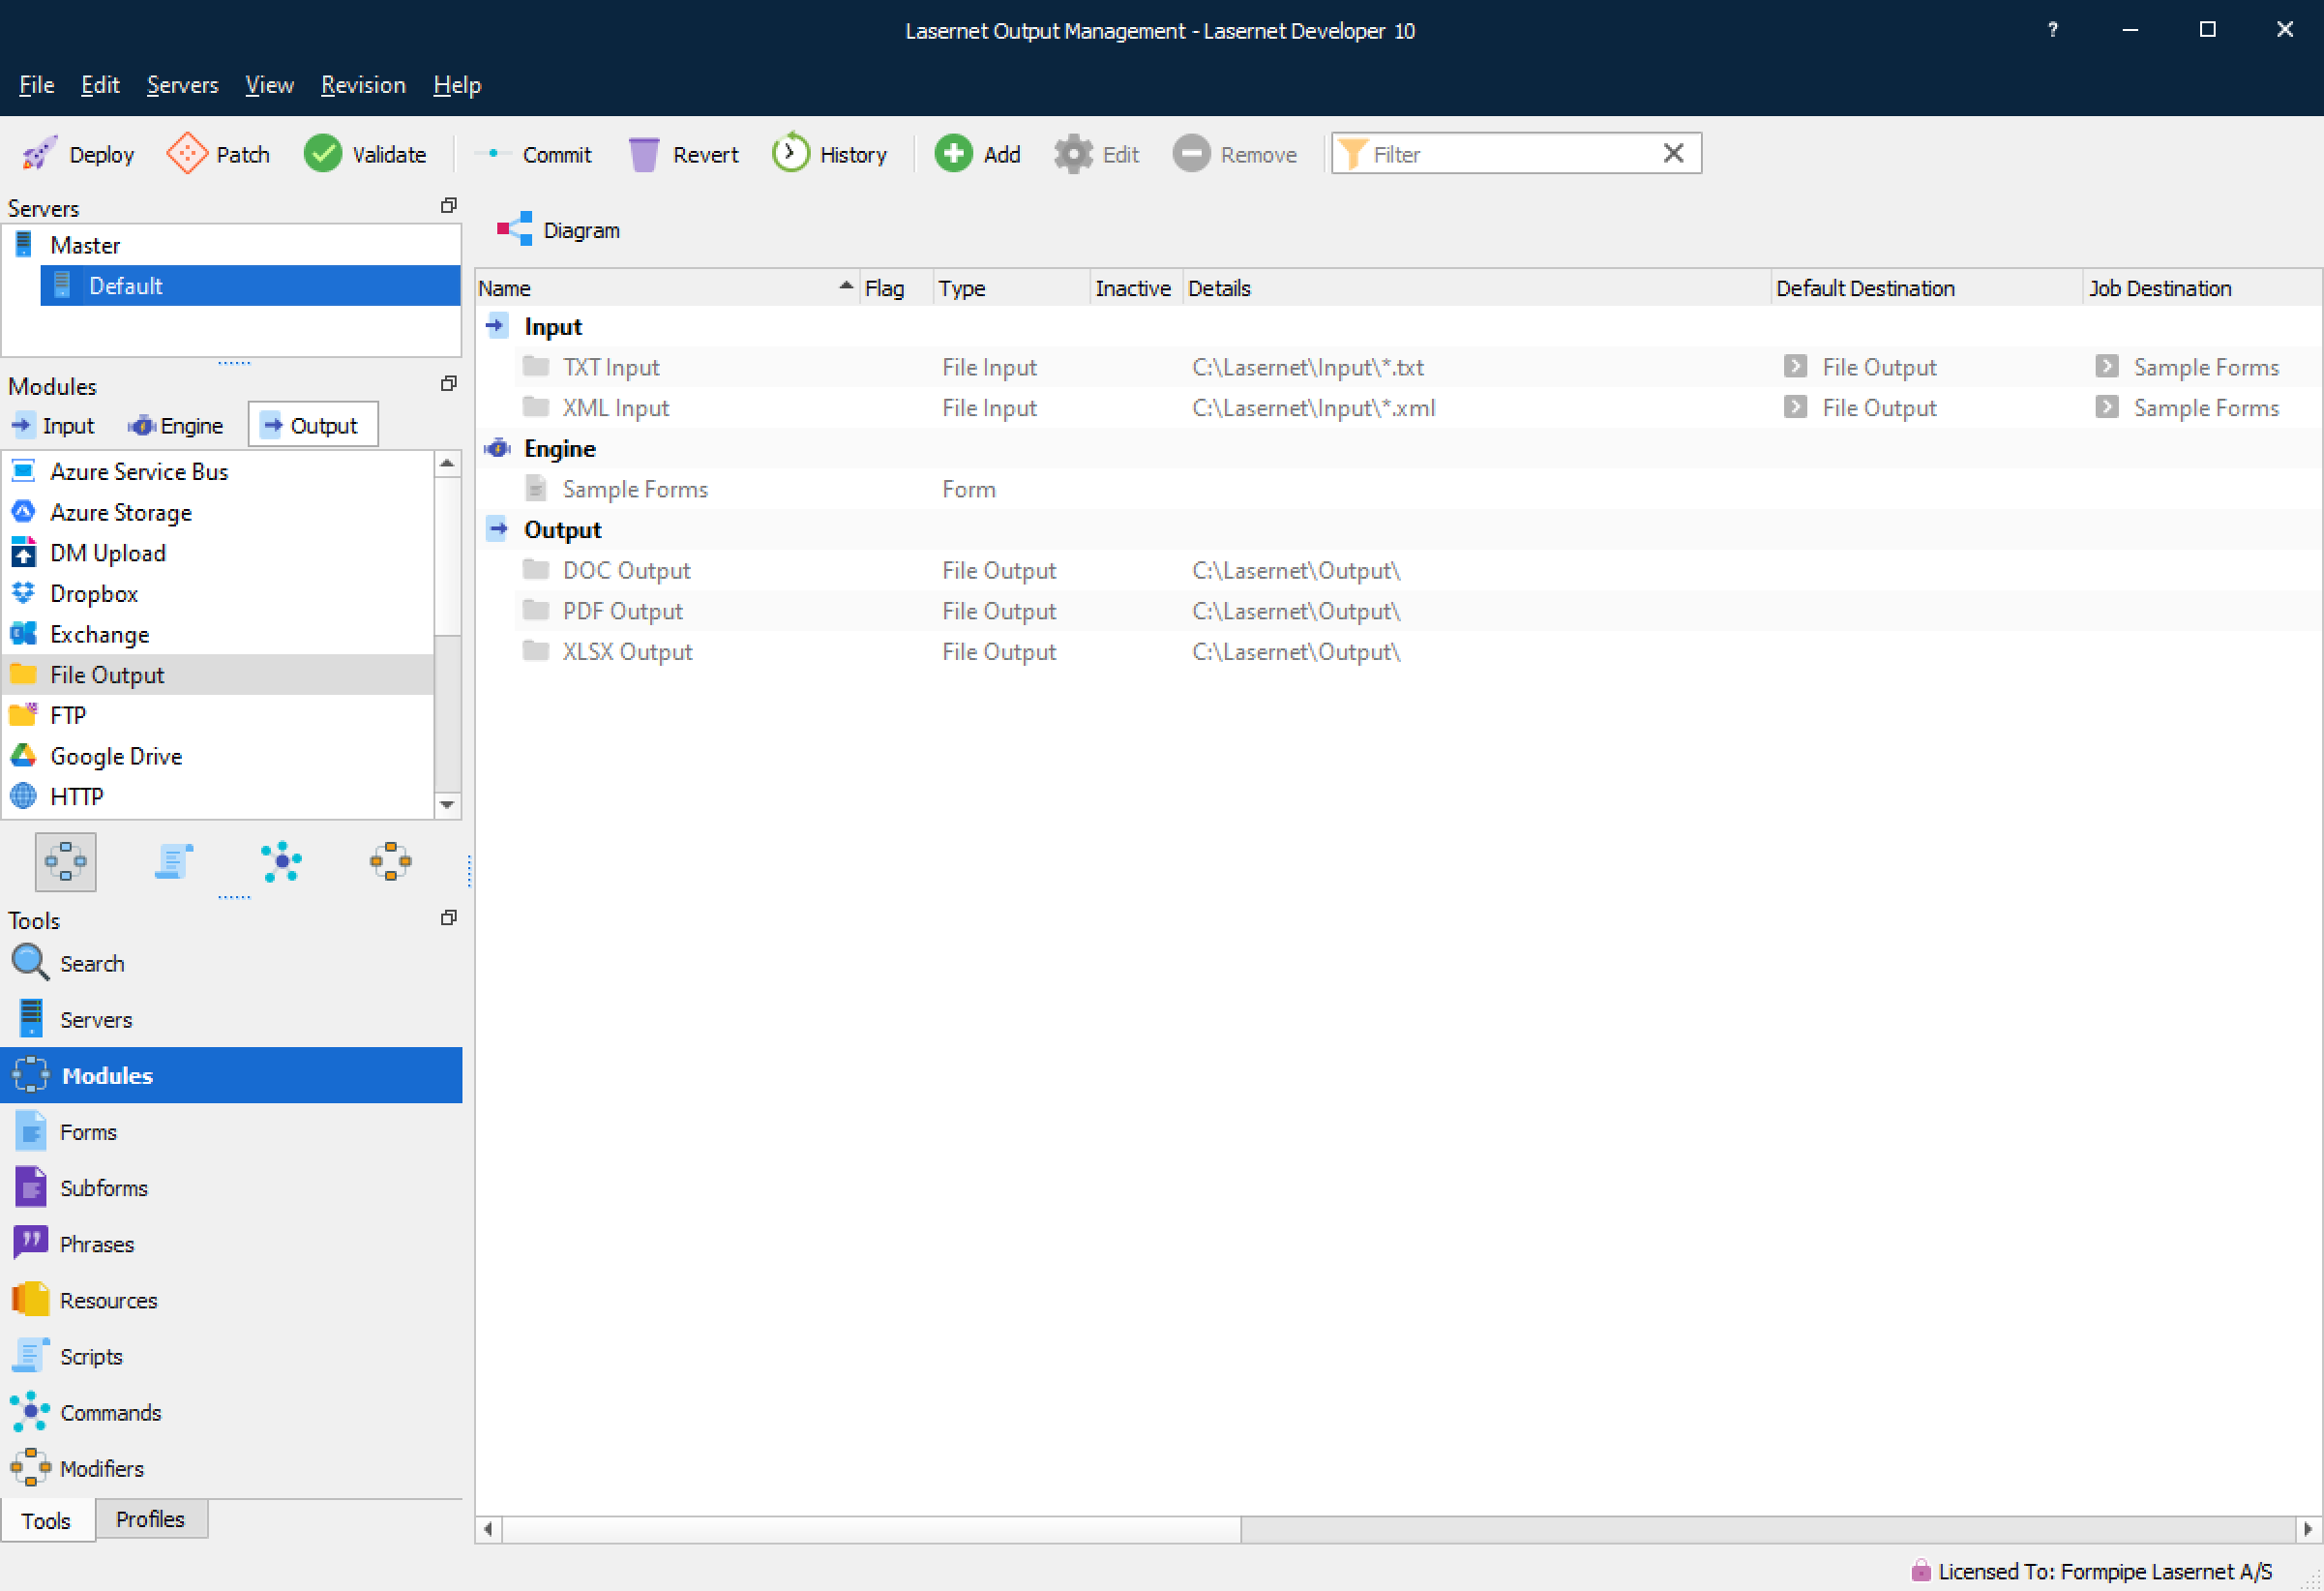
When changing to another server, some modules for Master are greyed out. Modules which are not greyed out will be available for that specific server only and cannot be inherited by any other servers listed.
Inactive Modules
Modules can be marked as inactive. This means that they will not be started when uploading the configuration to a Lasernet Core environment. You can toggle between the active/inactive status by right-clicking the modules and choosing Toggle Inactive. If a module is inactive, it is marked by a red cross in the column Inactive.
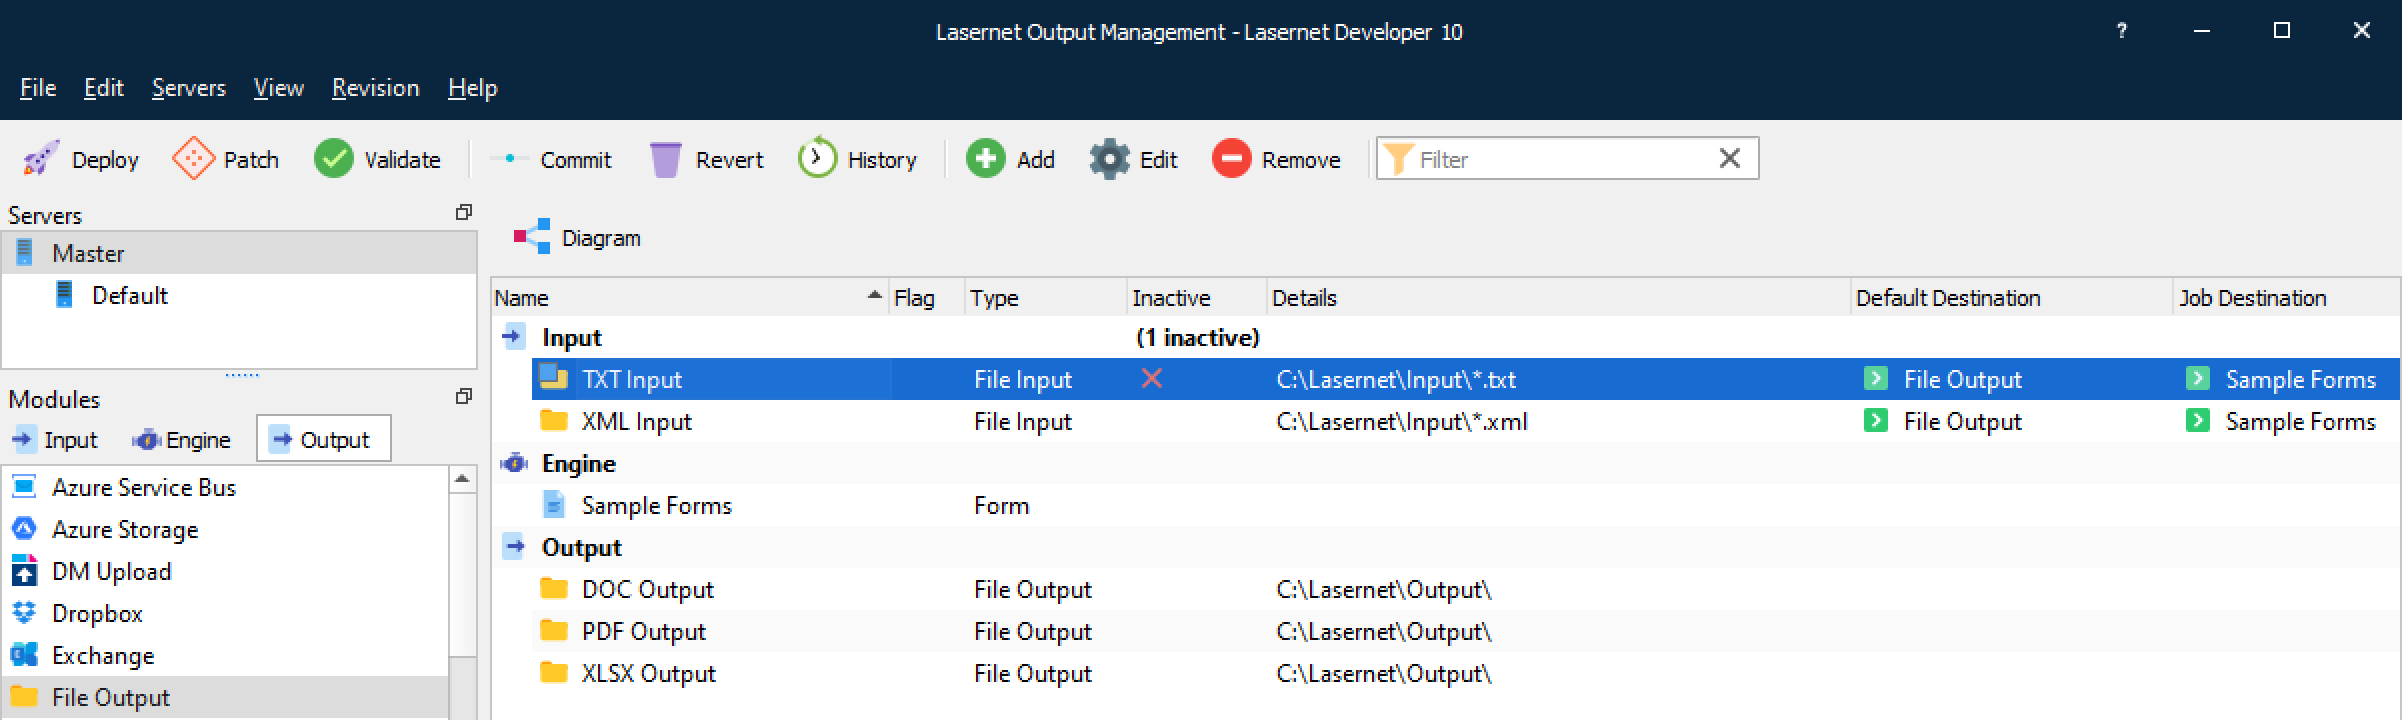
Diagram Mode
Diagram mode is an alternative to the list view. You can toggle between views using the tool button above the modules.
When Diagram is toggled on, you are presented with a top down overview of your configuration. This makes it much easier to see how Jobs are passed between the modules in the configuration.
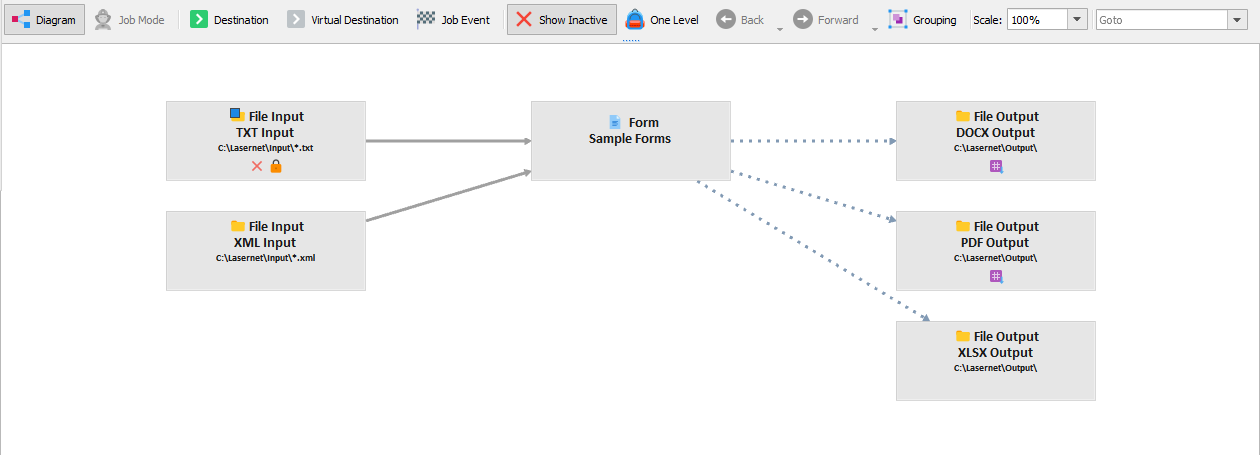
In Diagram mode you can create and design the configuration in the same way as in the list view.
New modules can be added by: dragging them from the left side of the screen onto the diagram, by using the Add button or using the popup menu.
Modules can be edited by: using the property editor, double clicking the module, choosing edit from the tool bar or using the popup menu.
Deletion of selected object(s) is done by: pressing the delete key, using the delete tool button or choosing delete from the popup menu.
Destinations / Job Events
Create new destinations or Job Events by dragging a line between two modules. Properties for the destination / Job Event are shown in the property editor and it is possible to double click the arrows to add or change criteria.
When criteria are added to a destination or Job Event, the arrow line is dashed.

Virtual Destination
Destinations created via script commands and inserted on sheets in forms will not be visible as destination lines in the diagram view. To help create a more useful and accurate diagram showing which objects are actually linked together, you can drag virtual lines between modules. The virtual line has no function when a job is parsed, it is only used as a guide to help to visualize your configuration.
When virtual destinations are used, the arrow line is dotted.

One Level
The One Level Browsing feature enables the user to only view modules ‘one level away’ from the selected module or destination/Job Event. The selected module is indicated with a yellow background and blue border. The selected destination/Job Event is indicated in blue. One Level browsing makes it possible to navigate through a configuration, in the same way web pages are navigated in a browser. Back and forward is supported, both via the mouse buttons and the Back and Forward tool buttons.

Grouping
Grouping is a way to arrange similar modules together in order to get a cleaner overview. For example, if you have a lot of Printer Input modules which all go to the same destination, you could group these into a single box.
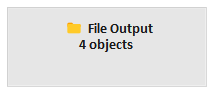
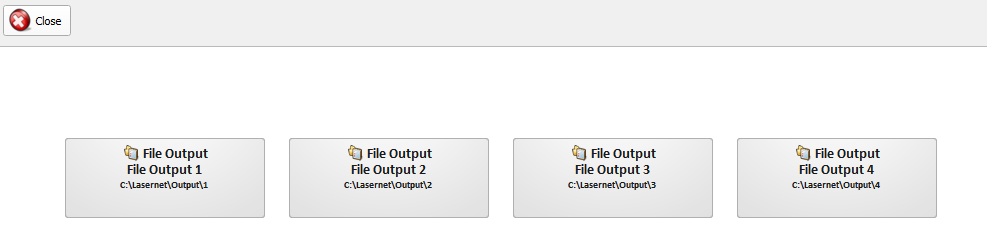
By double clicking the group, you can then access the group view where all of the objects can be managed.
Module Selection
The drop-down box on the right displays a list of modules in the configuration. They can be selected by clicking or by typing one of their names. The module is then highlighted and scrolled in to view.
Modifiers
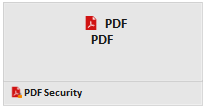
Modifiers can be run on the enter or exit side of modules. Enter modifiers are listed above the box and exit modifiers are listed below.
The example below shows PDF encryption running as an exit modifier (below module):
Job Mode
Job Mode allows you to see which jobs have been processed. Jobs are either displayed as green or red, with red indicating that the Job has failed.
Enabling
Before Job Mode can be used a few things need to be enabled:
Job Retention. By default, all the information regarding successfully processed Jobs is deleted from the Lasernet Core database. To be able to view this information going forward, Job Mode must be turned on and a value must be set (in minutes) to determine how long Jobs should be stored, after they have succeeded.
This is done via the server configuration on the Database > Job Mode tab.
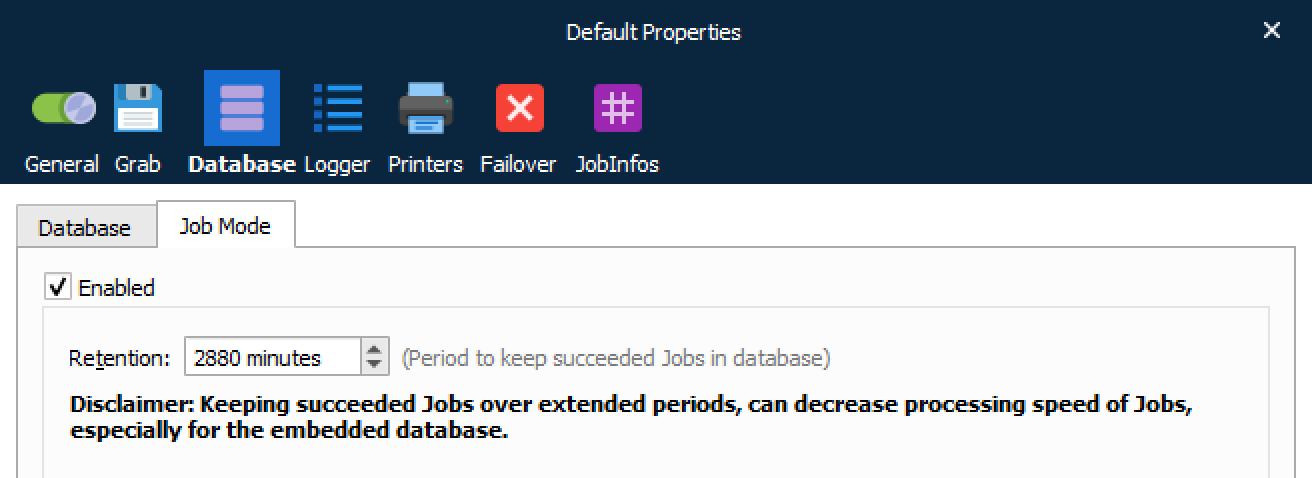
You must Deploy or Patch the server object to activate Job Mode and reconnect the Lasernet Developer by signing out and signing in again.
Note
Failed, Paused and Scheduled Jobs are kept “forever”, regardless of this setting.
Usage
Now that Job Mode has been enabled, it can be used on a per server basis in our configuration. By selecting a server, it is now possible to switch to Job Mode.
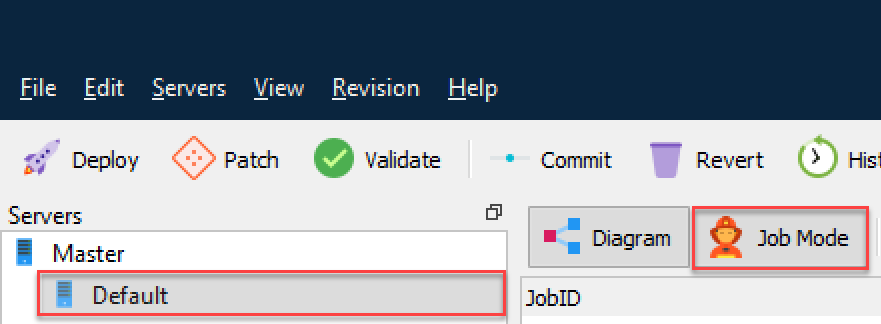
When entering Job Mode, you are presented by a list of all the processed Input Jobs on the selected server. Initially this list is empty.

Mode
There are two modes for viewing Jobs;
Input: Viewing the Jobs going into Lasernet Core.
Output: Viewing the Jobs coming out of Lasernet Core.
Search
By default, all jobs are listed. However, it is possible to search for JobInfos stored via JobInfo Profiles.
Example
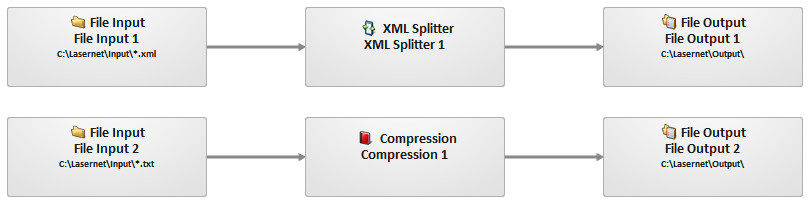
The example above shows two input modules which use different methods of processing in Lasernet Core.
File Input 1. Picks up XML files and splits them in to fragments. Fragments are saved to disk by File Output 1.
File Input 2. Picks up TXT files and combines and compresses them into a single ZIP file which is saved by File Output 2.
Processing a single XML file which is then split into 3 parts and compressing 3 text files into one ZIP file gives us the following view of the Input Jobs:

Our one XML file resulted in 3 output Jobs.
Our three TXT files resulted in 1 output Job.
And the output Jobs for these Input Jobs:

Opening the Job shows us the XML Input processing:
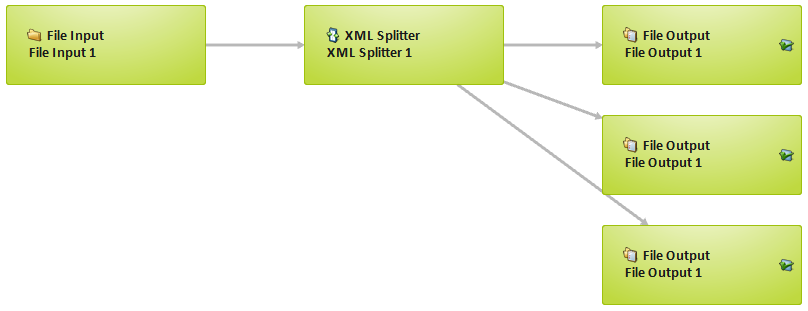
You can see one file coming in and being split into three files coming out.
Below you can see how the ZIP file Output Job is processed:
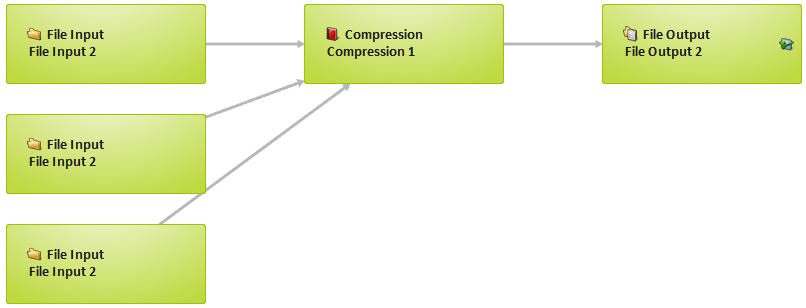
You can see three files coming in and being combined into one zipped output file.
Compact
When Jobs are processed in Lasernet Core, a number of ancillary Jobs are also created, which can make the diagram harder to follow. To improve readability, you can use the compact button to remove these jobs from the diagram view.

If you prefer to view all of the available Jobs created during processing, you can toggle the Compact feature to ‘off’. This will close the log window (if open) and data will be fetched from the server again.
JobInfos
JobInfos which have been saved to database via JobInfo profiles, are displayed in a property browser along with those JobInfos that are always available, such as Status, JobID and failure reason.

Log
The log lines regarding the viewed Jobs can be fetched from the server by clicking the Log tool button.

A few helpful features make it easier to navigate the log lines.
Selecting Jobs highlight the corresponding lines in the log in yellow.
The search box enables the user to highlight specific keywords in the log.
The filter button toggles between showing all log lines or just the ones being highlighted.
Selecting a log line will select the corresponding Job, so the properties are displayed.
Example of filtering on keyword ‘txt’:

System Destinations
A list of predefined system destinations is available in Lasernet Developer. When listing available Destinations for a module, the system destinations will appear in the System section. The names of the system destinations are: Default, Meta (only listed if a Meta Input module is added to the configuration), Null, Preview, and Webservice. Lasernet Core will hide a system destination, if a required setting in the configuration is missing.
 To force Lasernet Developer to list all available system destinations, click the All icon.
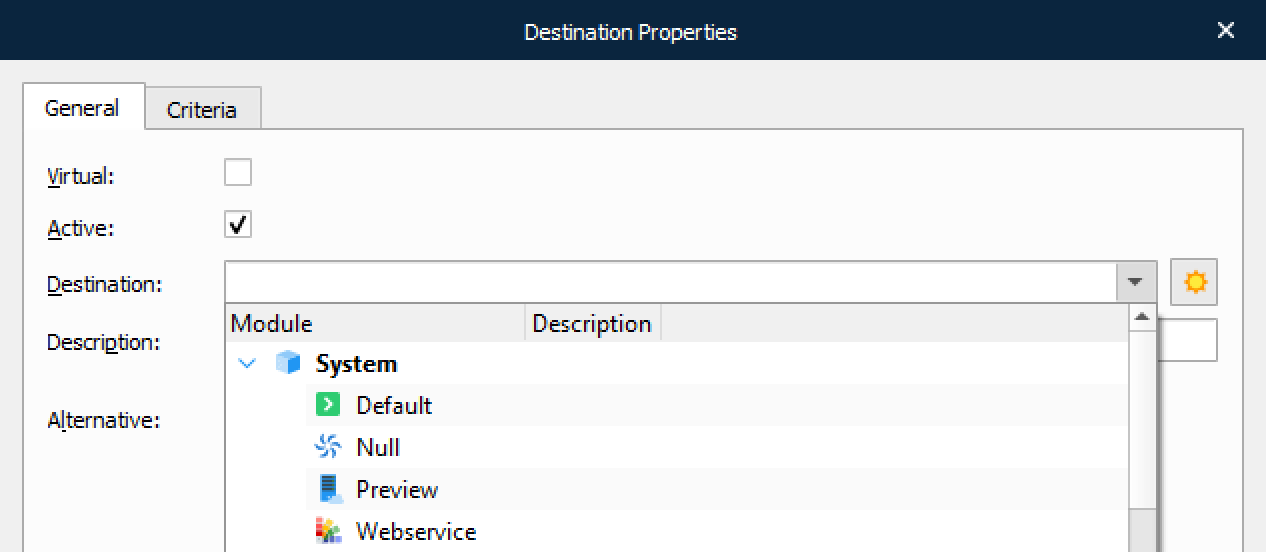
| Default | In the Destination tab of an input module, you can define a Default destination:
When a job is being processed by the input module, the value defined in the Default destination will be stored in the JobInfo named Default. If a module is configured to send a job to the Default destination, it will send it to the destination specified in that Default JobInfo. The Default destination enables this module to route jobs to different modules that follow it in the workflow, depending on which input module received the job. This dynamic control is possible because each input can specify a different Default destination. |
| Meta | The Meta destination is only listed if a Meta Input module is added to the configuration. It is used for returning the job initiated by Auto-Fill. |
| Null | Sending a job to the Null destination will stop the processing of a job in the workflow. If a module does not contain any destinations the job will be marked as failed. The Null destination is used if you want to ensure that a job is successfully stopped by the Job Engine. |
| Preview | The Preview destination is added by default if a Web Server module is added to the configuration. More info regarding the Preview destination can be found in Web Server Input. |
| Webservice | The Webservice destination is added by default if a Web Server module is added to the configuration. If Webservice is selected as a destination, the job must be received by the Web Server module. When the job is received, an open TCP/IP connection is created by the Web Server and the Webservice module will re-direct the job back to the client via the open connection. Afterwards the connection will be closed. |
