
Applies to: Lasernet Core 11
After you install the Lasernet Printer Service application on the print server, you can start it. In the Windows Start menu, click Lasernet Printer Service 11.
After the application starts and you connect to the Lasernet Config Server, use the application to create printer profiles, deploy printers, and view the printer service log.
Note
After you complete these tasks in the Lasernet Printer Service application, the final part of the process is to modify the Lasernet Core workflow and form settings in Lasernet Developer, so that Lasernet Core workflows print via the Lasernet Printer Service.
Connect
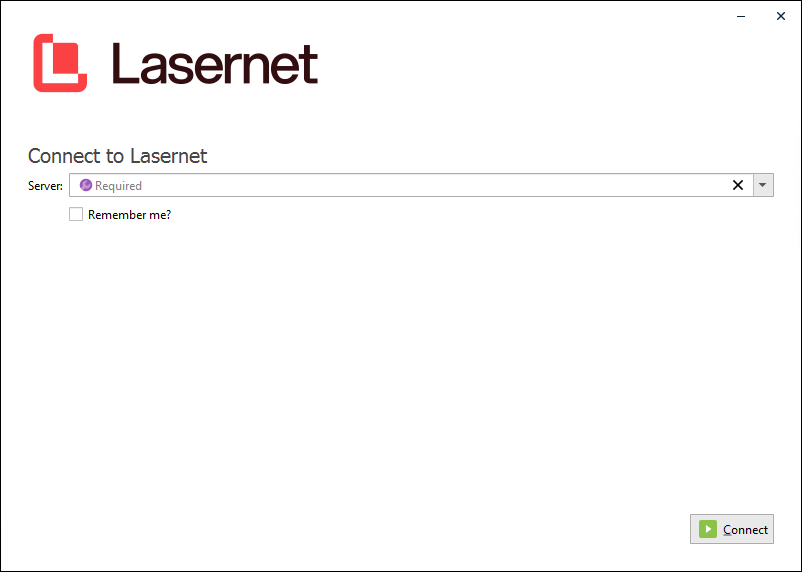
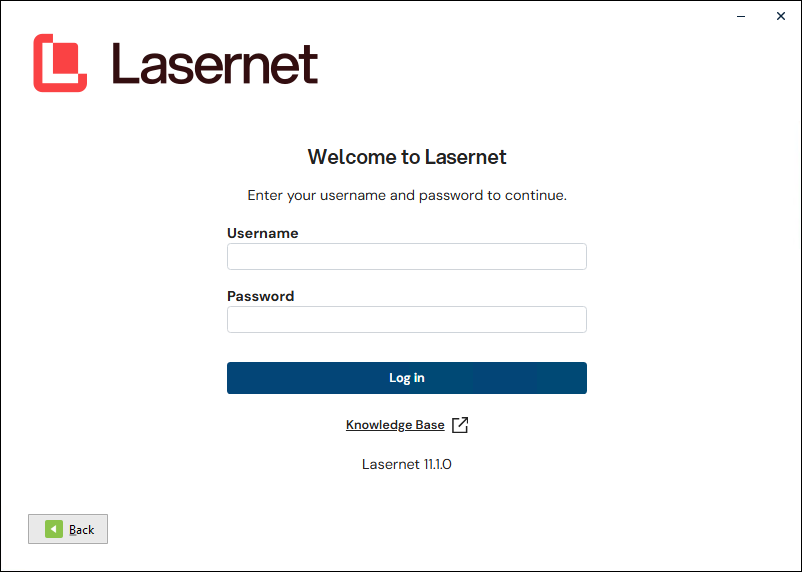
To connect to the Lasernet Config server, enter the Server name, click Connect, then enter credentials.
Printer Service Window
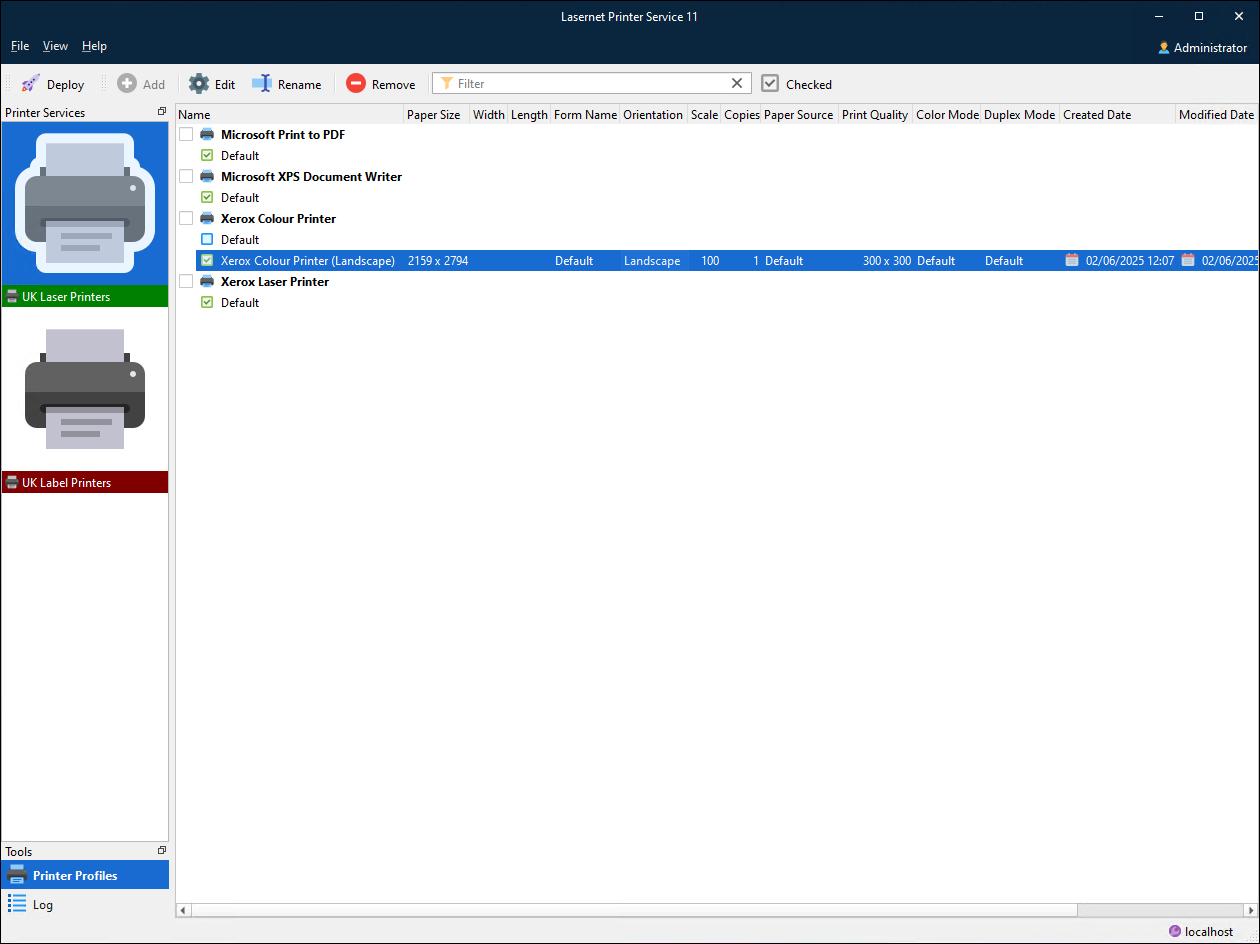
The left side of the window lists the printer services configured in the Lasernet Config web app. The label below each printer icon is colored to describe the status of each printer service’s Windows services:
| Service is installed and running |
| Service installed but not running |
| Service not installed |



When you click a printer service, the main area of the window lists all the Windows printers that are available on this print server. To make a printer available via a printer service, you deploy the printer.
For each printer, the main area lists Lasernet Core printer profiles, which store printer settings. Each Default profile represents the default settings for the Windows printer. You can add additional printer profiles, which describe custom printer settings.
Note for Cloud print servers
Separate printer servers should have individual service bus queues. They should not share the same details.
Printer Profiles
Printer profiles are saved sets of printer driver settings that are different from the Windows defaults. The exception to this is the Default printer profile for each printer, which represents the default Windows settings for the printer.
You can add additional printer profiles, which describe custom printer settings. For each custom printer profile, the main area displays common device mode settings, such as Paper Size, Orientation, and Paper Source.
For each printer, select the checkbox of the printer profile that you want Lasernet Core print jobs to use by default. Your choice is sent to the Config Server when you deploy printers. If a print job does not specify a profile to use, Lasernet Printer Service uses that default profile for the print job.
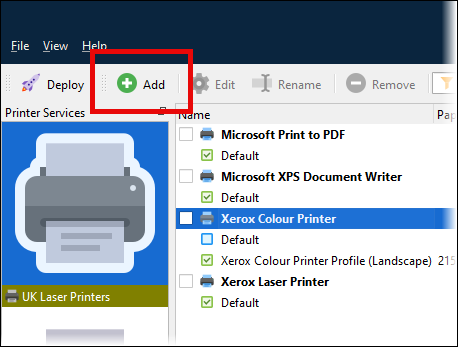
To add a printer profile for a printer, click the printer and then click Add in the toolbar. For more information about adding printer profiles, see Add a Printer Profile.
To edit a printer profile, click it and then click Edit in the toolbar. Alternatively, double-click the profile.
To rename a printer profile, click it and then click Rename in the toolbar.
To delete the selected printer profile, click it and then click Remove in the toolbar.
Note
Printer profiles apply to EMF print jobs only.
PDF and DOCX print jobs disregard printer profiles and use the default settings for the relevant Windows printer. For more information, see About Printing PDF and DOCX files.
Add a Printer Profile
In the Printer Properties window that appears when you add a printer profile, you can specify printer settings.
Enables you to name the profile and see which printer it is associated with.
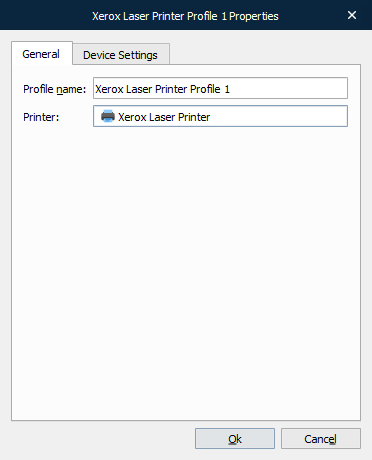
Profile name: Type a unique name to identify the profile.
Printer: The printer that the profile is for.
Use the Device Settings tab to define standard properties for the printer, such as Paper size, Paper source, number of Copies, Color mode, and Duplex mode. Valid values for Scale are between 1 and 1000 (inclusive). Valid values for Copies are between 1 and 9999 (inclusive).
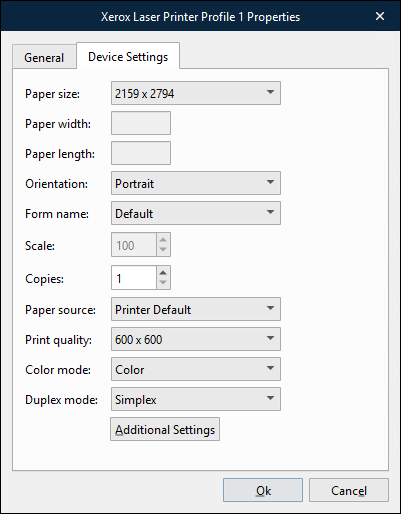
Additional Settings
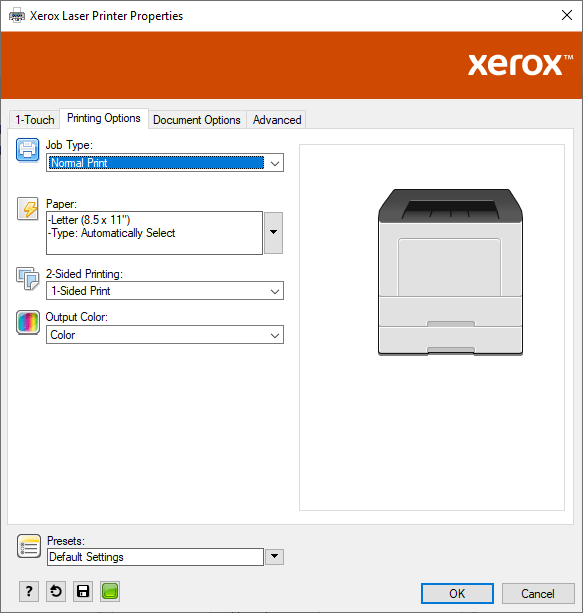
To access printer-driver-specific settings, click Additional Settings at the bottom of the window.
These settings will be saved by Lasernet Core in a device mode context and can later be activated from Lasernet Core workflows.
Click OK to close the additional settings window.
Note
The dialog shown and settings available vary depending on the printer hardware being configured.
Save the Printer Profile
When you have finished specifying printer settings in the Printer Properties window, click Ok to save the printer profile.
Deploy Printers
To make specific printers available to the workflows that Lasernet Core environments are running, you must select a printer service and then deploy printers to it.
In the Printer Services panel of the Lasernet Printer Service 11 window (on the left side), click the printer service that you want to deploy printers to.
In the main area of the Lasernet Printer Service 11 window, select the checkbox of each printer that you want to deploy to that printer service.
Important
For each printer that you want to deploy, select the checkbox of the printer profile that you want print jobs to use by default.
In the toolbar, click Deploy.
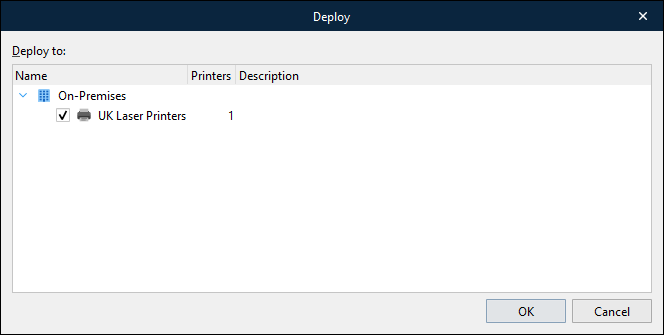
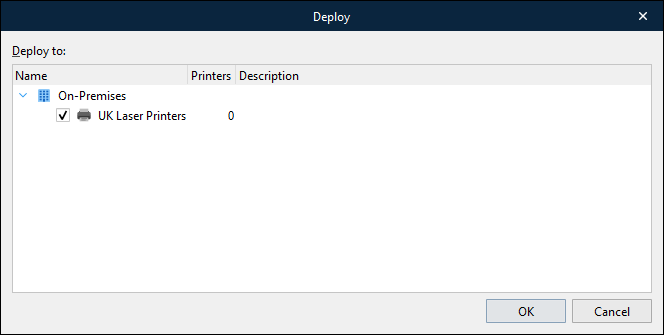
In the Deploy window, check that the correct printer services are selected. The Printers column describes how many printers will be deployed to that printer service.
Click OK. The Lasernet Printer Service application will create and appropriately configure Windows services to receive and handle print jobs.
Tip
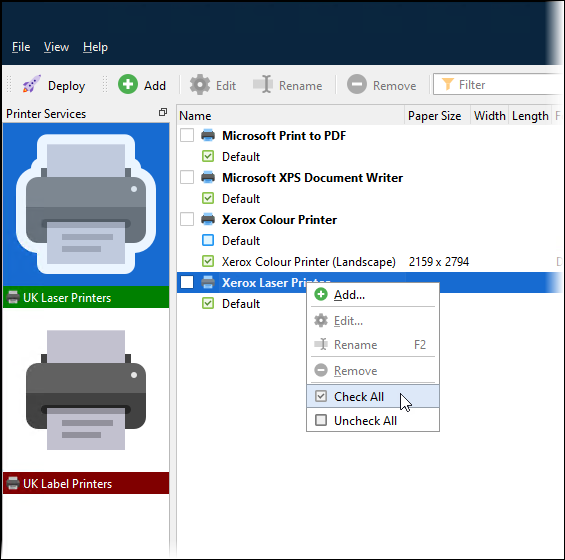
To select all printers, right-click on a printer name and then select Check All. This is a quick way to select all printers so that you can deploy them all to the selected printer service.
Automatic Windows Service Installation
After you deploy printers, the Printer Service application creates a Windows service for each printer service that you deployed a printer for.
These services are named Lasernet Printer Service 11 (<Printer Service name>). Appropriately substitute <Printer Service name>. For example, Lasernet Printer Service 11 (UK Laser Printers). The services are listed in the Windows Services window.
These services receive print jobs from Lasernet Core environments and print to the specified printer, using settings from the default printer profile, or the printer profile specified by the print job.
Each of these services listens on:https://<host name>:<printer service port number>/lnprintservice/api/<print server name>
Appropriately substitute <host name>, <print service port number>, and <print server name>.
Uninstall Printer Services
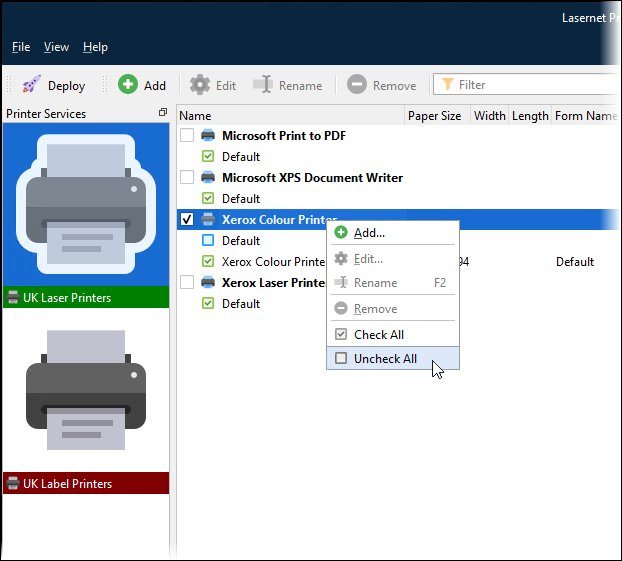
Deselect all printers in the Printer Service window list that are assigned to a particular printer service.
Click Deploy in the toolbar. The printer count for that printer service will be 0. Next, click OK.
This will remove the selected printers and profiles from the Lasernet Core configuration and uninstall their Windows services from this print server.
Elements of the Printer List in the Printer Service Window
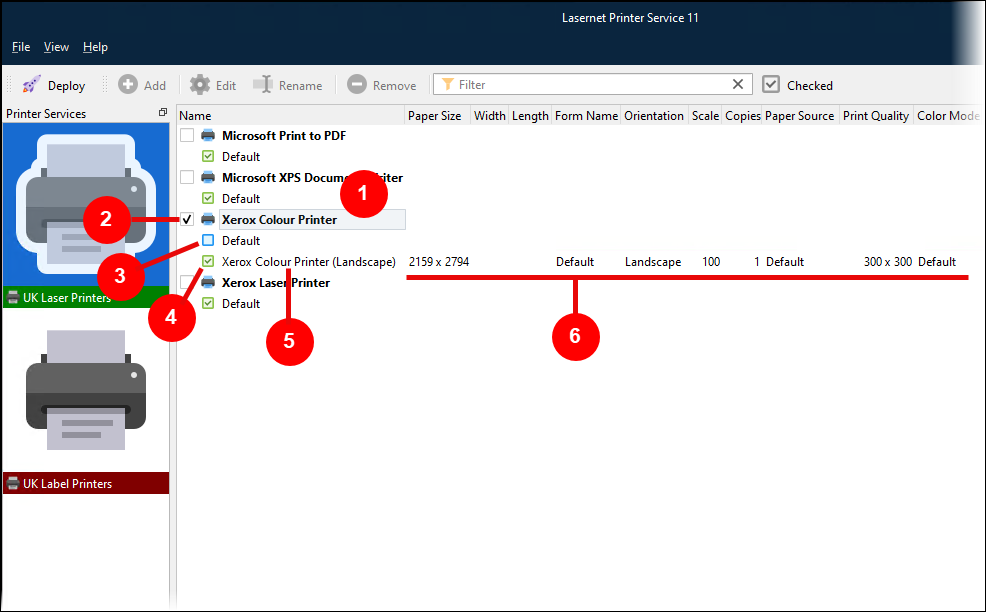
Element | Description |
|---|---|
1 | Printer name |
2 | Selection checkbox for printer |
3 | Windows default profile for the printer |
4 | Active printer profile for the printer |
5 | User-defined printer profile |
6 | Device mode settings for the user-defined printer profile |
In the toolbar of the Lasernet Printer Service 11 window:
Type a term in the Filter box to filter results by printer name.
Click the Checked button to list only selected printers. Selected printers have a checkmark in their checkbox.
Log
You can view the log for each printer service:
Click a printer service icon in the left panel, then click Log (at the lower-left of the window).
Click Fetch newest in the main area toolbar to retrieve the latest log entries for processed print jobs.
Scroll up to get older log messages, scroll down for new messages.
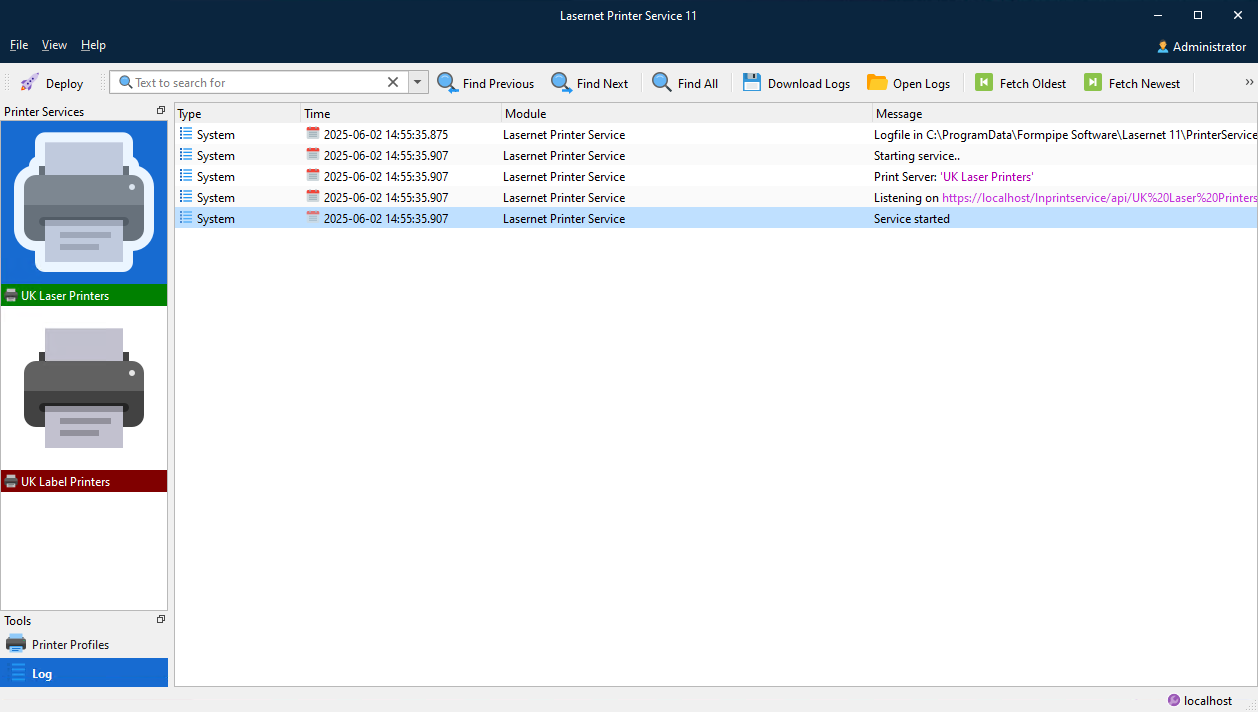
In the toolbar, you can:
Type a term in the Text to search for box to search the log. Text strings are not case-sensitive.
Click Find Previous to display the previous string found by the search.
Click Find Next to display the next string found by the search.
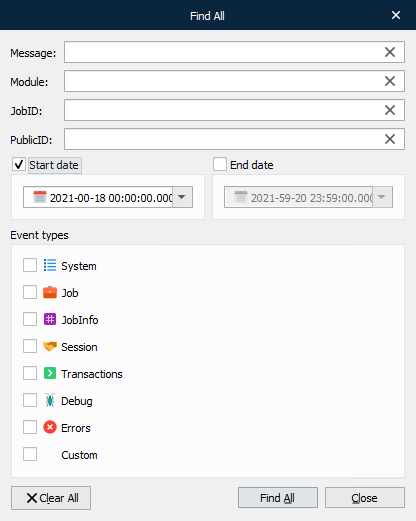
Click Find All to display the Find All window, where you can define more specific search criteria.
Click Download Logs to download the log files as a ZIP file.
Click Open Logs to view saved log files.
Click Fetch Oldest to scroll to the oldest log entries available on the server. Alternatively, scroll up to fetch older entries.
Click Fetch Newest to scroll to the most recent log entries available on the server. Alternatively, scroll down to fetch newer entries.
Click Clear Log to remove log entries from the window.
Next Steps
The final part of the process is to modify the Lasernet Core workflow and form settings in Lasernet Developer, so that Lasernet Core workflows print via the Lasernet Printer Service.