
Applies to: Lasernet Core 11
After you have tested your changes and verified that the configuration works, the next stage of the process is to send the configuration to a production Lasernet Core environment.
First, you must “commit” the configuration changes, which will create a new revision of the configuration. Then, at an appropriate time, you can use Deploy Commit to deploy that new revision to a production environment.
Note
To “deploy” a configuration means to send it to a Lasernet Core environment, which will run the configuration.
Note
For Lasernet Core 10 documentation on this subject, see the Lasernet Config Server and Deployment Guide.
Deploy Commit
You can use Manage (or the Lasernet Config web app) to deploy any revision of a configuration.
You can use Lasernet Developer to deploy only the latest revision of a configuration.
Manage
To deploy a revision of a configuration to one or more environments, follow these steps:
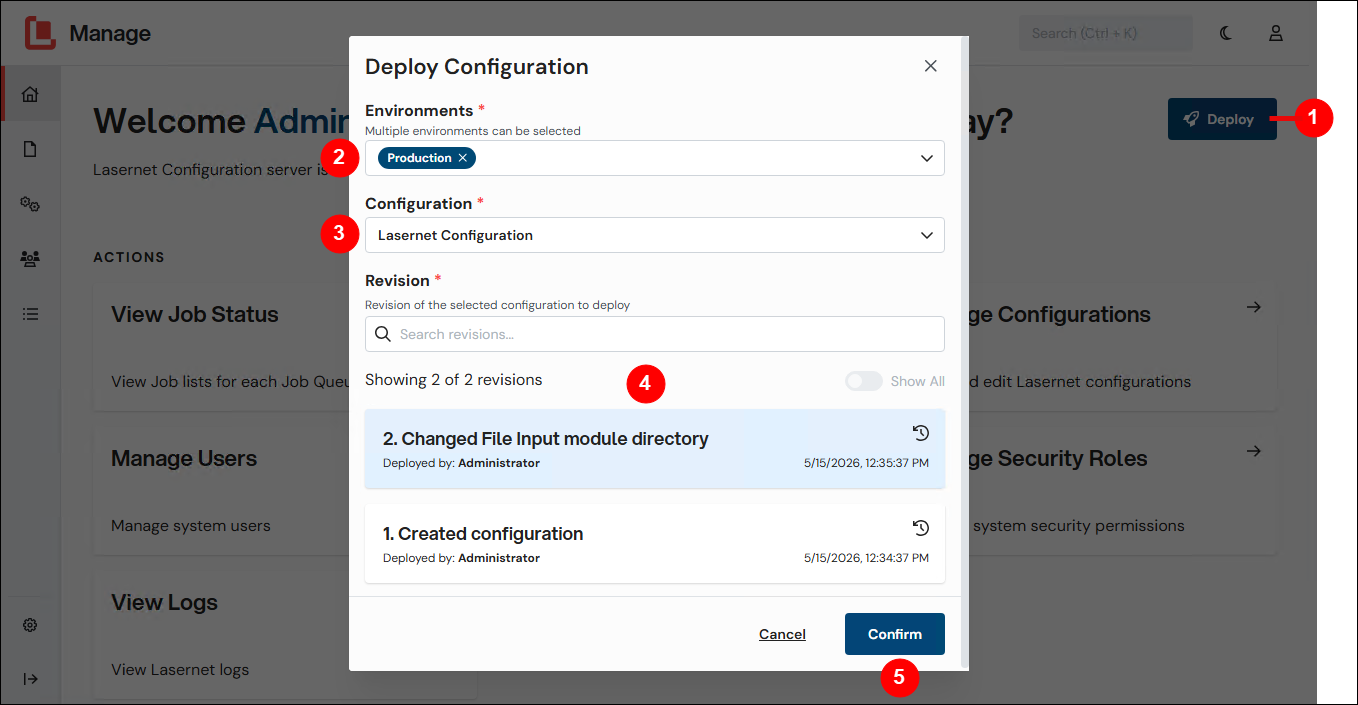
In the upper-right corner, click Deploy (1).
In the Deploy Configuration window:
Use the Environments list (2) to select which environments you want to deploy the configuration to. You can select more than one environment.
Select a configuration from the Configuration list (3).
In the revision list, select which configuration revision you want to deploy (4).
Click Confirm (5).
After the process completes, the selected environments are running the configuration.
Lasernet Config Web App
Note
The Lasernet Config web app was provided with earlier versions of Lasernet Core. It is a legacy web app and will be deprecated in a future version of Lasernet Core.
Expand for information
To deploy a revision of a configuration to one or more environments, follow these steps:
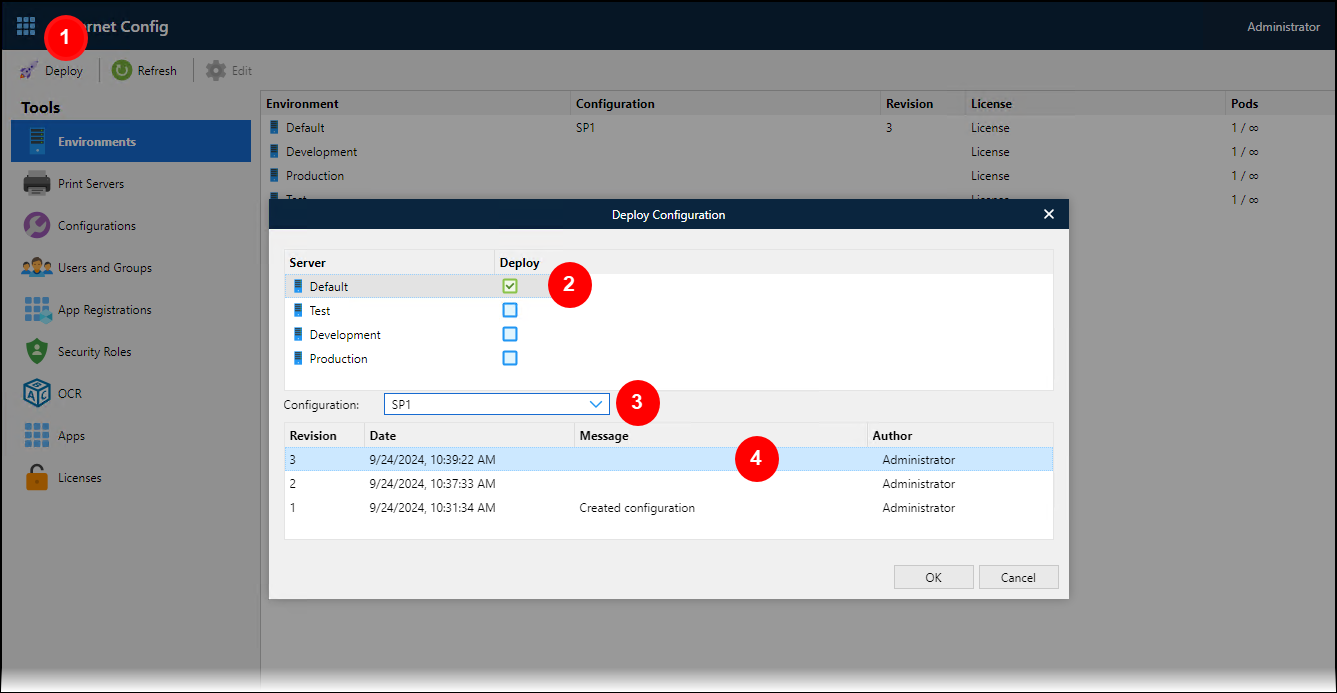
In the toolbar, click Deploy (see 1 in the image below).
In the Deploy Configuration window, select the checkbox for each environment that you want to deploy the configuration to (2). You can select more than one checkbox.
Select the configuration from the list (3).
In the revision list, select which configuration revision you want to deploy (4).
Click OK.
Lasernet Developer
To deploy the latest revision of a configuration to one or more environments, follow these steps:
In Lasernet Developer, open the configuration that you want to deploy.
In the Lasernet Developer toolbar, click Deploy Commit (see 1 in the image below).
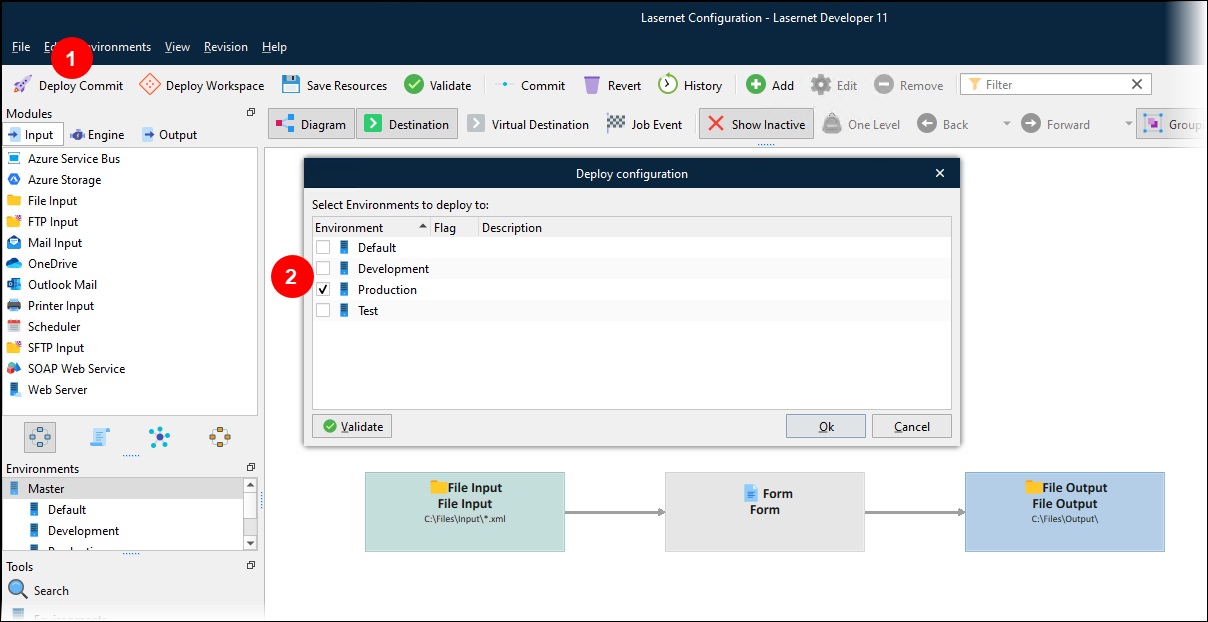
In the Deploy configuration window, select the checkbox (2) for each environment that you want to commit the latest revision to.
Note
You can only deploy committed objects. If the workspace currently contains any uncommitted objects or resources, Lasernet Developer will display a warning.

To commit objects and resources before deploying the configuration, click Commit below the warning then commit the objects and resources.
To deploy without committing the objects and resources, do not commit the changes and proceed with the following steps.
Click Ok. Lasernet Developer displays a progress bar for the deployment.
After Lasernet Config Server has deployed the configuration, click Close.
After the process is complete, the selected environments are running the configuration.