You can configure Lasernet Core to send emails that have HTML body content. Compared to plain-text emails, HTML emails have multiple advantages. You can:
Apply meaningful formatting to text.
Apply branding to the email content.
Create visually appealing content that improves the user experience for readers.
The Mail Output and Outlook Mail output modules use the content in the MailBodyHTML JobInfo (if present) to set the email body for the outgoing email.
To set MailBodyHTML’s value to the HTML that you want to use, use one of the following methods:
Directly set MailBodyHTML as a pre-JobInfo on the Mail Output or Outlook Mail output. Set its value to the HTML you want to use.
The following sections describe how to implement each of these methods.
Create an HTML Sheet in a Form and Use Sheet Combining
This method has the following main elements:
An HTML sheet in your form. In this form, you design the email HTML content. You can use rearranges to include input data in the email content.
Sheet combining enabled for the HTML sheet. When enabled, the sheet’s destinations are ignored. Instead, the sheet’s output is written to a selected JobInfo (in this case, MailBodyHTML). This JobInfo is available to the next sheet.
A PDF sheet as the form’s second sheet. This sheet generates the PDF attachment for the email. This sheet’s destination is a Mail Output or Outlook Mail output module. The job that is passed to the output module includes the MailBodyHTML JobInfo, which the output module will use as the email’s body.
Follow these steps:
Create a form, then add an HTML sheet as its first sheet and a PDF sheet as its second sheet.
On the HTML sheet, design the email’s HTML content.
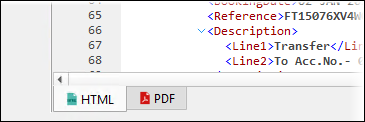
Right-click the sheet’s HTML tab (see image above), then click Sheet Options. The sheet’s Sheet Options window opens.
On the Combining tab, select JobInfo (to enable sheet combining) and then select MailBodyHTML from the JobInfo list.
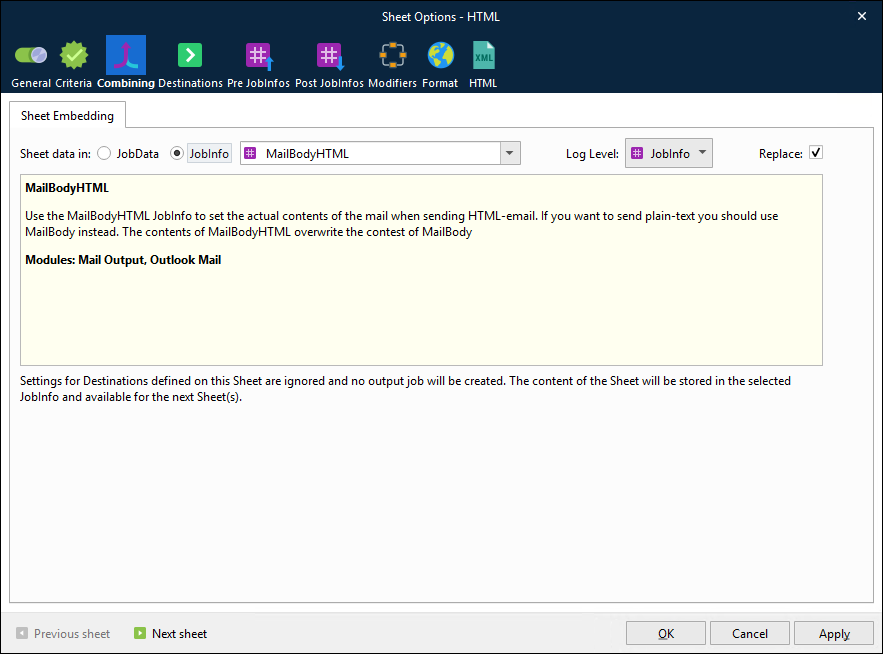
Click OK to close the window.
On the PDF sheet, design the content of the PDF that will be attached to the email.
Right-click the sheet’s PDF tab, then click Sheet Options. The sheet’s Sheet Options window opens.
On the Destinations tab, add the Mail Output or Outlook Mail output module as a destination for this sheet.
Note
The Lasernet Core workflow on the Modules page of Lasernet Developer must already include the Mail Output or Outlook Mail output module.
On the Post JobInfos tab, create Filename and MailSubject JobInfos:
Filename: Specify the file name of the PDF attachment (including the extension).
MailSubject: Specify the subject line for the email.
Click OK to close the Sheet Options window.
Save and close the form.
Directly Set MailBodyHTML as a Pre-JobInfo on the Mail Output or Outlook Mail Output
When following this method, you add the MailBodyHTML JobInfo to the output module and manually enter HTML code.
Follow these steps:
On the Modules page of Lasernet Developer, double-click the Mail Output or Outlook Mail output module in the workflow. The module’s Properties window opens.
On the Pre JobInfos tab, click Add.
In the Edit JobInfo window:
Set Type to Assign.
Select the MailBodyHTML JobInfo from the Name list.
In the Value box, enter the HTML code that you want to use.
Click Ok to close the Edit JobInfo window.
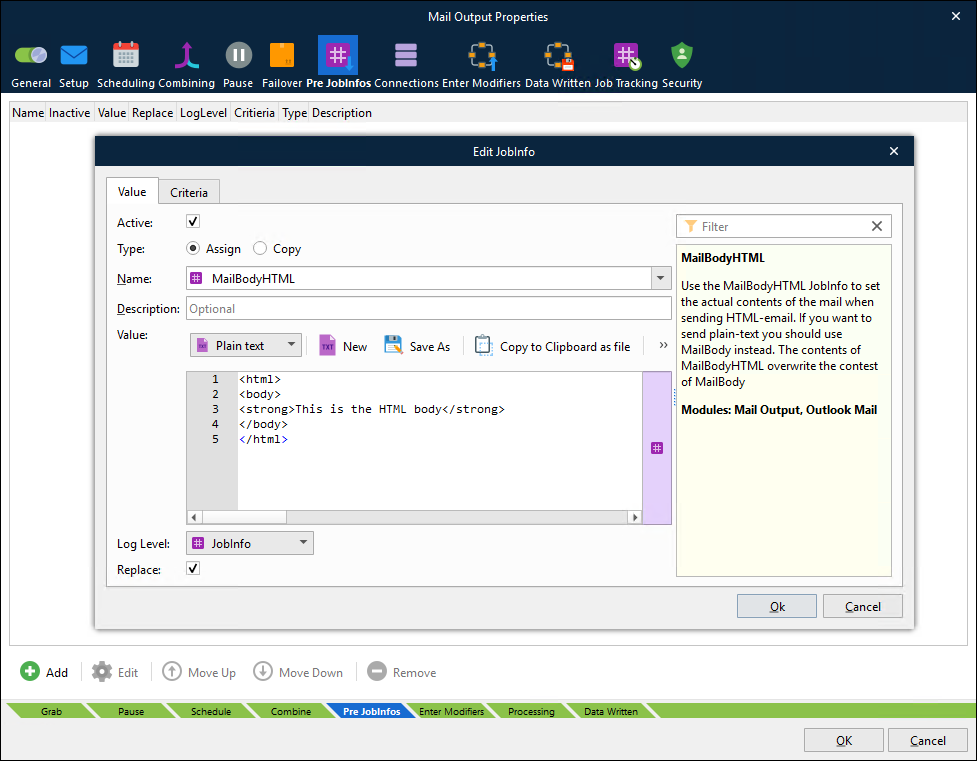
Click OK to close the module’s Properties window.
Use Dynamic Data in the Manually-Entered HTML
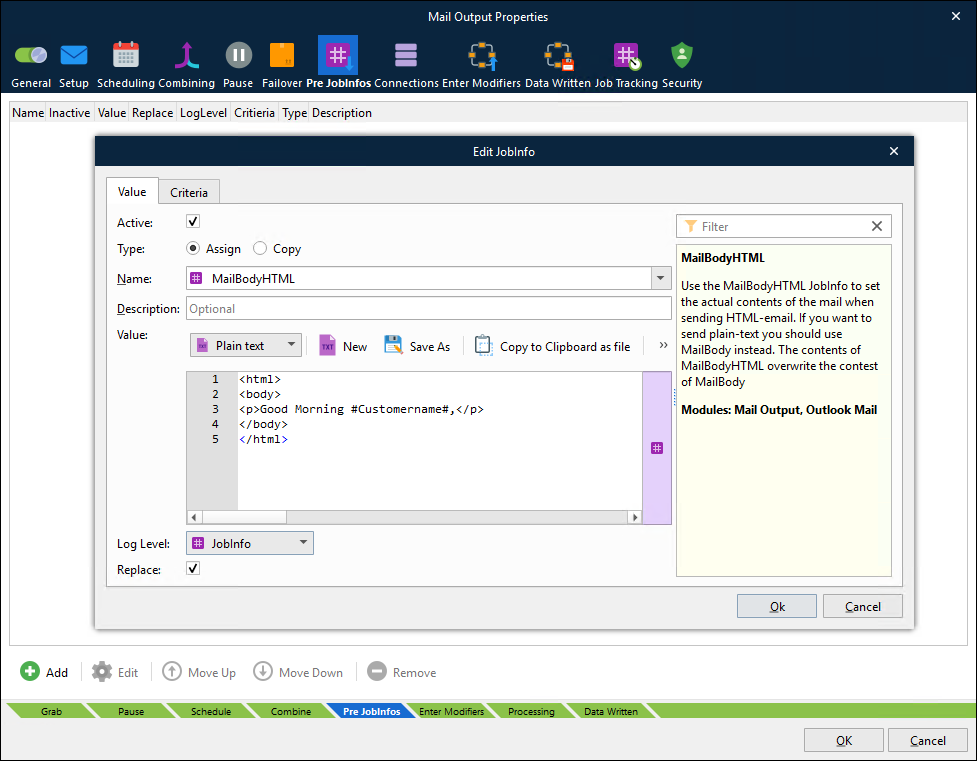
To insert dynamic data into the mail body, use a script or JobInfo substitution.
In the example below, JobInfo substitution is used to insert the CustomerName JobInfo (that was created earlier in the workflow by a form) into the HTML in the JobInfo’s Value box. To insert a JobInfo’s value, enclose its name in # (hash) characters: <p>Good Morning #CustomerName#,</p>
If the referenced JobInfo is an array, the first value in the array is inserted.
The referenced JobInfo must exist and contain a value before the Mail Output or Outlook Mail output module processes the job.