

Applies to: Lasernet Core 11
This module uploads files to OneDrive storage.
To set up the module, follow this process:
Configure Authentication
Note
Lasernet Core 11.0 and 11.1 support only user authentication.
Lasernet Core 11.2 and later support only application authentication.
Refer to the information for the version of Lasernet Core that you are using.
Lasernet Core 11.0 and 11.1
To configure the module’s authentication, follow these steps:
Click Obtain Authorization. Lasernet Developer redirects you to Microsoft to authorize OneDrive for Lasernet Core.
Enter your Microsoft credentials.
Authorize the access request. The authentication window closes automatically, and then Lasernet Developer automatically completes Display name and E-mail with your details.
This process stores an encrypted token in the configuration. This token is used later to gain access to OneDrive.
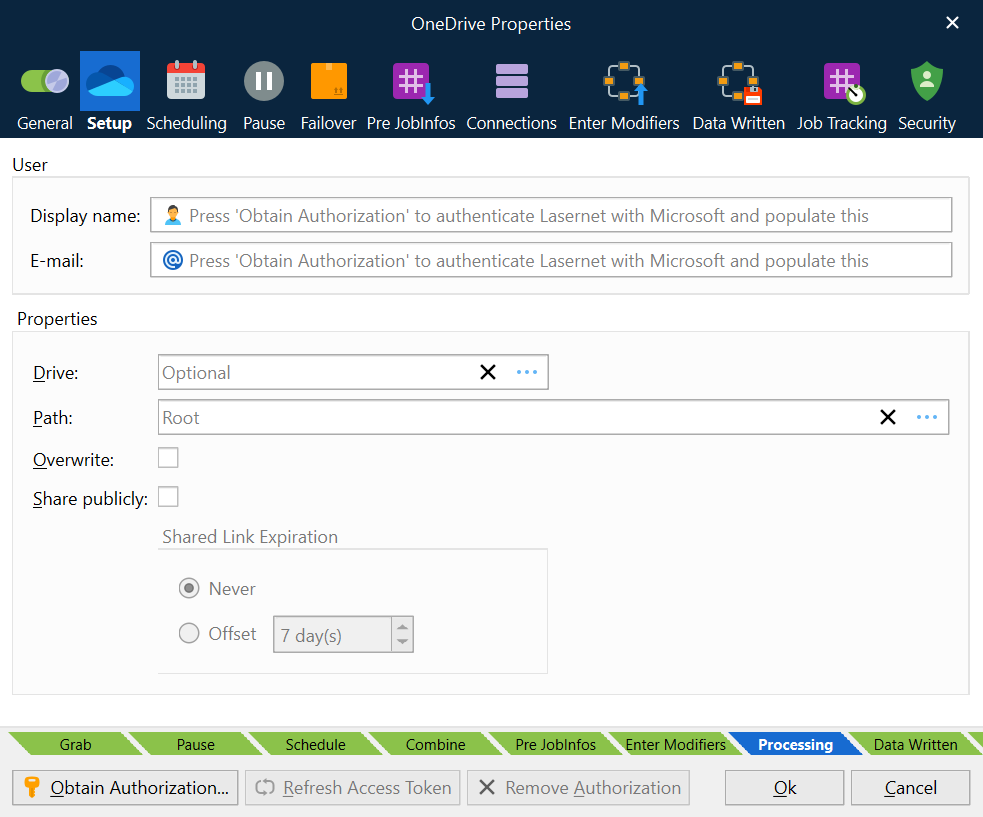
Refresh Access Token
If Lasernet Core experiences issues connecting to OneDrive, there might be a problem with its current security tokens. In some cases, the Refresh Access Token button can resolve connection issues.
Connection issues can occur for a number of reasons, including:
More than 90 days of inactivity.
The user changed their password.
Permission or security changes to the user.
Revocation of permissions.
If Lasernet Core experiences connection issues, click Refresh Access Token to obtain new tokens, then commit and deploy the Lasernet Core configuration.
If doing this does not resolve the issue, click Remove Authorization to remove the currently stored security tokens, then click Obtain Authorization to reauthenticate using the user account (which will also refresh the security tokens). Then, commit and deploy the Lasernet Core configuration.
Lasernet Core 11.2 and later
Application authentication for OneDrive communication requires that:
Lasernet Core is registered as an app by an Entra ID admin.
In Entra ID, the app has the
Files.ReadWrite.Allpermission.The Entra ID admin must provide a ClientID and Client Secret for the module to use to sign in.
Important
Before implementing application authentication for this module, see Understand the Security Implications of Application Authentication for Outlook Mail, OneDrive, and SharePoint Modules.
To configure the module’s authentication, follow these steps:
In the Tenant Domain box, click the … (three dots) button to specify your domain (for example, microsoft.com).
Enter the correct Client ID and Client Secret.
Click Test Connection.
.png)
Note
If the client ID and client secret change in the future, repeat the steps above, then commit and deploy the Lasernet Core configuration.
At any time, you can click Test Connection to test that the currently provided credentials are valid. When you click the button, Lasernet Developer attempts to use those credentials to obtain a new access token.
Important Upgrade Information
If you are upgrading from Lasernet Core 10, Lasernet Core 11.0, or Lasernet Core 11.1, and your configuration includes a OneDrive Output module using user authentication, you must update it to use application authentication instead.
Also, you must modify the module to identify the user whose OneDrive to connect to. In earlier versions of Lasernet Core, the module could connect to the OneDrive of the user that the module authenticated as. In Lasernet Core 11.2 and later, the module authenticates as an application; as a result, you must use the module’s User Principal Name property to identify the user.
Provide Values for Other Module Properties
Refer to the information for the version of Lasernet Core that you are using.
Lasernet Core 11.0 and 11.1
To complete the configuration for this module, follow these steps:
Set Drive and Path to specify the location this module will upload files to. If Drive is not set, the module uses the specified user’s default OneDrive location.
Select Overwrite to allow this module to overwrite files that already exist in the destination.
If relevant, select Share Publicly and use the accompanying options.
Lasernet Core 11.2 and later
To complete the configuration for this module, follow these steps:
Decide whether the module will connect to a specific user’s OneDrive or to another OneDrive location that the app registration has access to. Then, follow the relevant instructions:
User’s OneDrive: Enter an identity (as a Microsoft Entra ID email-style login identifier) as the User Principal Name (UPN). The UPN identifies the user whose OneDrive this module will connect to. If you enter a UPN, you do not select a drive.
Other OneDrive location: In the Drive box, click the … (three dots) button to select from a list of other OneDrive drives that the app registration has access to.
Use Path to specify the folder this module will upload files to.
Select Overwrite to allow this module to overwrite files that already exist in the destination.
If relevant, select Share Publicly and use the accompanying options.
JobInfos
Set this JobInfo as a Boolean value to overwrite the setting for the Share publicly property. | |
URL that the publicly shared file returned after upload. The JobInfo is only set when Sharing publicly is enabled on the module’s Setup tab. | |
OneDriveURLExpiration | This JobInfo overwrites the offset of the Shared Link Expiration defined in the OneDrive module. An expiration time for a shared document must be defined in the format |