
You can add barcodes that are based on input data or fixed text.
Note for Lasernet Core 11 and 10 users (not Lasernet Essentials / Professional / Advanced)
The method for adding a barcode to a form design depends on the form’s output data format.
Steps
Follow the steps that correspond to the form’s output data format:
EMF-Based Output (Lasernet Core 11, Lasernet Core 10, and Lasernet Essentials / Professional / Advanced)
Note
The following information applies only to PDF, TIFF, and EMF sheets whose underlying format is EMF.
A large range of built-in linear barcodes and 2D barcodes (such as QR codes) can be inserted into the form design. A barcode can be inserted and delivered as part of print output or embedded into PDF or TIFF files for archiving, mailing, or other purposes.
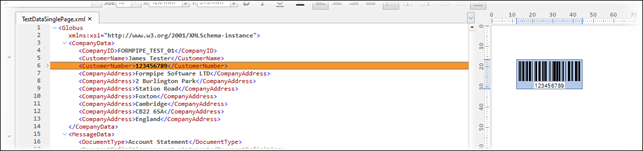
The data to encode into a barcode can be read from the input data (to create a rearrange).
Built-in barcodes are inserted as images and are included as a standard feature in Lasernet Core.
Supported Barcode Types
Lasernet Core can generate a range of linear and 2D barcode types.
Linear Barcodes
Lasernet Core supports the following types of linear barcodes.
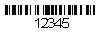
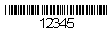
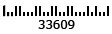
Code 128 - Alpha-numeric barcode with three character sets. Supports Code-128, GS1-128 (Formerly known as UCC/EAN-128) and ISBT-128. | |
| Code 39 - An alpha-numeric bar code that encodes uppercase letters, numbers and some symbols; it is also referred to as Barcode/39, the 3 of 9 Code and LOGMARS Code. |
| Code 93 - Similar to Code 39, but requires two checksum characters. |
| Codabar - A numeric barcode encoding numbers with a slightly higher density than Code 39. |
| Interleaved 2 of 5 - The Interleaved 2 of 5 barcode symbology encodes numbers in pairs, similar to Code 128 set C. |
| POSTNET - Used by US post offices for mail delivery and tracking. |
| UPC, EAN & GTIN - This is one of the most common barcode types. It is used to encode the GTIN and also used to create JAN, ISBN and Bookland barcodes. |



Note
For detailed information about these barcode types, including descriptions of relevant settings, see Linear Barcodes in Barcodes in Lasernet Developer.
2D Barcodes
Lasernet Core supports the following types of 2D barcodes.
| DataMatrix: A matrix symbol that allows very efficient encoding of data into a square barcode with error correction. |
| MaxiCode: Used primarily by UPS to route and track packages. |
| PDF417: This unique 2D barcode type is commonly used on FedEx shipping. |
| QR Code: A matrix symbol that is capable of encoding binary and ASCII characters. Asian/Kanji characters are not supported.
|
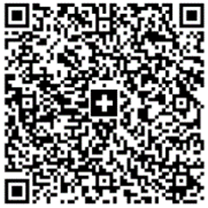
| Swiss QR Code: A matrix symbol similar to the QR code, with a Swiss cross in the center. Used for invoice documents in Switzerland. For more information about the Swiss QR Code standard, refer to the Swiss Implementation Guidelines for the QR-bill: https://www.paymentstandards.ch/dam/downloads/ig-qr-bill-en.pdf |


Note
For detailed information about these barcode types, including descriptions of relevant settings, see 2D Barcodes in Barcodes in Lasernet Developer.
Symbology Barcodes (TrueType Fonts)
Applies to: Lasernet Core 11 and 10 (not Lasernet Essentials / Professional / Advanced)
Symbology barcodes are inserted as a TrueType font. Lasernet Core is capable of calculating the symbology for a list of linear, insert stop, start code, and checksums. The symbology for a TrueType font can only be maintained via profiles; it cannot be added in the settings of a barcode rearrange.
The following barcode types are supported:
2 of 5 Interleaved
Code 3/9
Code 128
EAN 8/13
Note
For detailed information about this feature, including descriptions of relevant settings, see Linear Barcodes (Symbology and TrueType Fonts) in Barcodes in Lasernet Developer.
Note
Inserting barcodes via TrueType fonts is compatible with barcode fonts from www.elfring.com, which must be bought and installed separately.
Add a Barcode
To add a barcode to the form design, follow these steps:
In the Developer toolbar, click Barcode (see “a” in the image below).
Tip
Click the downward-facing arrow on the Barcode button to check whether Built-in or Symbology is selected. Select Symbology only if you want to use font-based Symbology barcodes (see Symbology Barcodes (TrueType Fonts) above). In all other cases, ensure that Built-in is selected (to create barcodes using Lasernet Core’s built-in linear and 2D barcode capability).
Your next action depends on whether you want to create a barcode from input data. In either case, Lasernet Form Editor adds a No barcode assigned yet label to the form (b).
Create a barcode from input data: In the input data area, drag the mouse pointer across the data that you want to create a barcode from. Or, for some input data types (such as XML), you can click the input data value. This creates a barcode form item whose data comes from one rearrange.
Tip
To create a barcode whose data comes from multiple rearranges, you can merge barcode form items. Follow these steps:
Repeat the instruction above to create one barcode form item for each rearrange you want the barcode to include.
Click one of the barcode items, then press Ctrl and click the other ones.
Right-click one of the barcode items, then click Merge output. The Form Editor merges them into a single barcode form item. In the barcode form item’s Edit Barcode window, the Objects table (on the Objects tab) contains mutiple rearrange objects. You can click Move Up and Move Down to change their order in the object list, which affects the resulting barcode.
Manually add data later: In the form design area, click the position in the form design where you want to insert the barcode.
Double-click the No barcode assigned yet label. The Edit Barcode window opens.
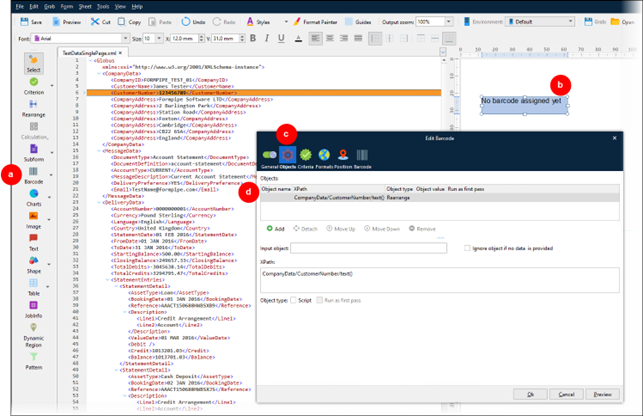
Click Objects at the top of the window (see “c” in the image above). In this step, you specify the barcode data. The rows in the Objects table (d) specify the data that the barcode encodes.
If you created the barcode from input data, check that the Rearrange object specifies that the correct data is included.
Otherwise, by default, Lasernet Form Editor will add a “fixed text” object to the barcode. Manually change the default “New Insert Text” value to the data that you want the barcode to encode.
Or, to encode data from another source (instead of manually entering it or using input data):
Click the Fixed text object.
Click Remove (below the Objects table).
Click Add.
Change the Object type of the new object so that it adds data from another source (for example, you can select JobInfo or Script). Then, provide any necessary information (such as the JobInfo name).
Tip
Regardless of the source of the barcode data, you can add fixed text to it. For example, for some types of barcode, you might need to add a “Fixed text” object that prefixes an “application identifier” to the barcode data. For more information and examples, see Application Identifiers for Code 128 and Application Identifiers for UCC128 in Barcodes in Lasernet Developer.
To add fixed text to existing barcode data:
Click Add (below the Objects table).
Check that Object type is Fixed text.
Change the text in the box at the bottom of the Edit Barcode window.
Use the Move Up and Move Down buttons to appropriately change the order of the objects.
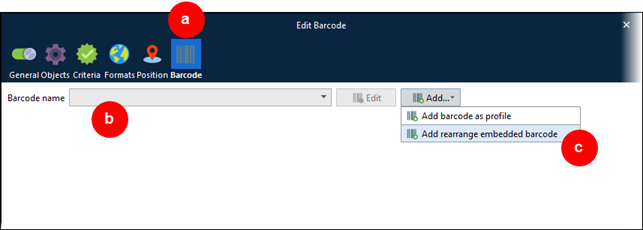
Click Barcode at the top of the window (see “a” in the image below). From this step onwards, you configure the barcode itself.
For Lasernet Core 11 and 10 only (not Lasernet Essentials / Professional / Advanced): Your next action depends on whether you want to use a barcode profile:
To use an existing barcode profile (using built-in Lasernet Core barcode generation): Select the profile from the Barcode name list (see “b” in the image above), and then click Edit if you want to modify the profile.
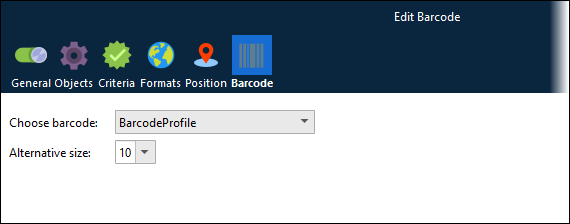
To use an existing barcode profile (using symbology TrueType fonts to generate barcodes): Select the profile from the Choose barcode list (see image below). Optionally, change the Alternative size.
To create a new barcode profile (using built-in Lasernet Core barcode generation): Click Add, and then select Add barcode as profile. This option enables you to create a barcode profile, which is a collection of barcode settings. Profiles and their settings are maintained in the Barcode Profile list (in Lasernet Developer), and the profiles are available when you create barcodes in other forms.
If you do not want to use a barcode profile: Click Add, and then select Add rearrange embedded barcode (see “c” in the image under step 5). Barcode settings will be embedded in this form and apply to this barcode only. This option uses built-in barcode generation.
Note
For more information about barcode profiles, see Barcodes in Lasernet Developer.
If using built-in Lasernet Core barcode generation:
Click Linear or 2D beside Barcode type (see “a” in the image below). Then, select a barcode type from the Symbology list (b).
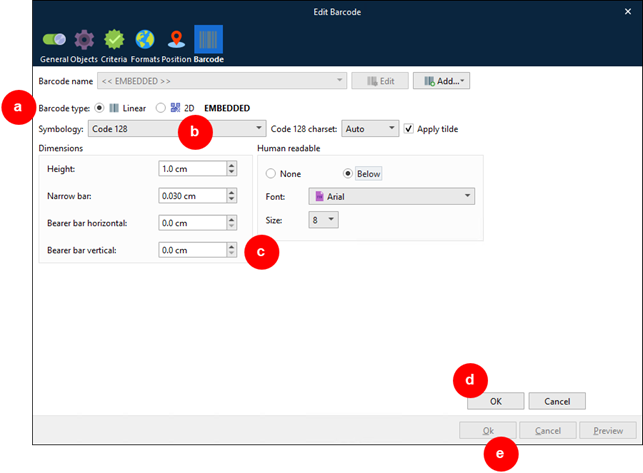
Use the rest of the settings on the page (c) to configure the barcode.
Note
Settings vary depending on barcode type and follow industry standards. See Settings Reference for more information.
For Lasernet Core 11 and 10 only (not Lasernet Essentials / Professional / Advanced): If you selected Add barcode as profile earlier, click OK to close the Built-in Barcode Profile window.
Click OK at the bottom of the Barcode page (d) to accept the settings.
Click Ok at the bottom of the Edit Barcode window (e). Lasernet Form Editor creates the barcode in the form design.
Add Custom Images to QR Codes
Note
This feature is available in Lasernet Core 11 and Lasernet Essentials / Professional / Advanced.
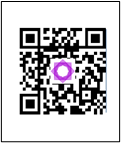
You can add a custom image to the center of your QR code. This does not affect the readability of the QR Code.
Note
This feature applies only to sheets whose underlying output type is Enhanced Metafile (EMF). Also, it applies only to QR codes; it does not apply to Swiss QR codes.
Add an Image to a QR Code
Before you begin, add a QR code to the form design, then add the image to the form design. The following image formats are supported:
WMF
SVG
PNG
TIFF
JPEG
To add the image to the QR code, follow these steps:
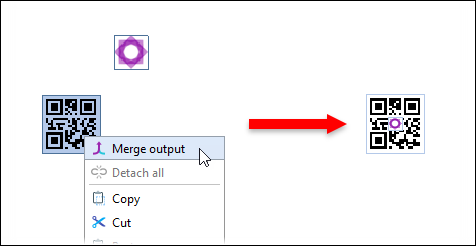
Click the image.
Press and hold Ctrl, then click the QR code. The QR code and image are both selected.
Right-click the QR code, then click Merge output.
Use Multiple Images with a QR Code
A QR code can have multiple images merged into it. But, only one image can be displayed in the QR code.
For example, if a company operates two distinct brands, the image that they want to add to the QR code used in a particular document might depend on the brand that the customer (who will receive the generated document) uses. If the name of the brand that they are a customer of is included as text within the input data, the company could add two images to the QR code, then base the criteria (applied to each image) on the brand name data in the input data.
If you merge multiple images into the QR code, more than one image will be listed in the Logo list (see image below). If multiple images have criteria that are satisfied, the image that appears highest in the Logo list will be used.
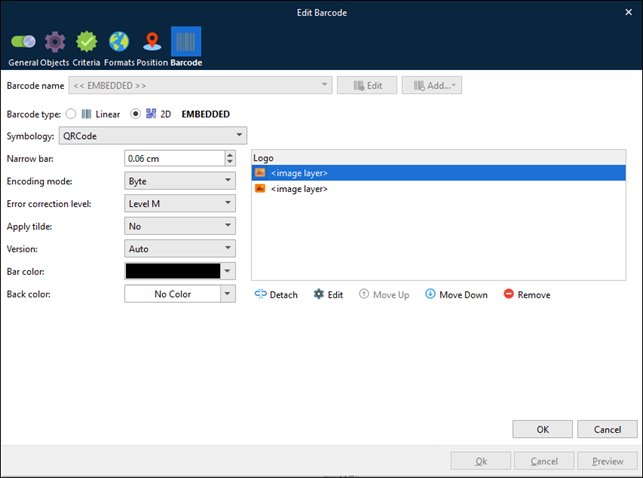
To change the order of images in the list:
Double-click the QR code to open the Edit Barcode window.
If the QR code configuration options and Logo list are grayed out, click Edit (beside the Barcode name list).
Select an image in the list.
Click Move Up or Move Down.
To add criteria to an image in the list:
Double-click the QR code to open the Edit Barcode window.
If the QR code configuration options and Logo list are grayed out, click Edit (beside the Barcode name list).
Select an image in the list.
Click Edit (below the Logo list).
In the Edit Image window, click the Criteria tab.
Create the image criteria for the image in this window
Click OK.
Separate an Image from a QR Code
To separate a QR code and an image:
Double-click to open the Edit Barcode window.
Click the Barcode tab.
Select the image in the Logo list.
Click Detach.
Delete an Image from a QR Code
To delete an image from a QR code:
Double-click to open the Edit Barcode window.
Click the Barcode tab.
Select the image in the Logo list.
Click Remove.
Settings Reference
The following links provide settings reference information to help you to configure barcodes.
Linear Barcodes (Built-in Lasernet Core Barcode Generation)
See Linear Barcodes in Barcodes in Lasernet Developer.
2D Barcodes (Built-in Lasernet Core Barcode Generation)
See 2D Barcodes in Barcodes in Lasernet Developer.
Linear Barcodes (Using Symbology TrueType Fonts)
See Linear Barcodes (Symbology and TrueType Fonts) in Barcodes in Lasernet Developer.
Rich-Text-Based Output (Lasernet Core 11 and 10 Only)
Note
The following information applies only to DOCX, PDF, and HTML/XHTML sheets whose underlying format is rich text.
Click the Barcode tool. The Form Editor will insert a barcode at the cursor position in the form design area.
To configure the barcode, click it, then click the Properties (cog/gear) icon in the toolbar.