Applies to: Lasernet Core 10
General
The name of a server has to be added in the configuration setup. Use the name of the computer where the Lasernet Core 10 service is installed.
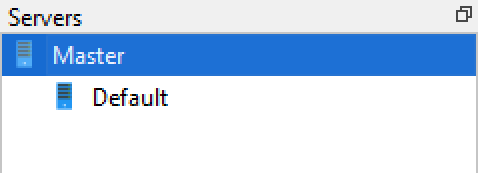
Server names
When entering server names, only a specific set of characters are allowed. The set is described in RFC 952 (http://www.faqs.org/rfcs/rfc952.html): (A-Z), digits (0-9), minus sign (-), and period (.) plus one addition: the underscore (_) character, which is commonly, used in NETBIOS names. Other special characters such as: ! @ # $ % ^ & ' ) ( – { } ~ [space] are not allowed in computer names in Lasernet Core. The reason for not allowing these characters is the transition to Active Directory in Windows 2003 which uses the DNS-naming scheme, which prohibits use of these characters. NETBIOS support in Windows 2003 exists only for backwards compatibility. Please note that it is not possible to use an IP-address as computer name.
Master server
When you create a new configuration, Lasernet Developer will automatically create a Master server for you. This means that all modules etc., that are added for this computer will be inherited by all other computers in the configuration. This makes it easier to share settings between multiple machines by placing only those components that need to differ under the corresponding server.
Managing server
Choose the Server tool to show the list of servers.

Then press the Add tool button to add a new server.
Press Ok to confirm the ”Server name” or Cancel, if not accepted.
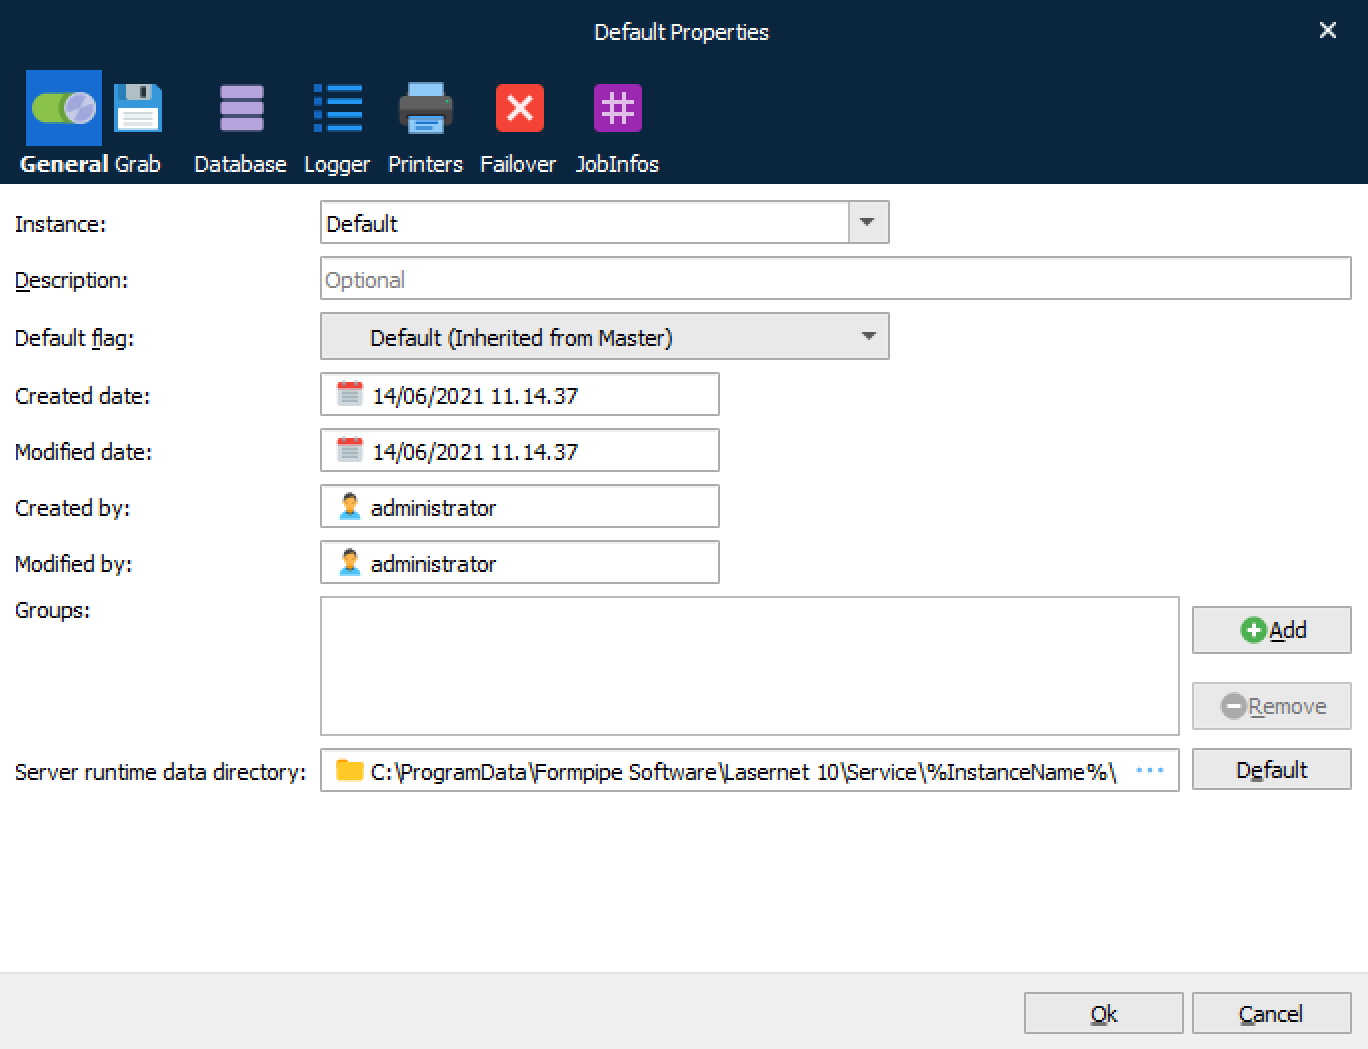
To edit the properties of a Server Setup, right-click the Server Name and in the drop-down menu select command “Edit...”
| Instance | The instance name is linked to the server name and port number set on the Lasernet Config 10 server. Click the dropdown button to select an existing instance name.
|
| Description | An optional field used to describe the server and settings. |
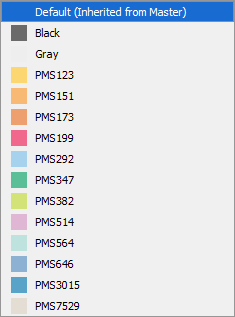
| Default Color | This parameter is only used for the visualization of modules in the Lasernet Developer. The default background color setting is used when drawing/listing added modules in diagram or view list mode. The default color is a light gray, but can be set to any color available in the pre-defined list.
A color can be defined for each server to make it easier to see which modules are connected to which server. |
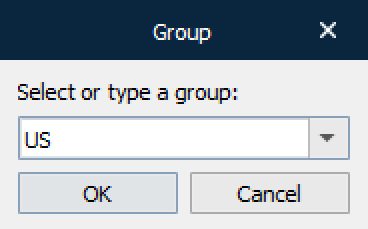
| Groups | A server can belong to a user defined group or none. Click Add to connect the server to a group or Remove if you want to exclude the server from an added group.
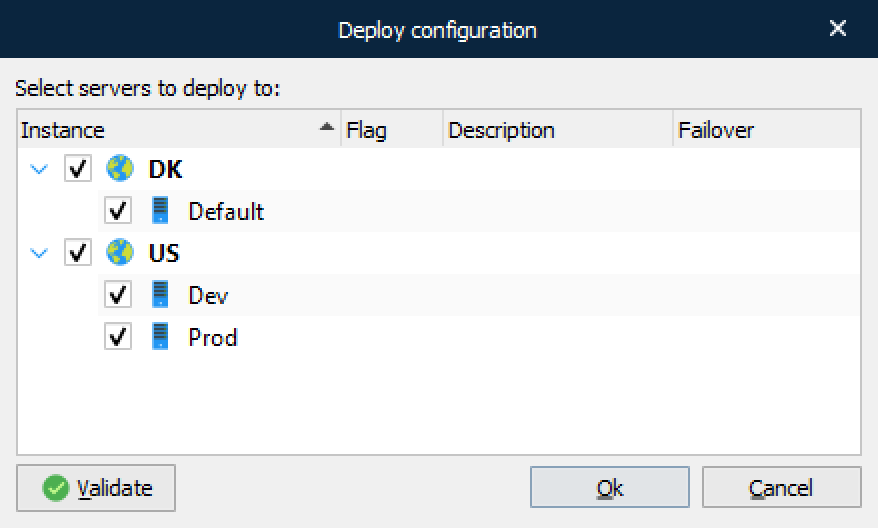
Select an already existing group in the configuration or type the name of a new group. Grouping names are used when updating a configuration. Instead of selecting a specific server name, a group of servers can be selected.
|
| Server runtime data directory | Location to store temporary files, failed jobs, scheduled jobs and combined jobs. This folder is created on the server, which can be different from the machine where Lasernet Developer is started. |

Printers
Any printer input port added to the Lasernet Core configuration is added as a Lasernet Printer Port in the Windows Spooler System by default, when deploying a configuration to a Lasernet Core environment.
The Lasernet Core environment is also able to automatically create the actual printer queues in Windows and connect them to the respective printer port if a “Master input printer” is defined and “Create input printers in Windows on startup” is activated in the Master Printer tab.
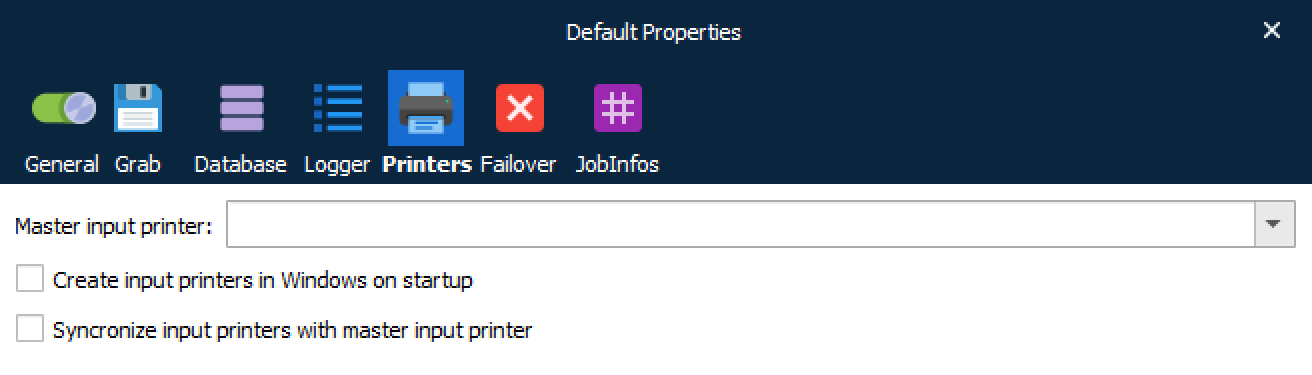
| Master input printer | The name of the Windows printer which is used as the master printer, when creating or synchronizing input printers. Printer queue settings defined for the master printer will be copied to new or synchronized input printers. |
| Create input printers in Windows on startup | Any Lasernet Core printer input port defined in the configuration, will automatically be created as a Windows printer queue during service startup. |
| Synchronize input printers with the master input printer | Any Windows printer queue created by Lasernet Core, will automatically be synchronized with the settings saved in the master input printer, during service startup. |
This feature ensures that any Lasernet Core input printer that is added to the configuration is always available on the Windows printer server. If a user makes breaking changes to the Windows printer queues by mistake, Lasernet Core is able to synchronize and reconfigure the settings, as defined for the master input printer.
This feature is also useful if Lasernet Core contains a large list of printer input ports. You only have to manually create the master input printer in the Windows printer environment, with the required settings for the type of printer driver, paper format, share settings, and so on. During service startup, Lasernet Core will then automatically create a Windows printer queue for any of your listed printer input ports in the configuration and apply the configured settings from the master printer.
Please note that the Device Settings configured in the printer queue settings will not be synchronized as they are not a part of the basic printer device mode settings.
Database
Each job has a selection of system created JobInfos (metadata), which are stored in the database during the processing of a job. When a job has successfully been processed, the metadata is deleted and no references for the job are available afterwards.
Paused, scheduled and failed jobs are stored temporarily in the database until they are released and processed successfully. When jobs are in temporary storage they can be viewed and managed from the Lasernet Client or they can be tracked the jobs and view the job flow in Diagram > Job Mode.
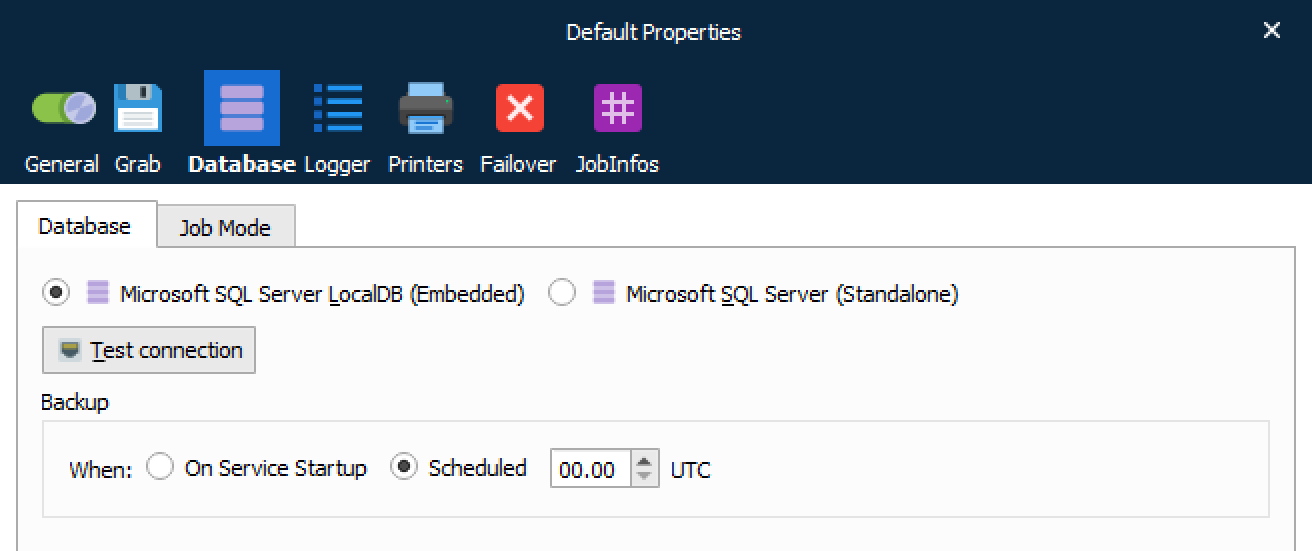
As an alternative to the embedded Microsoft SQL Server LocalDB database, you can connect to a either a Microsoft SQL Server Express or Microsoft SQL Server, for storing jobs.
Job Mode
If Job Mode is not activated (default), jobs are not stored in the database for a specified retention time.
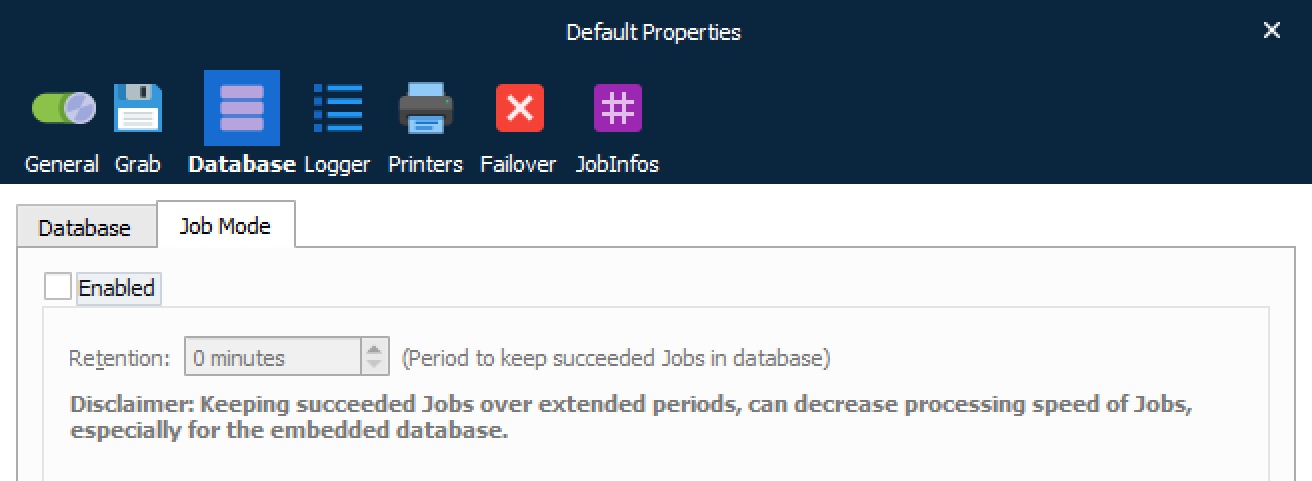
This is the fastest way to process jobs through Lasernet Core. If the value for Retention is set to 0 (zero) minutes, information about the job is stored in the database as long as the job is running, but deleted immediately after it is successfully processed. If you want to keep JobInfos in the database for successfully processed jobs, you must set a positive Retention value (in minutes). Only JobInfos (metadata) will be saved, not the physical job (JobData). Archiving must be enabled to save a copy of the JobData.
When the retention is reached for a completed job, metadata will automatically be deleted from the database. Job retention has no effect for paused, scheduled and failed jobs. They will not be removed from the database, before they are deleted manually or released from the Lasernet Client and processed successfully. More info about how to view, release or delete jobs can be found in the manual for the Lasernet Client.
Disclaimer: Keeping completed jobs over extended periods, in the embedded database, can decrease the processing speed of jobs.
JobInfo Profiles and Security Roles
More information can be found in JobInfo Profiles and Security Roles and Security Profiles, regarding how to set up configuration rules for the paused, scheduled, failed and succeeded jobs. JobInfo profiles are required to specify the metadata selection to be saved with each job. Security Roles are required to specify which user/group is allowed to view and manage saved jobs in the database from the Lasernet Client.
Logger
During processing, the Lasernet Core service will generate log messages which can be used to determine processing status and forms flow within the Lasernet Core environment.
Log data will be sent to the Lasernet Monitor, which is a useful administrative tool for viewing the live log. Read the Lasernet Monitor 10 Guide for more information on how to use the Lasernet Monitor.
Local File Log
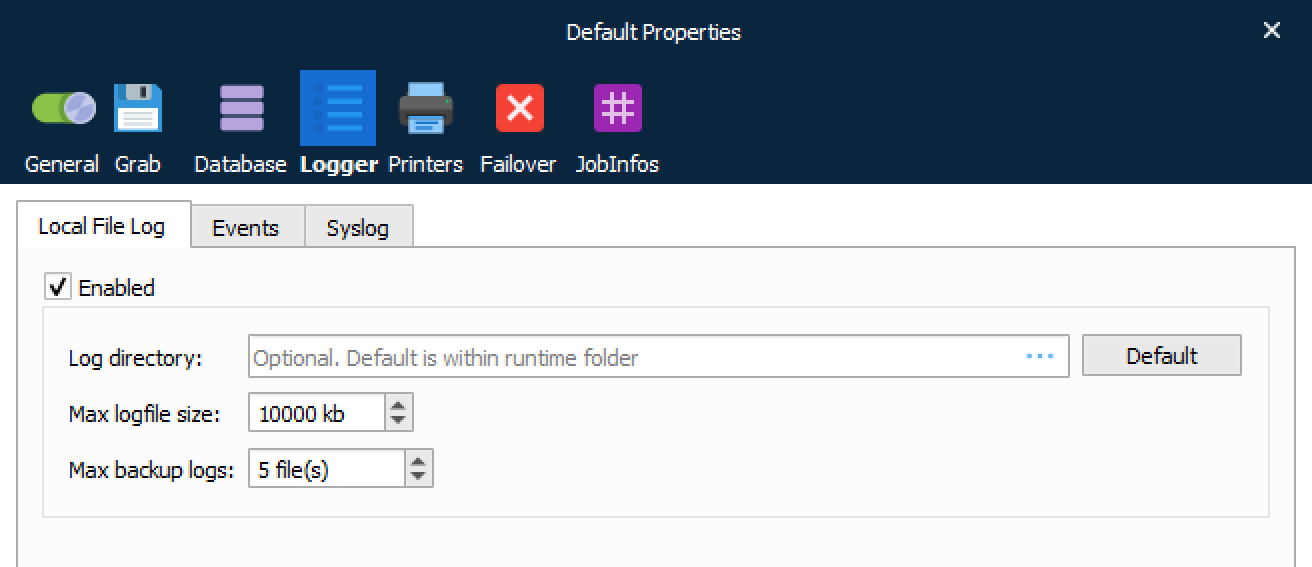
Log data can also be sent to log files, in a user defined directory, containing the same information as sent to the Lasernet Monitor. The log files will contain historical information about processes and forms flow, which can later be opened from the Lasernet Monitor.
| Log directory | The directory in which to save the log file. |
| Max log file size | Maximum file size for the log file. |
| Max backup logs | Maximum amount of log files. |
| Enabled | Turn on/off logging to local file log. |
We recommend that you use a local drive as a log directory for faster processing. In the chosen directory, the file named Lasernet.lnlog contains the newest log information. When the log file has reached the max log file size, it will be renamed to Lasernet.1.lnlog and Lasernet.1.lnlog will be renamed to Lasernet.2.lnlog etc.
The default settings cap the maximum log file size to 10,000KB. With five (5) full backup logs, this will result in a total of 50,000KB of log data.
Log these events
Each system defined log line is associated with a log event type. You can configure the event type you want to save in the log file. By default, Debug mode is not activated, since this is primarily used for developers to store very detailed information about a processed job.
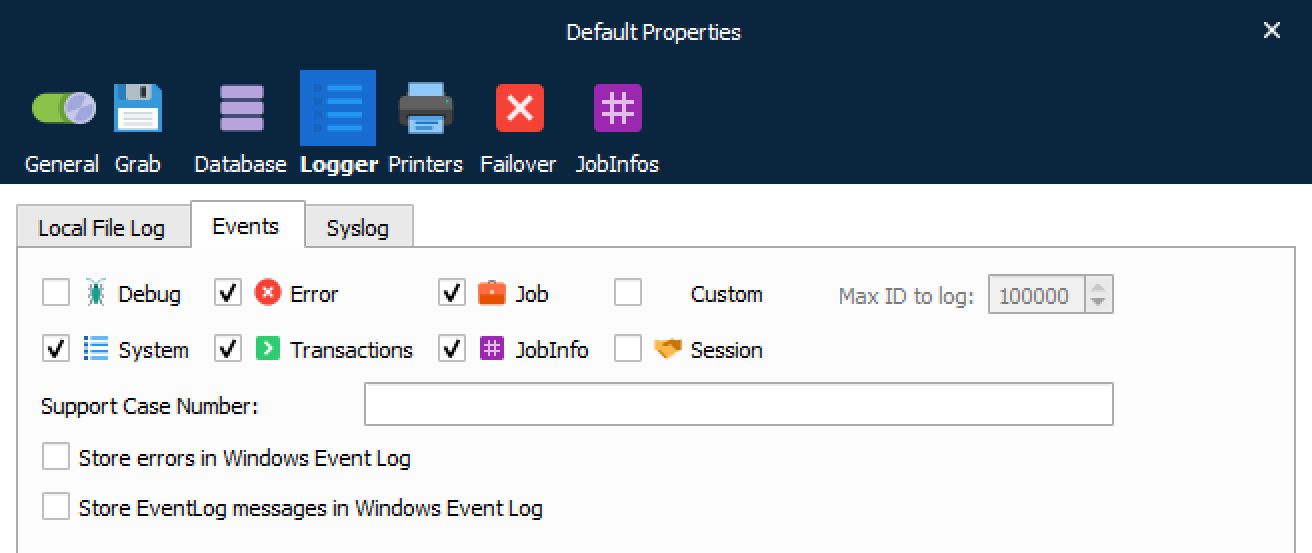
| Debug | Events that generally produce too much noise to be included in EID_JOB or EID_SYSTEM, but which may provide extra help tracking down a problem or a possible bug in the system |
| Error | Fatal errors that prevent a job from being successfully received, handled or sent to an output port. |
| Job | Log data from the modules as a job passes through them. The Overlay Engine may comment on what overlays are put on or what JobInfo is found. The Forms Engine logs what form was chosen. Information that helps show why the job passes through the system as it does. |
| System | Boot and shutdown messages. License information about modules. |
| Transaction | Log information that shows how a job is received by the input port, handled by the engines and committed by output ports. Mostly produced by the Job class and the transaction manager. |
| JobInfo | Set JobInfo log events. |
| Session | This option applies to all modules which communicate with other systems to intercept the session log. Sessions are logged for: HTTP, FTP(S), SFTP, POP3, IMAP, File Retriever (FTP(S), SFTP, HTTP), SharePoint and Web Service. |
| Custom (Max ID to log) | User defined log messages. By setting “MAX ID to log” you can choose to log only event ID’s, lower than the defined number. |
| Support Case Numbers | This field is for internal use only. Allows an individual or list of support case numbers, separated by a comma, to be entered. |
Syslog
Server option to activate the ability to log to a remote Syslog server via UDP (as per the RFC5424 standard).
All log events, selected for logging in the Events tab, are forwarded to Syslog server. Syslog UDP packages are limited to 500 bytes, which leave ~480 bytes for the message itself (depending on machine name of the Lasernet Core server etc.).
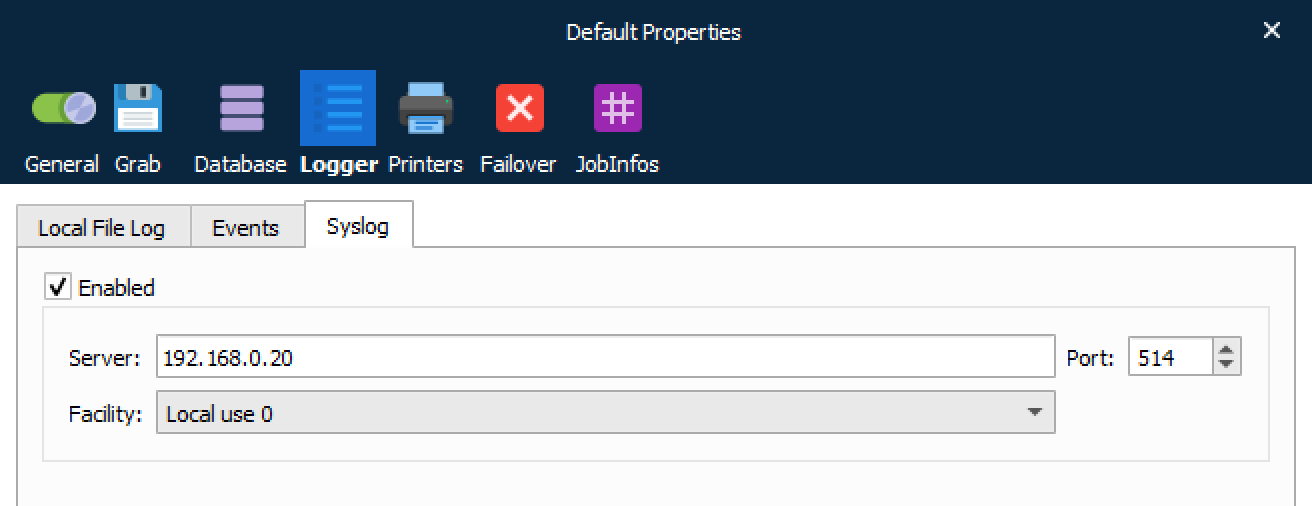
| Server | The name or IP address of the Syslog server. |
| Facility | A facility code is used to specify the type of program that is logging the message. Messages with different facilities may be handled differently. The list of facilities available is defined by RFC 3164. |
Facility codes
The mapping between facility code and keyword is not uniform between operating systems and different syslog implementations.
| Facility code | Keyword | Description |
|---|---|---|
| 0 | Kernel | Kernel messages |
| 1 | User-level | User-level messages |
| 2 | Mail system | |
| 3 | System daemons | System daemons |
| 4 | Security/authorizations | Security/authorization messages |
| 5 | Syslogd/internal | Messages generated internally by syslogd |
| 6 | Line printer subsystem | Line printer subsystem |
| 7 | Network news system | Network news subsystem |
| 8 | UUCP subsystem | UUCP subsystem |
| 9 | Clock daemon | Clock daemon |
| 10 | Security/authorizations | Security/authorization messages |
| 11 | FTP daemon | FTP daemon |
| 12 | NTP subsystem | NTP subsystem |
| 13 | Log audit | Log audit |
| 14 | Log alert | Log alert |
| 15 | Clock daemon | Scheduling daemon |
| 16 | Local use 0 | Local use 0 (local0) |
| 17 | Local use 1 | Local use 1 (local1) |
| 18 | Local use 2 | Local use 2 (local2) |
| 19 | Local use 3 | Local use 3 (local3) |
| 20 | Local use 4 | Local use 4 (local4) |
| 21 | Local use 5 | Local use 5 (local5) |
| 22 | Local use 6 | Local use 6 (local6) |
| 23 | Local use 7 | Local use 7 (local7) |
Severity
| Syslog | EventID | Description |
|---|---|---|
| Error | EID_ERROR | Fatal errors that prevent a job from being successfully processed |
| Warning | EID_WARNING | Warnings |
| Informational | EID_TRANSACTION EID_SYSLOG EID_CUSTOM |
Transaction log for JobEngine Customized logging for Syslog server only Customized logging for Lasernet Core |
| Debug | EID_DEBUG EID_JOB_PUBLIC EID_JOBLOG |
Debug logging Log data from the modules as a job passes |
| NOT logged | EID_IMMEDIATE EID_EVENT_LOG EID_NOLOG |
EventIDs in this category not logged to the Syslog server |
Any other EventIDs are logged as Informational.
Failover
A failover environment must consist of two physical Lasernet Core servers.
Primary server
Secondary server (backup server)

Add two servers to the list and ensure that your firewall settings on the Windows Server will allow the Lasernet Core services to communicate on the selected port number.
In a failover scenario you must ensure that your input ports are still able to receive data delivered from your clients. It is important to design your configuration and 3rd party connections with this in mind.
Read the section about recommendations for the setting up your database, embedded vs. Microsoft SQL Server, in Database.
Sharing the configuration
Go to the Failover tab and select which server is the secondary server (backup server) for the primary server.
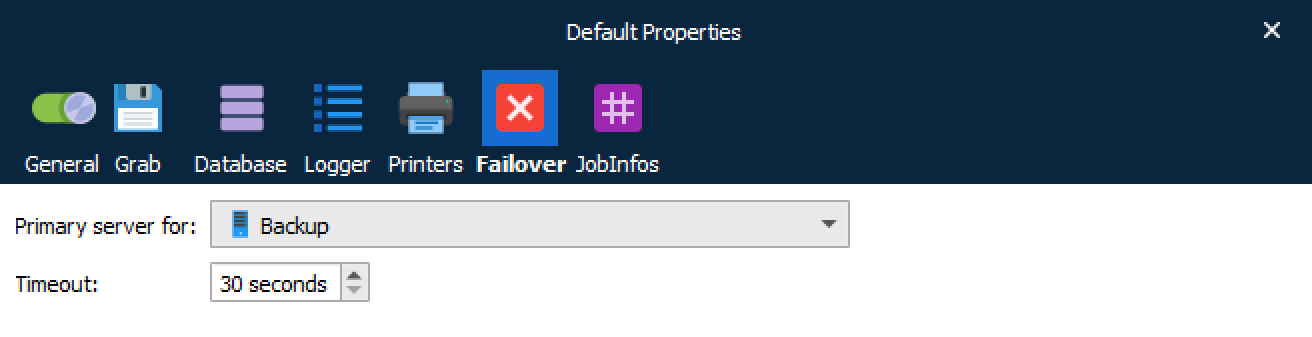
The primary server and secondary will share the same configuration, apart from the setting which determines which server has primacy.
The secondary server will have its input ports in passive mode unless the connection to the primary server is lost. Then the secondary server will activate its input ports until the primary server is ready to accept jobs again.
One or more Lasernet Developer clients can connect to the servers, query them for status and update their configuration.
Startup
Both of the servers will always start with their input ports set to passive.
Startup of Primary Server
The primary server will send a CONFIGURATION to the secondary server and activate its input ports when it receives a response or when the instruction times out. If the instruction times out, new attempts will be made at sending the configuration until a response is received.
Startup of Secondary Server
The secondary server will send a GETCONFIGURATION to the primary server. If that instruction times out the secondary server will activate its input ports. Otherwise, it will resume normal operation.
Normal Operation
The primary server is responsible for regularly sending the ACTIVE heartbeat to the secondary server. The secondary server will listen for heartbeats from the primary server. As soon as no heartbeat is received during a timeout period, the secondary server will assume that the primary server is not operating, and activate its input ports, until an ACTIVE or CONFIGURATION is received from the primary server.
Abortive Primary Restart
The failover system is primarily designed for handling the unintentional loss of the primary server. When the primary system experiences a power loss or network failure, it is classified as an abortive primary stop. Whenever the system is restarted, it must synchronize with the secondary server to get back control over incoming jobs.
Graceful Primary Restart
When there is a need to stop the primary server e.g., when the computer must be restarted, the primary server can communicate this to the secondary server, which then activates its input ports without the need to wait for the time-out period.
Secondary Restart
When the secondary server (backup server) needs to stop, nothing needs to be communicated to the primary server. Therefore, there is no difference in an abortive or graceful secondary restart. When the secondary server is restarted, it asks for the latest configuration.
Updating Roles Setup
Roles are updated from the client (Lasernet Developer). When a client wants to set up a pair of computers, a full configuration is sent to the primary server, together with the address of the secondary server. The client also sends a message to the secondary server instructing it to become a secondary server and which primary server to listen to.
This ensures robustness if more than one primary server accidentally ends up sharing a secondary server, and instructs the secondary server to sync to it.
If a secondary server receives a SETASSECONDARY instruction with an address different from the current, it will immediately perform a GETCONFIGURATION on that new server.
Updating Configuration
The primary and secondary server will synchronize their settings without the need of client interaction. That makes it possible for the Lasernet Developer to just update the primary server’s configuration and the servers will make sure the change is transferred to the secondary server. The update from the client can be made even if the secondary server is down.
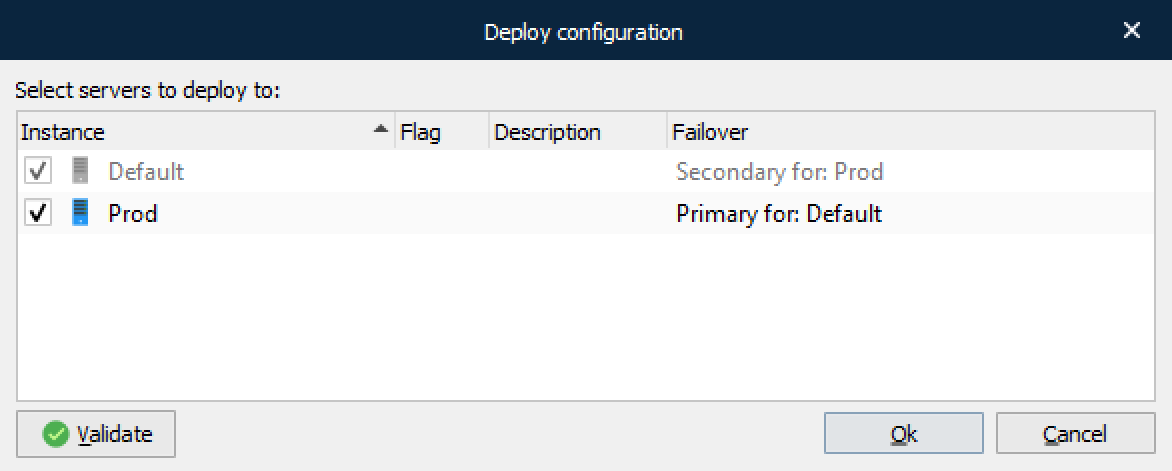
When the primary server configuration is updated, the primary server will send the CONFIGURATION to the secondary server.