

You can manage sheet properties by right-clicking the sheet tab and selecting Sheet Options. Alternatively, on the Sheet menu, click Sheet Options.
.png)
General
Property | Description |
|---|---|
Active | Enable or disable the sheet. |
Name | Change the name of the sheet. |
Description | Add a sheet description (optional). |
Output type | Specifies output type for the sheet. After a sheet has been created with a given output type, the setting cannot be changed. |
Base64 encoding | If checked, binary data will be converted to ASCII string format. |
Group | Add a group name for the sheet (optional). |
Language | Add the language of the sheet (optional). |
Company | Add the company name for the sheet (optional). |
Encode Documents to Base64
Note for Lasernet Core 11 and 10 users (not Lasernet Essentials / Professional / Advanced)
The Base64 encoding option applies only to Lasernet Core 11 and 10.
The Base64 encoding option in the Sheet Options dialog enables you to generate Base64 encoded documents for your web services or add them as an inline document in XML files.
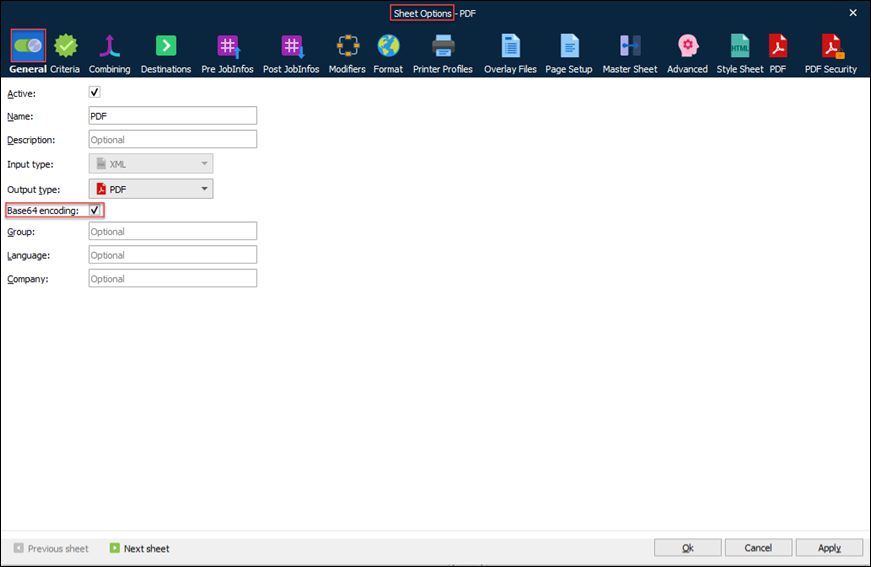
When activating this setting, your selected output type will be encoded to a Base64 document and sent to your selected output destination.
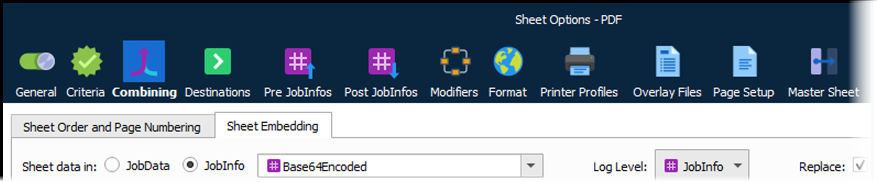
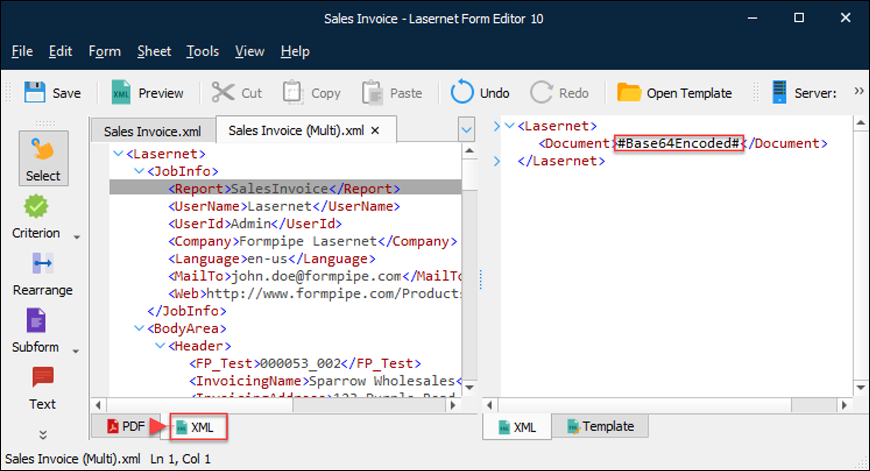
By activating JobInfo you can insert sheet data into any JobInfo in the Sheet Options > Combining > Sheet Embedding tab, encode your data, and insert the result in an XML file added to the next sheet.
Criteria
Property | Description |
|---|---|
Add Sheet | Add a sheet criterion. See Use Criteria. |
Add JobInfo | Add a JobInfo criterion. See Use Criteria. |
Add Schedule | Add a schedule criterion. See Use Criteria. |
Edit | Edit the selected criterion. |
Remove | Remove the selected criterion. |
Move Up | Move the selected criterion up in the list. |
Move Down | Move the selected criterion down in the list. |
Sheet Expression | Can be used to define a set of criteria which must be true (or false). |
Allow further sheet matching | Uncheck to stop processing sheets to the right of this sheet if the criteria for this sheet match. |
Sheet Order and Page Numbering
See Combine Sheet Output.
Destinations
Property | Description |
|---|---|
Add | Add a destination. |
Edit | Edit the selected destination. |
Remove | Remove the selected destination. |
Move Down | Move the selected destination down in the list. |
Move Up | Move the selected destination up in the list. |
A single sheet can have multiple destinations. For example, a copy can be emailed whilst another copy goes to the archive. If you require different designs for each of the output destinations, you need to create a separate sheet for each.
Note
To prevent unintended job failures, remove the Default destination from this list if the Lasernet Core workflow does not use it.
Pre JobInfos
On this tab, you can create custom JobInfos and set values for system JobInfos. The JobInfos defined on the Pre JobInfos tab are added to the job at the Sheet Start event point.
To add a JobInfo, click Add below the list. Then, in the Edit JobInfo window, define the JobInfo:
On the Value tab, select Active to ensure that Lasernet Core creates the JobInfo.
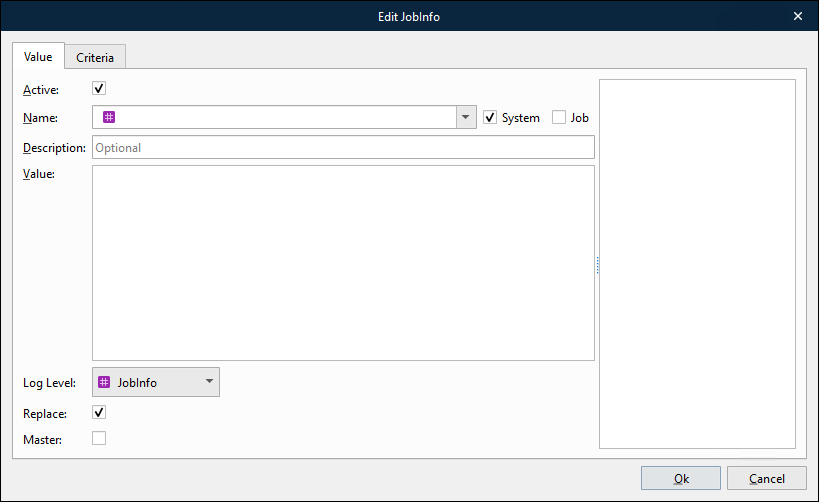
Specify the Name of the JobInfo:
To create a custom JobInfo: Enter a name for the JobInfo.
To set a value for an existing JobInfo: Follow these steps:
If you want to set a value for a system JobInfo, select System. Else, if you want to set a value for a JobInfo defined by the grab file currently selected in the Form Editor, select Job.
Note
The System and Job checkboxes are present in Lasernet 11.0 and later.
They enable you to filter the Name list to display system JobInfos, grab-defined JobInfos, or both, so that you can select a JobInfo from the list rather than enter its name. The Replace option (described below) controls whether the Value that you provide replaces that JobInfo’s value or is added to a list of multiple values stored by that JobInfo.
Select the JobInfo from the Name list.
Optional: Enter a Description for the JobInfo.
Enter a Value for the JobInfo.
Specify the Log Level for this JobInfo:
JobInfo: Lasernet Core environment logs will contain the JobInfo name and value if the Job Info logging level is selected in Manage.
Debug: Lasernet Core environment logs will contain the JobInfo name and value if the Debug logging level is selected in Manage.
NoLog: Lasernet Core environment log messages will not be created for this JobInfo.
If you select Replace, this JobInfo will replace any other JobInfo that has the same name. If Replace is not selected, values are added to an existing JobInfo. Some JobInfos can store multiple values; for example, an email distribution list.
If you select Master, this JobInfo is created in the master job for all the current form’s sheets. As a result, the JobInfo is available to the other sheets of this form that remain to be processed.
Optional: On the Criteria tab, provide criteria that control whether Lasernet Core creates the JobInfo. You add criteria to JobInfos similarly to how you add criteria to sheets, but in this case, the criteria controls whether the JobInfo is created.
Click Ok.
To edit a JobInfo in the list, click it and then click Edit.
The Move Up and Move Down buttons change the order in which Lasernet Core creates the JobInfos.
To delete a JobInfo from the list, click it and then click Remove.
Post JobInfos
On this tab, you can create custom JobInfos and set values for system JobInfos. The JobInfos on the Post JobInfos tab are added to the job at the Sheet End event point.
You add, modify, and remove JobInfos on the Post JobInfos tab in the same way as you do on the Pre JobInfos tab.
Modifiers
On this tab, you can add and manage modifiers for the current sheet. For more information, see Use Modifiers.
When adding a modifier, the current sheet is defined in the Container control, and the control itself is disabled.
Format
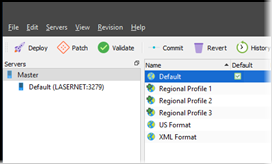
On the Format tab of the Sheet Options window, you specify which regional profiles Lasernet Core will use to format number, currency, time, and date data in the output document generated by this sheet.
Each of a form’s sheets can have a different set of regional profile assignments. For example, one sheet might create documents that contain Danish formatted numerical data, while another sheet might create documents for recipients in the United Kingdom.
Unless you apply a regional profile directly to a rearrange (through the rearrange’s Output format settings), the regional profile specified in the Sheet Options window is used. In general, a rearrange’s regional profile takes precedence over the sheet’s profile. If neither of these locations selects a regional profile for Lasernet Core to use, the Lasernet Core configuration’s default profile is used.
Note
In Lasernet Core 11 and 10, the Lasernet Core configuration’s default profile is part of the profile precedence sequence.
In Lasernet Essentials / Professional / Advanced, each form stores its own regional profiles. As a result, there is no shared default regional profile.
For more information about regional profiles and about regional profile precedence, see Regional Profiles.
Note
To specify which regional profiles Lasernet Core uses to interpret number, currency, time, and date data in incoming data, use the Form Options window (or apply an input format to a rearrange through its Input format settings).
Property | Destination |
|---|---|
Regional Profiles list | Lasernet Core 11 and 10 You can apply an existing regional profile to the sheet or create a new regional profile:
|
Lasernet Essentials / Professional / Advanced You can apply an existing regional profile (that you already created in this form) to this sheet, or you can create a new regional profile:
| |
Move up Move down | You can click Move up and Move down to move the selected profile up or down the profile precedence list. As part of adding a profile to this list, you can add criteria to each profile in the list, as described above. The first listed profile whose criteria are met will be used. However, if multiple regional profiles are assigned to the form and specific profile selection behavior is required, you might need to move profiles to specific list positions. For example, a “fallback” regional profile that has no criteria (and will be used if none of the assigned regional profiles that do have criteria are selected) would have to be last in the list. |
Edit | Edit the selected regional profile. |
Remove | Unassign the selected regional profile from this sheet. |
Rounding | Specify how the system should round a certain number of decimals. Truncate: Discard any extra decimals by rounding towards zero. For example, rounding 15.7984 to two decimal places results in 15.79. Round: Round the extra decimals to the specified number of decimal places. For example, rounding 15.7984 to two decimal places results in 15.80. Ceiling: Discard any extra decimals by rounding away from zero. For example, rounding 15.7984 to two decimal places results in 15.80. |
Number of decimals | Specify the number of decimals to be displayed. |
Show NaN as | Specify how NaN (Not a Number) should be displayed. |
Color negative value | Specify the color for negative values. |
Remove trailing zeroes | Select to discard the trailing zeroes. |
Show only decimals | Select to display only decimals. |
Absolute value | Select to display the absolute value. |
Hide if zero | Select to hide the value if it equals zero. |
Hide if invalid date | Select to hide the value if date is invalid. |
Hide if invalid time | Select to hide the value if time is invalid. |
Printer Profiles
Applies to: Lasernet Core 11 and 10 (not Lasernet Essentials / Professional / Advanced)
Use the Printer Profiles tab to manage the printer profiles created in Lasernet Developer (for details, see Printer Profiles).
Overlay Files
Applies to: Lasernet Core 11 and 10 (not Lasernet Essentials / Professional / Advanced)
For more details, see Import Printed Overlays to the Setup and Adding Overlays to the Sheet in Use Overlays for Graphical Design.
Page Setup
Property | Description |
|---|---|
Paper Size | Allows selecting a pre-defined size format from the drop-down list. |
Width | Allows typing custom width in millimeters. |
Height | Allows typing custom height in millimeters. |
Orientation | Switch between Portrait and Landscape page orientation. |
Set JobInfos to control the Paper Format in the Printer Devices(s) | Applies to: Lasernet Core 11 and 10 (not Lasernet Essentials / Professional / Advanced) If selected, it allows to define values of the PaperWidth, PaperHeight, and Orientation JobInfos based on the corresponding Paper settings. The values will overwrite the device modes settings defined in the Printer Profiles for output printers. |
Master Sheet
You can configure this sheet to inherit rearranges, conditional areas, JobInfos, and static text items from another sheet (the “master sheet”). When Lasernet Core processes this sheet, it copies form items from the master sheet into this sheet. You can add additional form items to this sheet, so that its design consists of the items from the master sheet plus the additional form items.
Note
The master sheet feature is applicable only to sheets that have an EMF-based output format.
For example, a form could have two PDF sheets, Original and Copy, where the only difference is that the Copy sheet must include an additional “COPY ONLY” static text label. Rather than manually copying all the form items from Original to Copy (creating additional maintenance overhead), you can configure the Copy sheet to use the Original sheet as its master sheet. In Form Editor, the form items from the Original sheet are replicated in the Copy sheet. Although you can see the replicated form items there, you cannot modify them. Finally, you can add the “COPY ONLY” static text label to the Copy sheet.
You can also use master sheet processing to generate identical output documents in different formats. For example, suppose you want to generate an EMF print document (that Lasernet Core will send to a printer) and an identical PDF (for online distribution). To use master sheets to achieve this, first create an EMF sheet and design the document there. Then, create a PDF sheet and configure it to use the EMF sheet as its master sheet. Form Editor will replicate the EMF sheet’s form items in the PDF sheet.
Note for Lasernet Core 11 and 10 users (not Lasernet Essentials / Professional / Advanced)
Master sheets can also populate overlays from one sheet to another. It could be the case that the only difference between the Original and Copy sheets is that an additional overlay is required on the Copy sheet.
To access a sheet’s master sheet settings, open the sheet’s Sheet Options window and then click the Master Sheet tab.
Example of an EMF Print Master Sheet for a PDF Sheet
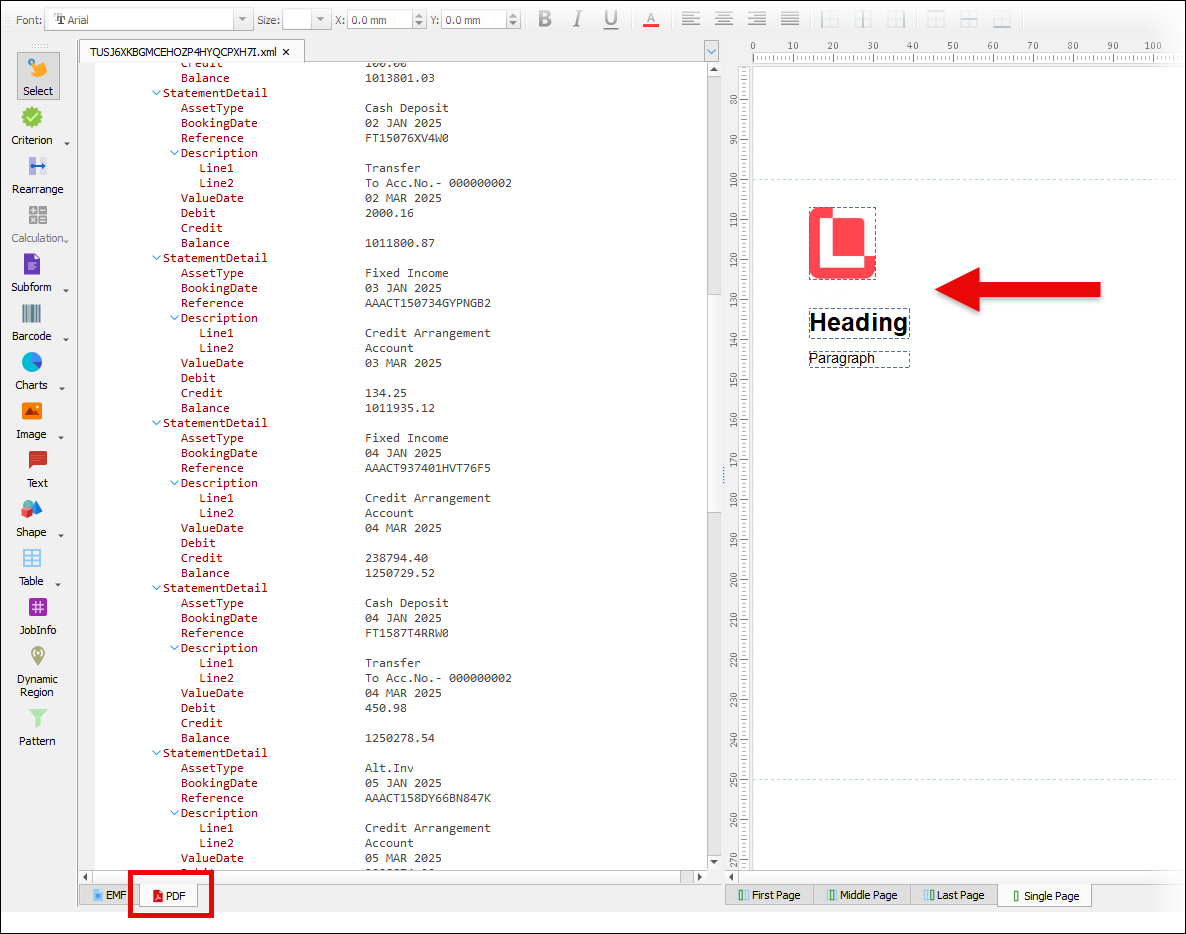
The following example shows how a PDF sheet can inherit form items from an EMF master sheet. In this example, the EMF print sheet’s destination is a Printer Output and the PDF sheet’s destination is a Mail Output. Because the output documents must be identical, set the EMF sheet as the master sheet of the PDF sheet. Doing this replicates all the EMF sheet’s form items in the PDF sheet (where they cannot be modified), so that the PDF output contains the same content as the EMF output.
Form items on an EMF sheet:
.png)
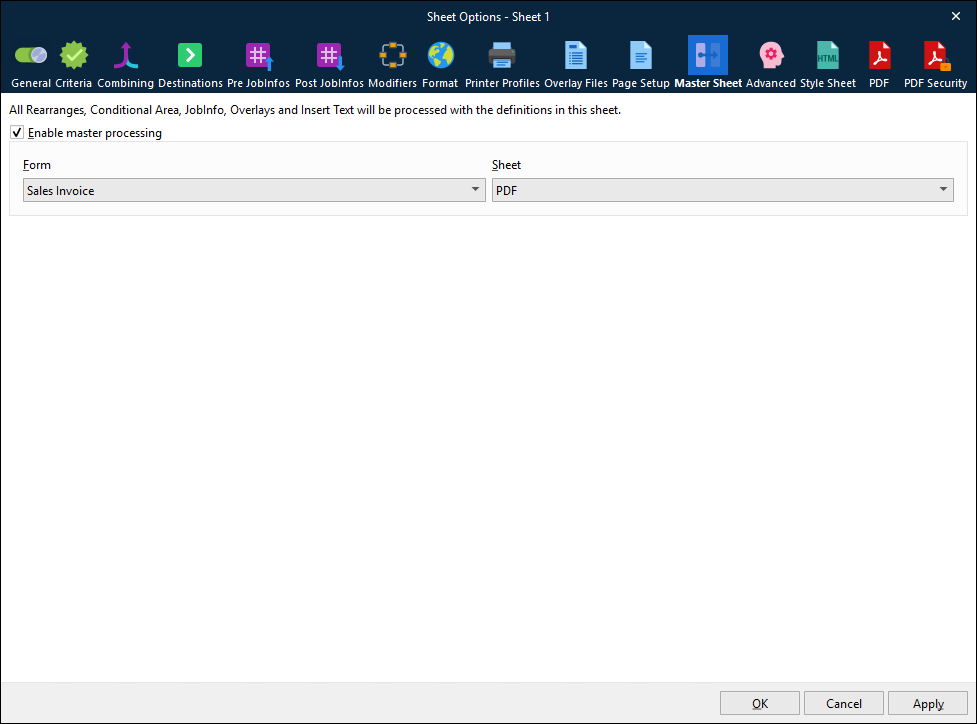
Master sheet settings for the PDF sheet:
.png)
Inherited form items on the PDF sheet have a dashed outline:
Assign a Master Sheet
To assign a master sheet to the currently selected sheet, follow these steps:
In the Sheet Options window (for the sheet that you want to assign a master sheet to), click the Master Sheet tab.
Select Enable master processing.
From the Form list, select the form that contains the master sheet.
From the Sheet list, select the master sheet.
Note
Only forms and sheets whose input and output formats are both compatible with the sheet you are working on are available in the selection list.
For example:
A sheet that has an EMF-based output format (EMF, PDF, PDF/UA, or TIFF) can be a master sheet for any other sheet that also has an EMF-based output format. So, an EMF sheet can be a master sheet for a PDF sheet.
However, the sheets’ input formats must match. So, if an EMF sheet’s input format is JSON and a PDF sheet’s input format is XML, the EMF sheet cannot be the master sheet for the PDF sheet.
The master sheet for a PDF/UA sheet must be another PDF/UA sheet. This requirement ensures that essential PDF/UA metadata from the master sheet is present in the receiving sheet. For more information, see PDF/UA Considerations for Master Sheet Processing.
Click OK.
The Form Editor adds the master sheet’s form items to this sheet. The replicated form items have a dashed border.
PDF/UA Considerations for Master Sheet Processing
Note
PDF/UA master sheet processing is available in:
Lasernet Core 10: Lasernet Core 10.13 and later.
Lasernet Core 11: Lasernet Core 11.2 and later.
From Lasernet Core 10.13 and 11.2, PDF/UA sheets are compatible with master sheet processing. A PDF/UA sheet can be a master sheet or a receiving sheet.
However, using the master sheet feature with PDF/UA sheets requires you to design and configure your form in a specific way. This is because you cannot modify the form items that a sheet inherits from its master sheet. This is relevant for PDF/UA sheets because the form items they contain must have Group order and Reading order property values.
As a result, if you want to use PDF/UA sheets with the master sheet feature:
The master sheet for a PDF/UA sheet must be another PDF/UA sheet, so that the receiving sheet inherits form items that have Group order and Reading order values. Because inherited form items cannot be modified in the receiving sheet, they must be inherited from the master sheet with that metadata already present in them. You must appropriately set the Group order and Reading order values for any form items that you manually add to the receiving sheet.
If you intend for Lasernet Core to generate a document in a different format (such as EMF) as well as PDF/UA, the form design must be created in the PDF/UA sheet with Group order and Reading order values assigned to form items there. Then, the other sheets (such as an EMF sheet) can use the PDF/UA sheet as their master sheet and inherit form items from it.
Note
For more information about the Lasernet Core PDF/UA capability, about Group order and Reading order, and to learn how the Group order and Reading order of each form item affects the structure tree within a PDF/UA document, see Configure PDF/UA Output.
Note
To learn how to convert forms that currently have an EMF master sheet and a PDF sheet to use PDF/UA instead, see Convert EMF Print Master Sheet Setups to PDF/UA.
Example of Master Sheet Processing for PDF/UA Sheets
To ensure that the items in the structure tree (in the output PDF/UA document) are correctly ordered, it is important that any form items that the receiving sheet inherits from the master sheet have appropriate Group order and Reading order values.
In this example, suppose that the PDF/UA master sheet contains a static text item and a rearrange, and you want the PDF/UA receiving sheet to add another static text item. Additionally, you want the receiving sheet’s text item to appear in the PDF/UA document’s structure tree after the master sheet’s form items.
To ensure that all these form items appear within the same <Sect> tag in the structure tree, they must all have the same Group order value.
To ensure that the receiving sheet’s text item appears in the structure tree after the master sheet’s form items, it must have a Reading order greater than the static text item and rearrange from the master sheet.
So, suppose that the text item from the master sheet has a Group order of 100 and a Reading order of 50, and the rearrange from the master sheet has a Group order of 100 and a Reading order of 60. The receiving sheet will inherit these form items from the master sheet. In this scenario, to achieve the desired ordering in the output PDF/UA document’s structure tree, it is crucial that the single text item that you add to the receiving sheet has a Group order of 100 and a Reading order of 70.
Advanced
On the Advanced tab of the Sheet Options dialog, you can manage the memory usage and quality for images for processing jobs with many pages.
Note for Lasernet Core 11 and 10 users (not Lasernet Essentials / Professional / Advanced)
When processing sheets, temporary files can be written to a disc for optimizing memory usage in Lasernet Core. This feature is only recommended if you have jobs which are too big to be handled by memory. Please note that temporary files are not deleted by the system after the job has been processed. The reason is that jobs which are scheduled or failed must be available as temporary files for Lasernet Core until they can be processed.
A user-defined process for deleting files must be defined in the setup, otherwise the files take up unnecessary disc space.
.png)
Property | Description |
|---|---|
Maximum image DPI | Specify the maximum image resolution for image(s) added to the output. |
Zip job data | Applies to: Lasernet Core 11 and 10 (not Lasernet Essentials / Professional / Advanced) Select if the JobData size is expected to be approximately 2 GB or more. This ensures correct processing of JobData.
|
Only line-break after space | Applies to: Lasernet Core 11 and 10 (not Lasernet Essentials / Professional / Advanced) Select to allow line-breaks only after a space. |
Style Sheet
Use the Style Sheet tab to add CSS (Cascading Style Sheets) for all XHTML rearranges available on the sheet using the internal way, which stands for a <style> element.
.png)
The style added here can be overwritten for a particular XHTML rearrange using the Style Sheet tab of the Edit Rearrange dialog (for more details, see Edit Rearrange Properties).
PDF Settings
See Configure PDF Output.
XML Settings
See Configure XML Data Output.
JSON Settings
DOCX Settings
XLSX Settings
CSV Settings
See Configure CSV Output.
EDI Settings
See Configure EDI Output.
EMF Settings
See Configure EMF Output.